Integrating SendPost To Send Transactional Email Notifications
Written By Angela L
Last updated 9 months ago

This article will walk you through the process of connecting your SendPost account with PayKickstart.
This integration allows you to leverage SendPost for your transactional email needs directly within the PayKickstart platform.
Important Note:
PayKickstart cannot guarantee the deliverability of all email notifications when using 3rd party services, outside of our own email servers.
Vendors would need to monitor email delivery via their email host.
Due to the complexity of the various SMTP platforms on the web, PayKickstart is only able to offer minimal support with 3rd party SMTP connections.
If integration connection issues occur, it is best to contact your Email host provider.
Step 1: Selecting SendPost on the Main Integration page
Step 1: Selecting SendPost on the Main Integration page
In your PayKickstart account, go to Configure → Integrations.

First, you’ll need to integrate on your main integration page.
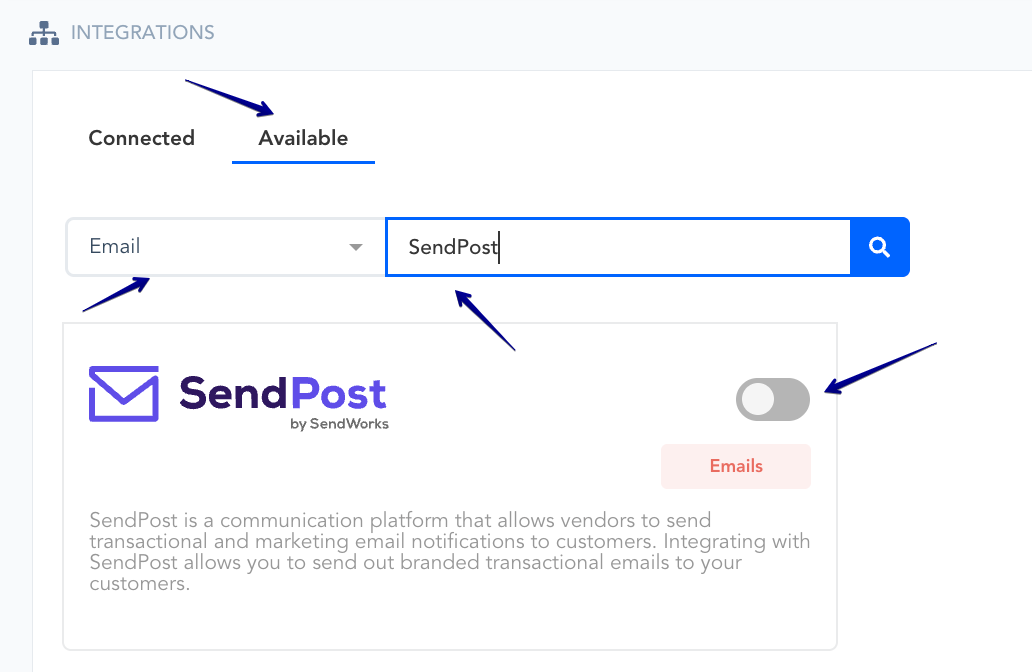
Inside the Integrations menu, make sure to click on the Available tab.
Then find the Email category in the filter, and scroll down to locate SendPost.
You can also search for SendPost directly within the Search field.
Enable SendPost by clicking the toggle switch.:
Step 2: Authorizing the SendPost integration
Step 2: Authorizing the SendPost integration
A pop-up window will appear asking for your SendPost account details.
Account Name: Enter a name for internal reference.
This is only for display purposes inside PayKickstart
(e.g., "My SendPost Integration").
In your SendPost account, access the Webhooks section at:
https://app.sendpost.io/webhooks
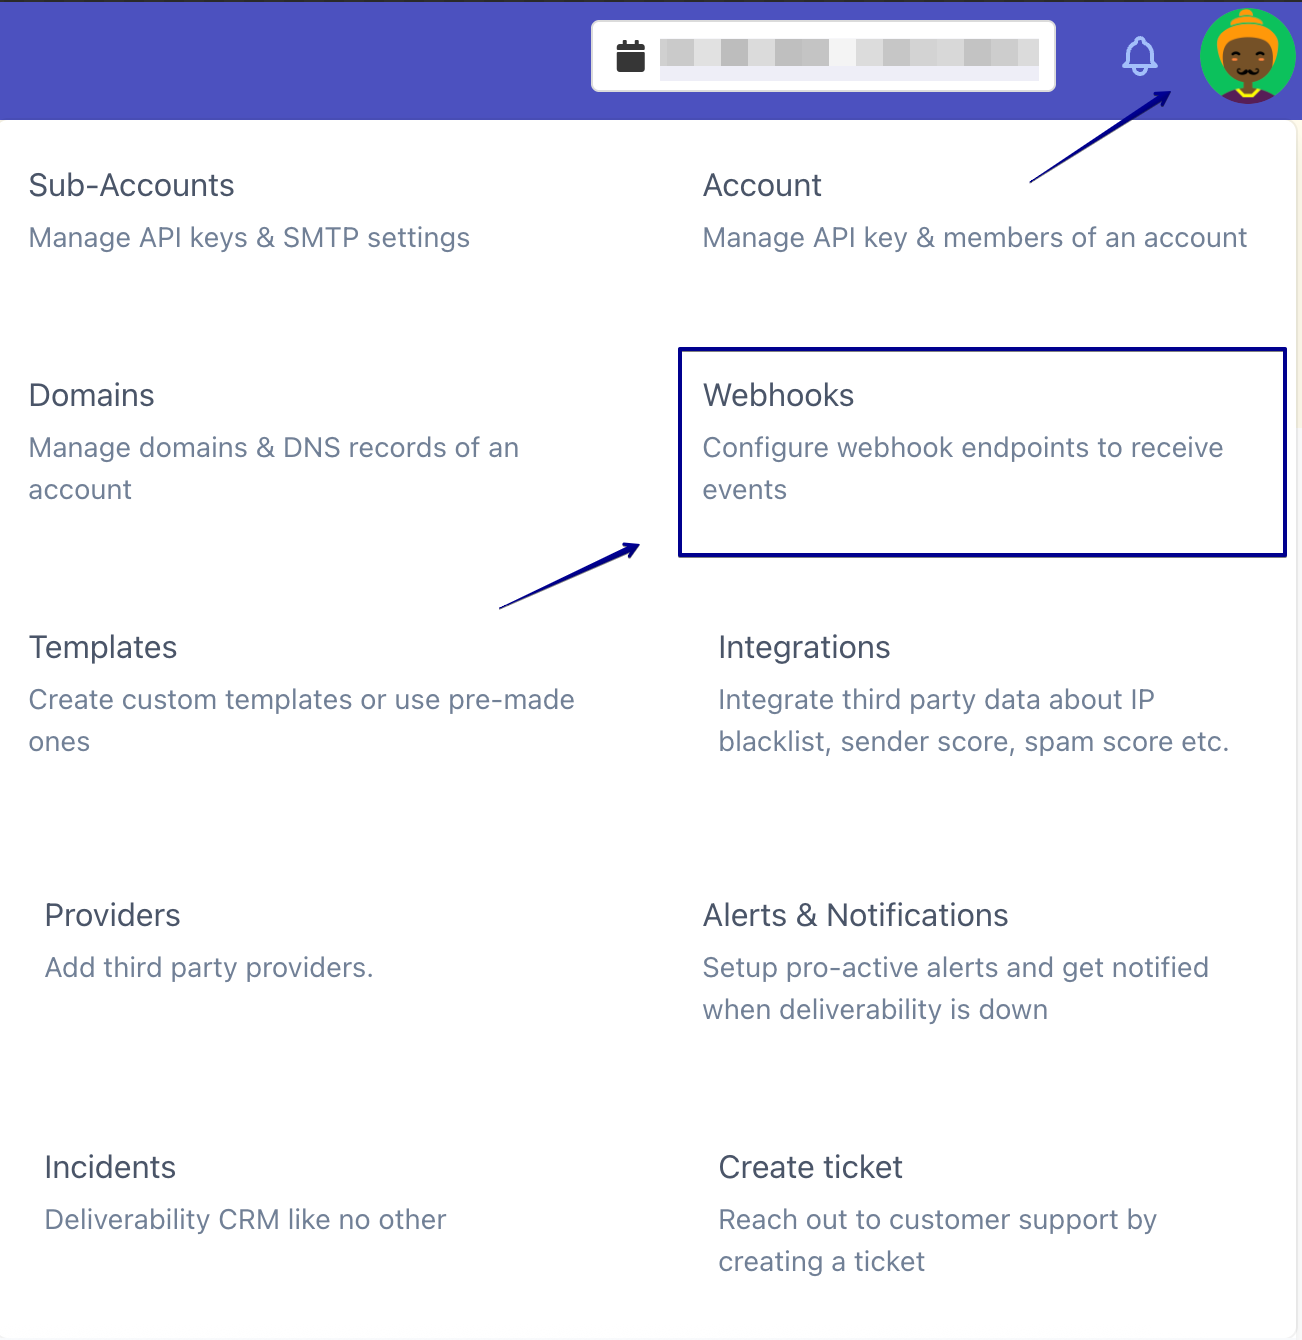
Then copy and add your Webhook URL into your SendPost account: https://app.paykickstart.com/email-webhook/sendpost

In the field “Which events should we send?” ****
please choose the following options: **** may be outdated - currently checking
Delivery, Bounce, and Spam Complaint.

Click the Connect button.
A success message will appear in the bottom-right corner confirming that the connection was successful if your credentials are entered correctly.
Once enabled and saved on the campaign level, you are now integrated to send transaction emails via SendPost for the selected campaign.
You can connect SMTP integrations with all Campaigns you want to use SMTP services for delivering your transactional emails.
Step 3: Enable SendPost in Your Campaign Settings
Step 3: Enable SendPost in Your Campaign Settings
To enable SendPost in your campaign settings, go to the Campaigns section in your PayKickstart account.
Then, go to the three-dotted menu on the right side of the relevant campaign and click on Edit Campaign.

Once you click on Edit Campaign, move on to the Communication tab and look for the Email Delivery section.
Select your SendPost integration you previously added from the provided options.
Once selected, make sure to click the Save button to save your campaign.
From this moment on, all of your transactional emails for this campaign will be sent through SendPost to your customers.
You can repeat these same steps, to enable SendPost for your other Campaigns, if needed.
You can also select the SMTP service to be used for sending out emails related to your Embeddable Customer Billing Portal.
Step 4: Enabling SendPost for sending Customer Billing Portal Authorization Emails
Step 4: Enabling SendPost for sending Customer Billing Portal Authorization Emails
You can also select the SendPost service to be used for sending out emails related to your Embeddable Customer Billing Portal.
The Hosted Billing portal does not need to be switched to the 3rd party integration.
If you have any previously created Embeddable Portals, please follow these steps:
To enable your SendPost integration for the portal, navigate to
Tools → Customer Billing Portal.

Find the Embeddable Portal you have created and click the edit icon (pencil icon).
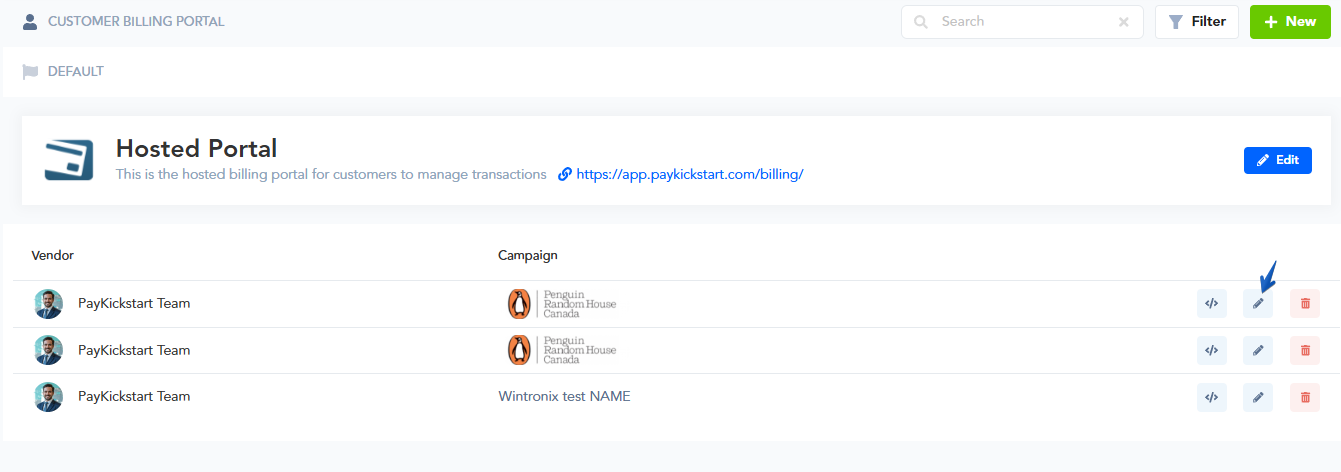
In the portal settings, select the Email SMTP Service tab and choose your SendPost integration from the dropdown menu.
Click Next Step and proceed to the final step to Save your portal settings.
Once saved, the integration will take over, and all future emails for authorizing customer access or related billing events will be sent via SendPost.
That’s it! Your SendPost account is now fully integrated and set up within your PayKickstart platform.
You can now fully handle notifying customers for any transactional email events via your own SMTP integration, allowing you full control over the deliverability of customer emails.
Maximizing the deliverability of your emails (Optional):
To maximize your delivery rate of your email notifications, we strongly recommend you set up Domain, SPF & DKIM verification. Below are some useful resources to help you with this:
→ What is SPF?
→ How to set up SPF on your server.
→ What is DKIM?
→ How to set DKIM on your server.
Helpful Tip:
MXToolBox is a great resource for monitoring the health of your domain.
→ SMTP Diagnostics
→ Blacklist Check
→ Free Monitoring
Was this helpful?
Still need help? Ask the team