Setting up Custom Triggers
One of PayKickstart's most flexible options - visually edit and set up your custom setup and integrations to pass data and use it where you need it the most.
Written By Stefan S.
Last updated About 1 year ago
Custom Triggers enable you to customize automated workflows for every transaction or event that happens in your account.
This feature helps automate several processes, such as sending out a customized email notification, creating or redirecting an IPN request to a specific route, refunding transactions, and changing subscriptions.
To create a Custom Trigger, simply follow the steps provided below:
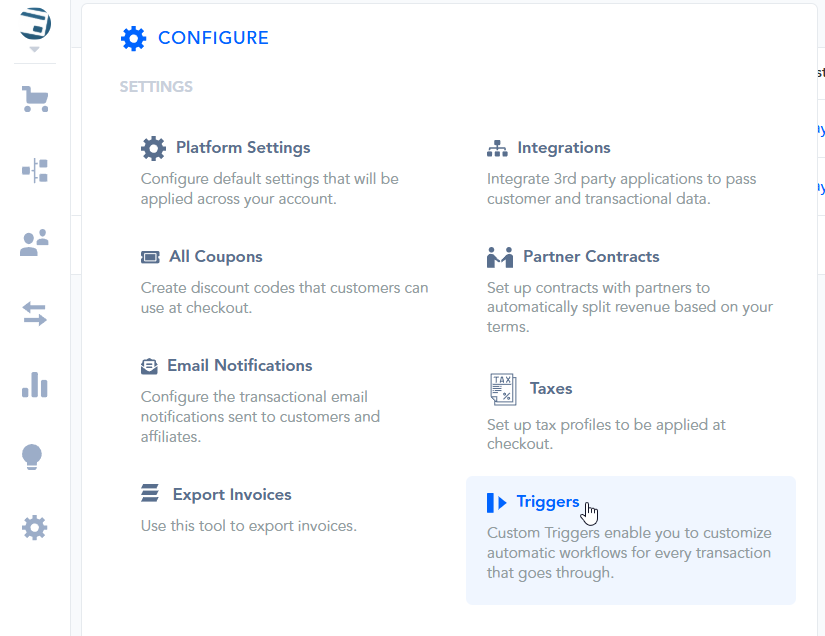
Step 1: Access the Tools > Triggers section
Step 1: Access the Tools > Triggers section
In your account locate the Tools icon , then click on the Triggers option.
Or access the section by following this link: https://app.paykickstart.com/vendor/configure/triggers
Step 2: Create a New Trigger
Step 2: Create a New Trigger
To create a new trigger, click on the New Trigger button:

The New Trigger button can be found at the top right corner of the Triggers section:

Step 3: Name the Trigger
Step 3: Name the Trigger
Enter the name of the trigger.
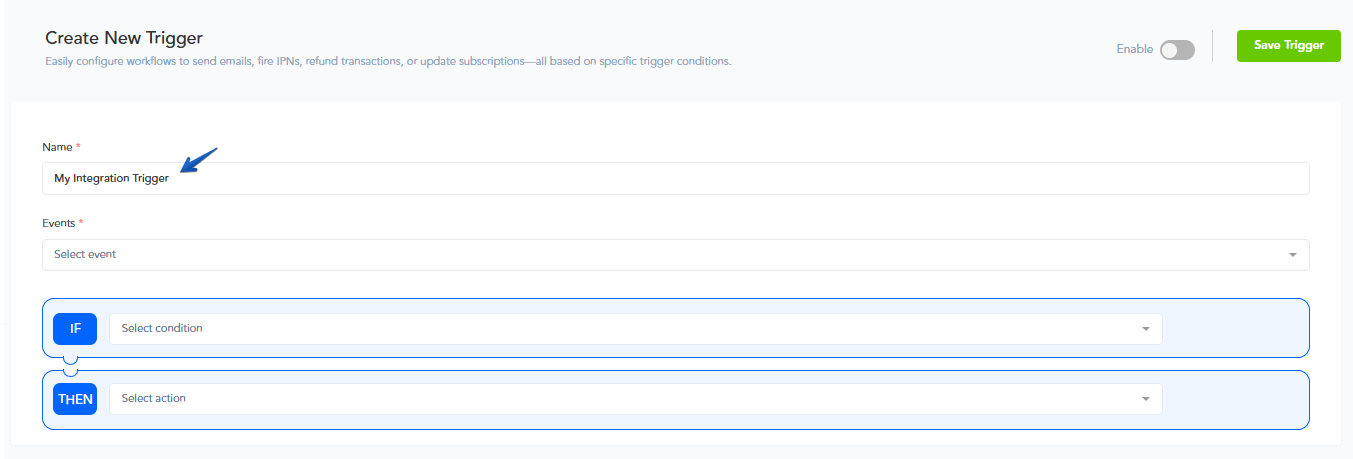
Step 4: Create your Conditions
Step 4: Create your Conditions
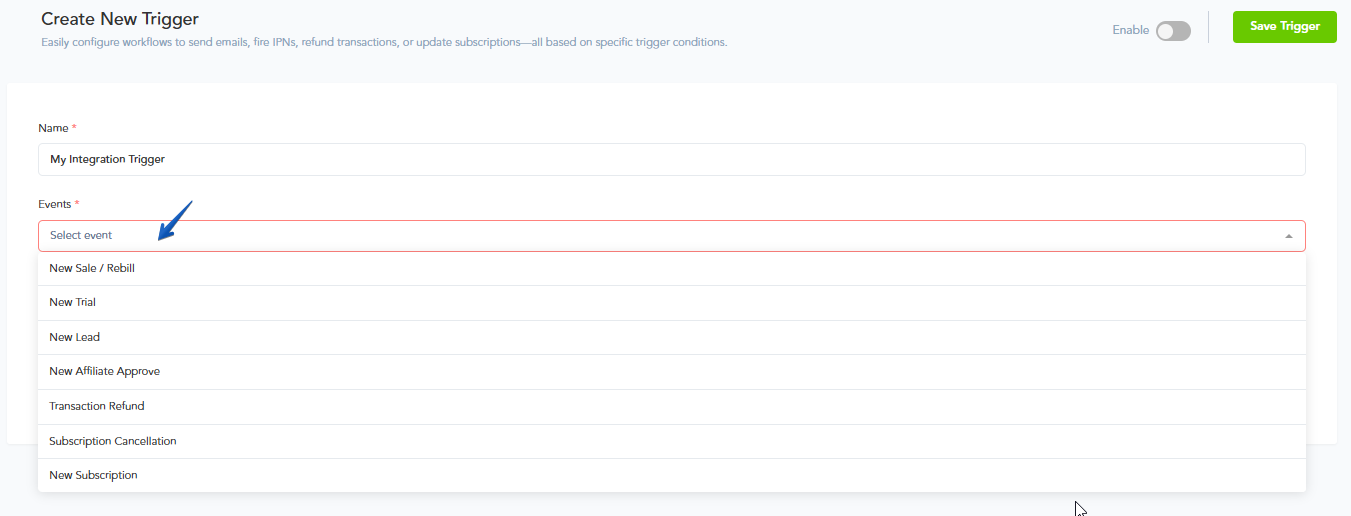
First, select the Event you wish the trigger to fire for. We always recommend starting with New Sale/Rebill, as this event will occur whenever a customer purchases the product, or is rebilled for their subscription:
When creating a trigger, the “IF” establishes a condition that must be true for the trigger to perform a specific action. This is like a requirement that, when fulfilled, activates the trigger.
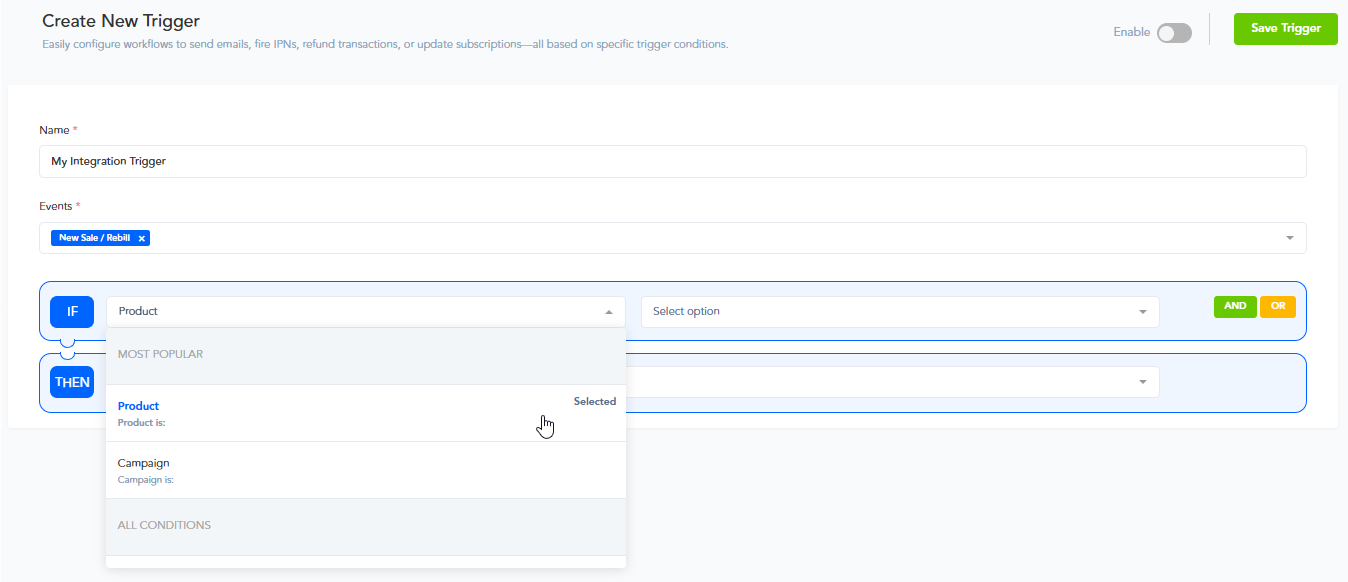
Vendors can choose from the following conditions:
transaction amount
coupon
tax
tax country
tax number present
billing country
shipping country
bump purchased
affiliate
payment method
quantity
checkout type
transaction type
product
campaign
funnel
phone number present
custom field
Step 5: Select which Events to Trigger
Step 5: Select which Events to Trigger
Select which events to trigger in the THEN section when the specified “if” condition is met. The subsequent event will be triggered, initiating the desired action or response.
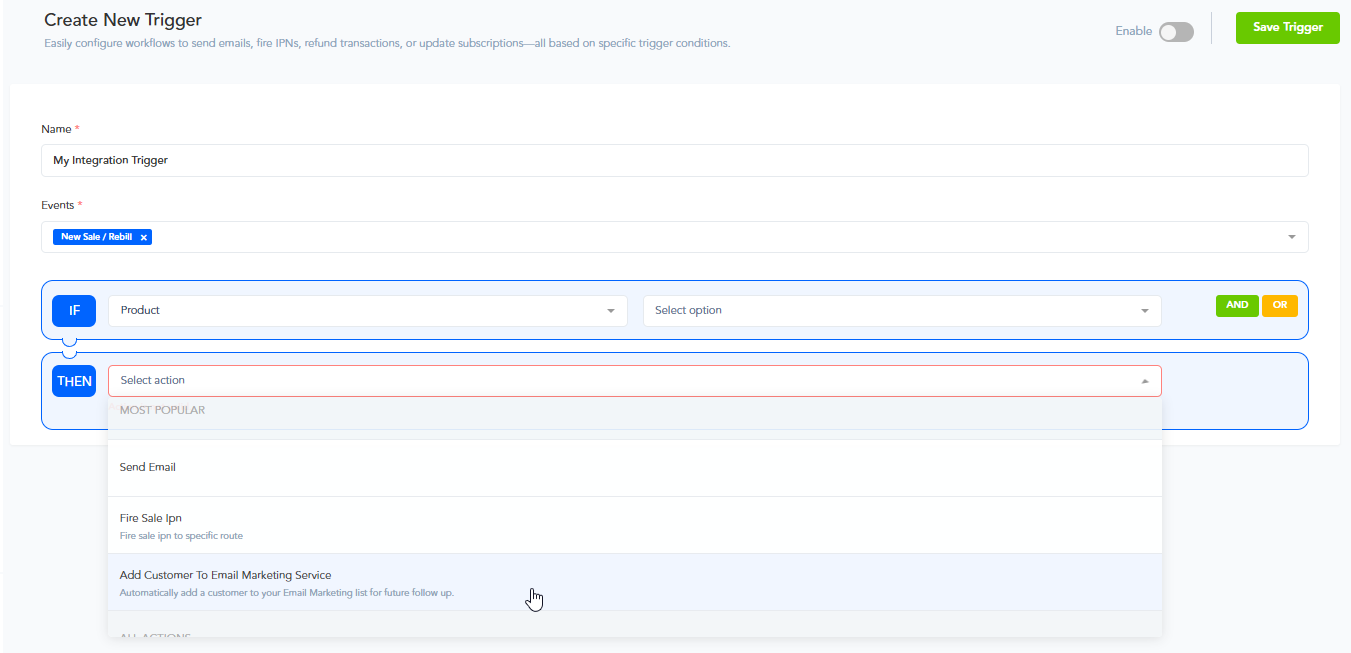
You can choose from the following events:
Send email
(sends an email to the specified user or address)Fire Sale IPN
(send first sale IPN to a specific route)Add Customer to Email Marketing Service
(used for Autoresponder integrations)Redirect
(redirect IPN to a specific route)Refund Transaction
(triggers a refund for the specific transaction)Change Subscription Status
(Cancels, Re-activates, or Pauses the subscription for the product)Register a Customer for a Webinar
(used for Webinar integrations)Add Customer to a Membership
(used for Membership integrations)Pass Customer Details To Fulfillment Service
(used for Fulfillment integrations)Pass Purchase Details To Slack
(used for the Slack integration)Pass Purchase Details To CRM Service
(used for CRM integrations)Pass Purchase Details To Accounting Service
(used for Accounting integrations)Pass Details To Facebook Conversion Tracking
(used for Facebook integration)
Step 6: Make sure to Save the Trigger
Step 6: Make sure to Save the Trigger
Click on the “Save Trigger” button located in the top-right corner of the page, and make sure to Enable it.

Once saved, you’ll see the trigger on this page.
IMPORTANT NOTE
When setting up triggers in your account, you can use the “and” and “or” options to decide how conditions should work together.
You have two option choices to select from:
“AND” → all specified conditions must be true at the same time for the trigger to activate.
On the other hand, if you opt for:
“OR” → the trigger will activate as long as any one of the specified conditions is true.
This flexibility allows all Vendors to fine-tune their automated processes.
Was this helpful?
Still need help? Ask the team