Integrating Authorize.net to Accept Payments
Written By Carlos
Last updated 9 months ago

Below are the step-by-step instructions on how to integrate and start accepting payments using your Authorize.net account.
Important: Authorize.net does NOT allow customer purchases via Debit/Prepaid cards at this time.
Important: Make sure in Authorize.net that you sign up and enable the Customer Information Manager.
Currently, this option is located under the “Marketplace section” in AuthorizeNet.
Important: Make sure in Authorize.net that you sign up and enable the Customer Information Manager. Currently, this option is located under the “Marketplace section” in AuthorizeNet.
IMPORTANT NOTE
Altering your Authorize.net API keys after the connection with PayKickstart has been made is strongly discouraged!
After integrating with Authorize.net, changing your API keys in Authorize.net would prevent our system from being able to contact Authorize.net to attempt rebills for any existing subscriptions before the Authorize.net API key was changed.
If you change the API keys, then existing subscriptions created prior to the change will need to update their billing via the billing portal in order to connect with the new Authorize.net API key and continue the subscription billings.
Step 1:
Step 1:
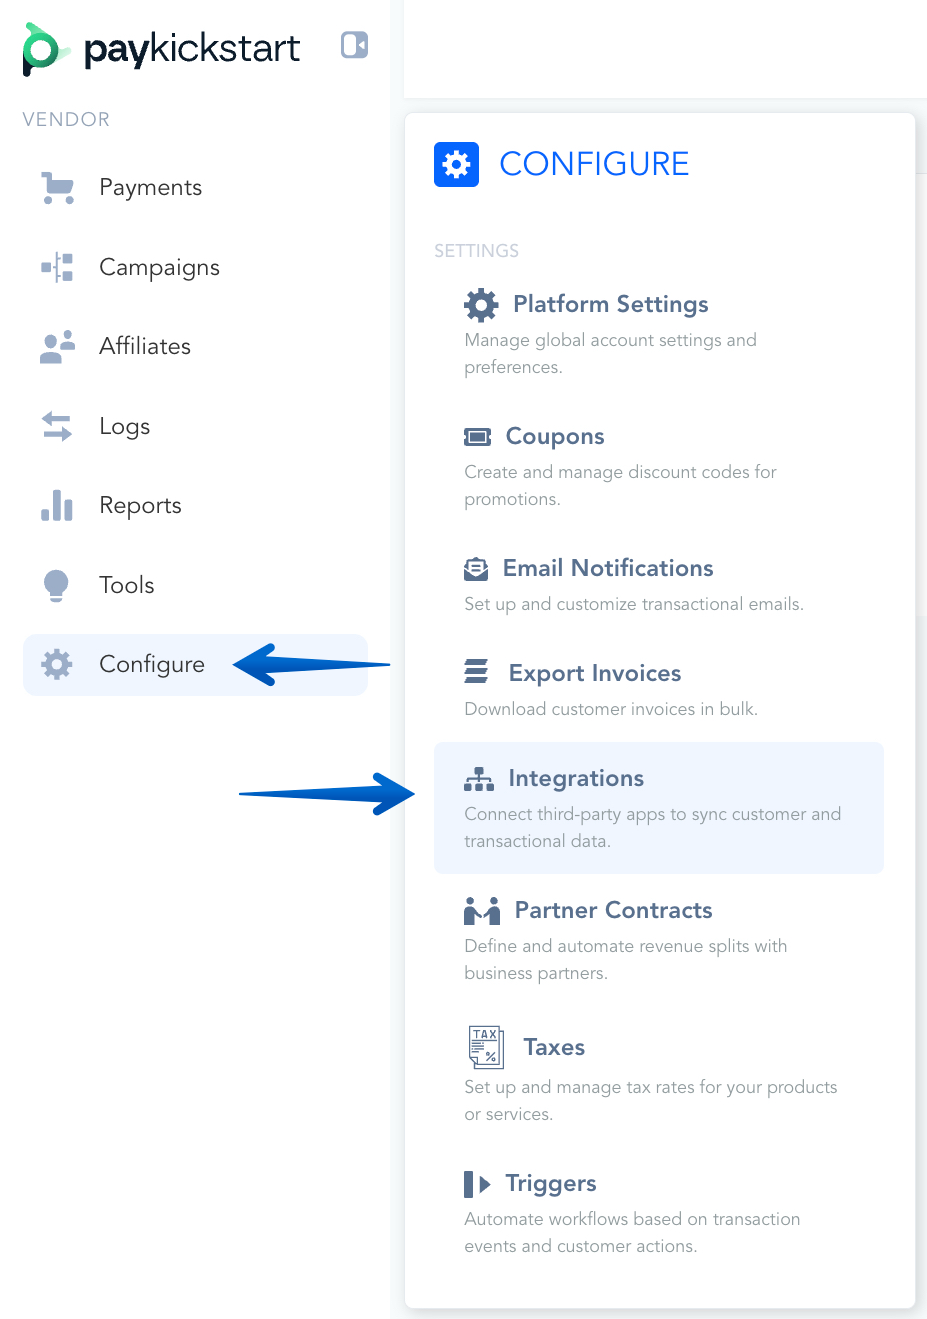
In the Configure ⚙️ Menu select Integrations.
Step 2:
Step 2:
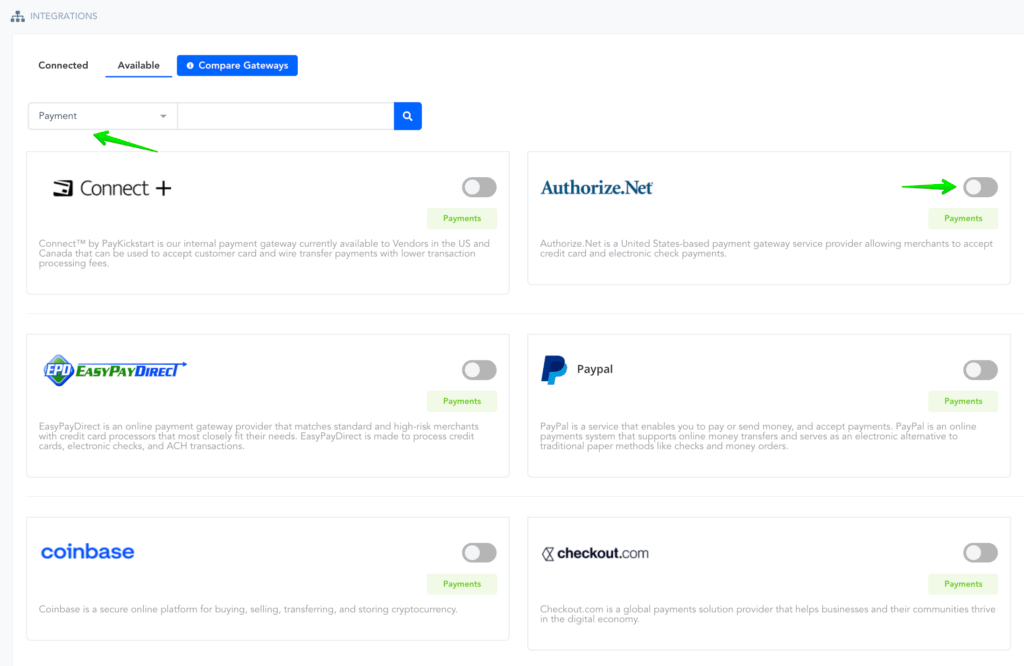
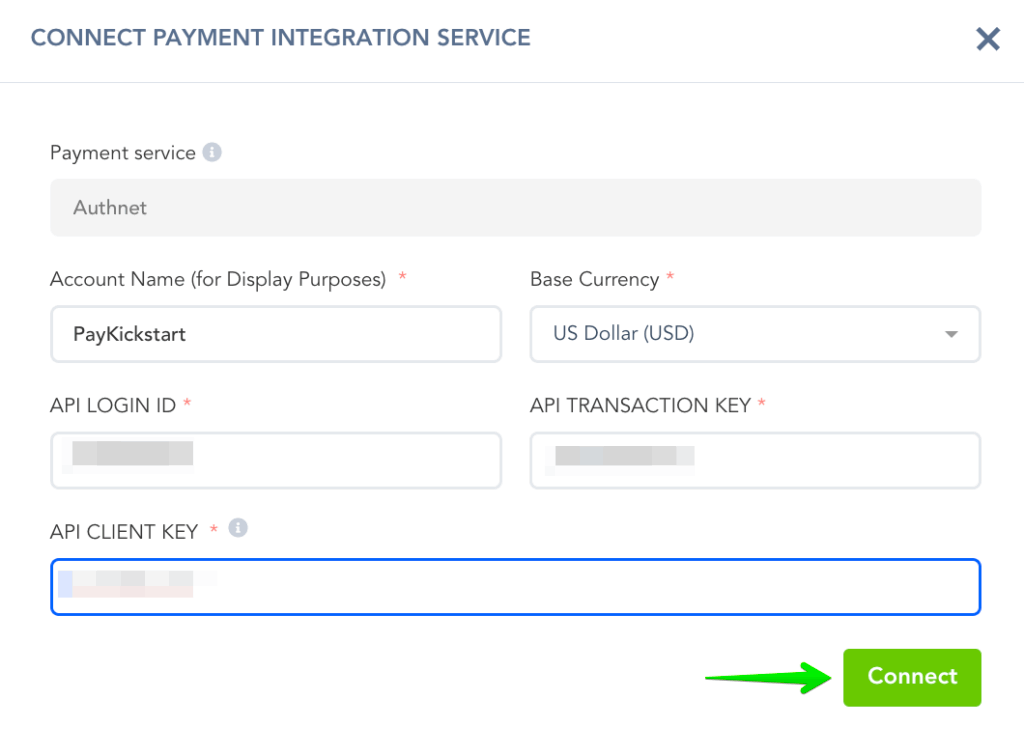
Select Payment in the drop down Menu and activate Authorize.net and enter the required fields:
Choose an Account Name for display purposes within your PayKickstart account and select the Base Currency as well.
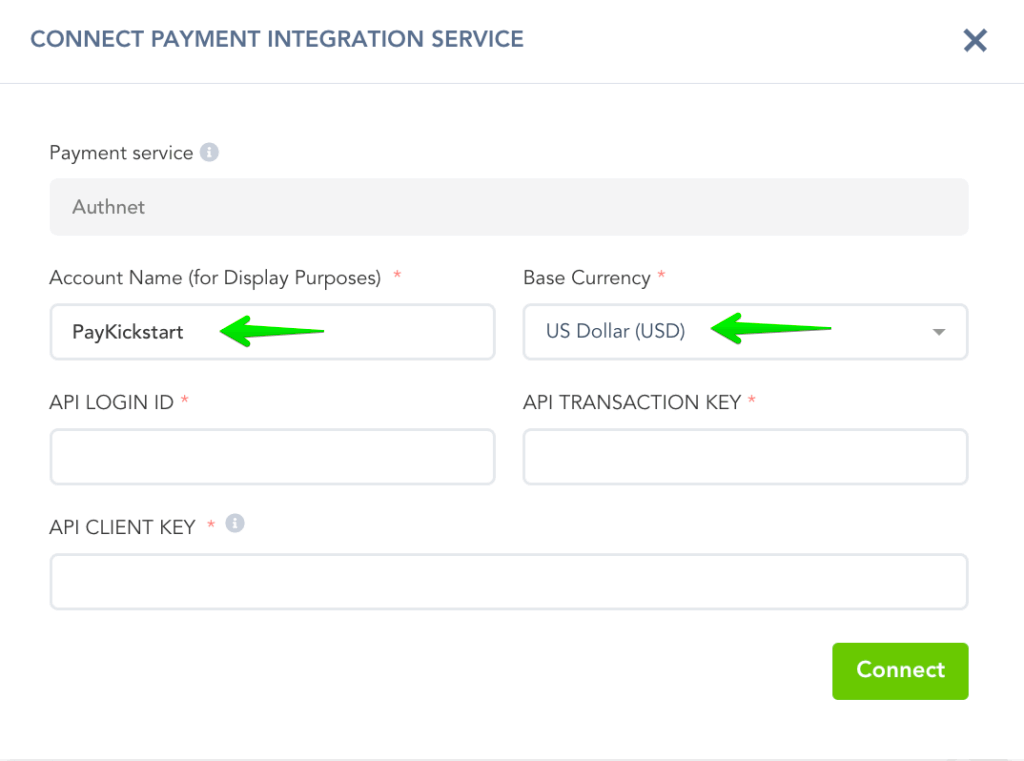
To integrate with Authorize.net, you’ll need your API Login ID, API Transaction Key, and API Client Key.
Here’s how to find them:
For your API Login ID & API Transaction Key:
1. Log in to your Authorize.net Account.
2. Click on Account.
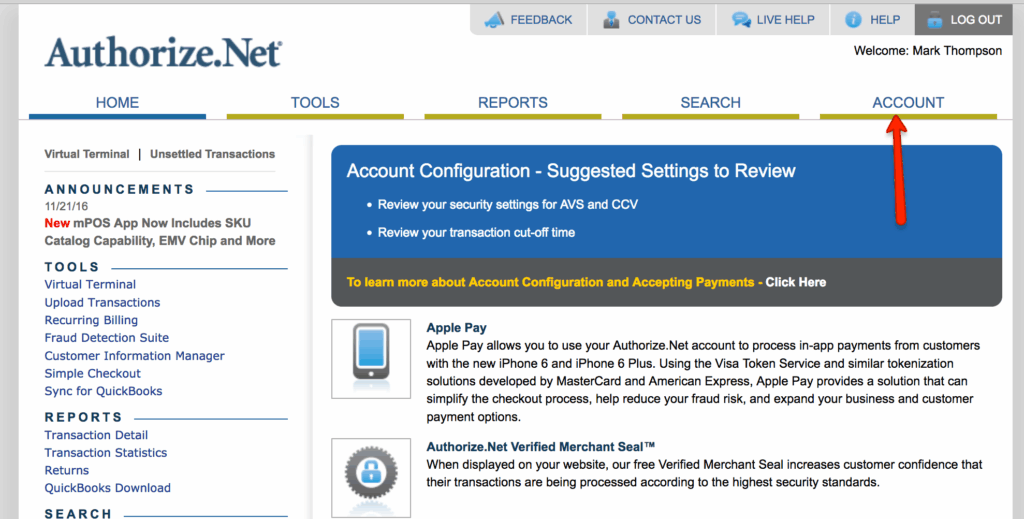
3. Click on API Credentials & Keys.
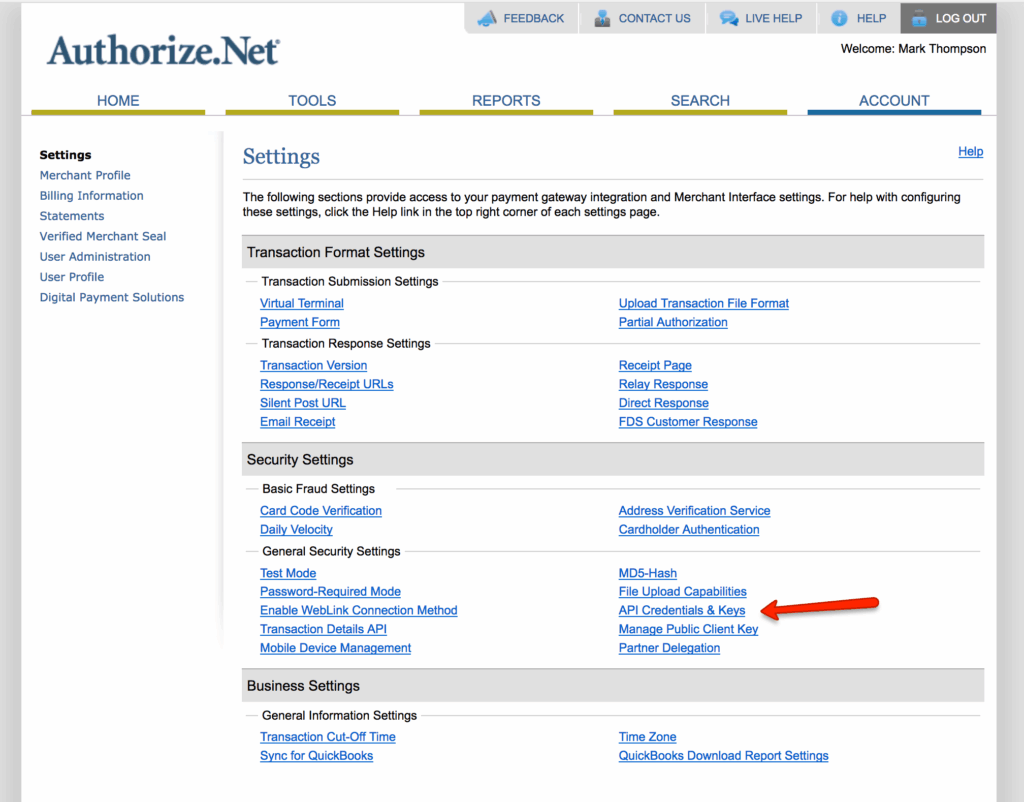
4. Your API Login ID and API Transaction Key will be displayed on this page. Copy them carefully.
For your API Client Key:
1. Navigate to your Authorize.net Account –> Settings –> Security Settings –> General Security Settings –> Manage Public Client Key.
2. If the Public Client Key does not yet exist, answer your security question to generate the key.
3. Copy the key, then go back to the PayKickstart integration page and paste the key in the field
After you have obtained all the necessary information, return to the main integration page in PayKickstart and click on Connect.
Step 3:
Step 3:
The next step will be Enabling Authorize.net for Campaigns if you choose to take Authorize.net as a payment option for those particular Products in the Campaign.
To do this, go to the Campaign’s settings for the Campaign you want to enable Authorize.net with to accept customer payments.
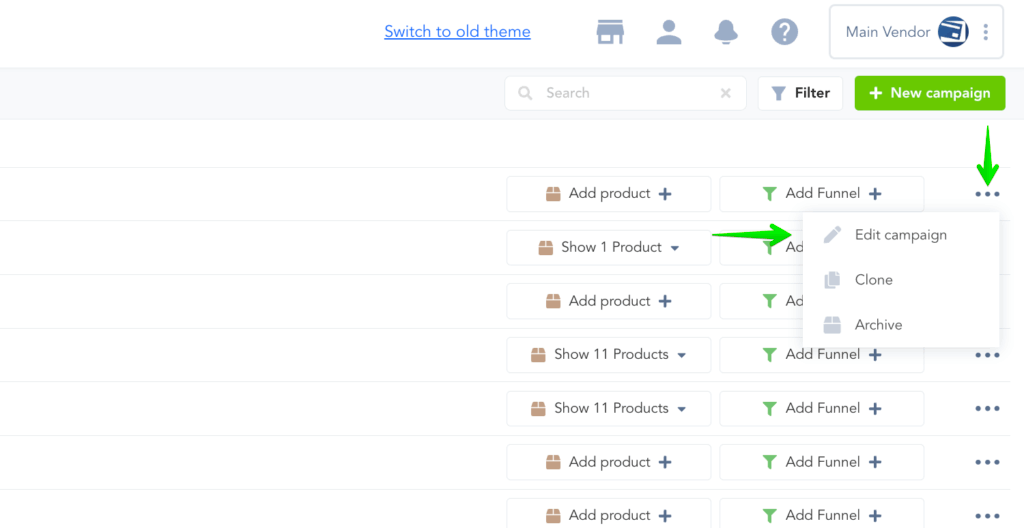
Then, go to the Payments section and Enable Credit Card and select Authorize.net as your Payment Gateway and select the account you wish to use:
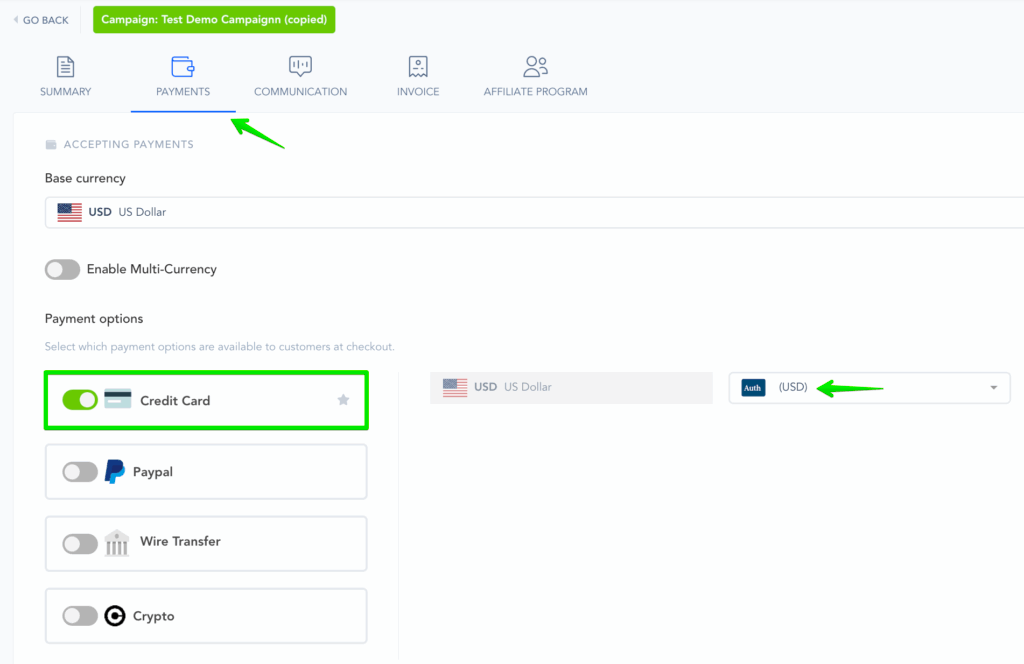
That’s it. You’re done integrating with Authorize.net and ready to accept customer payments via Authorize.net on your Product Checkouts related to the Campaign.
Was this helpful?
Still need help? Ask the team