Integrating Webinar Ignition
Written By Carlos
Last updated 9 months ago
You can automatically register a new customer for a webinar you have created with Webinar Ignition.
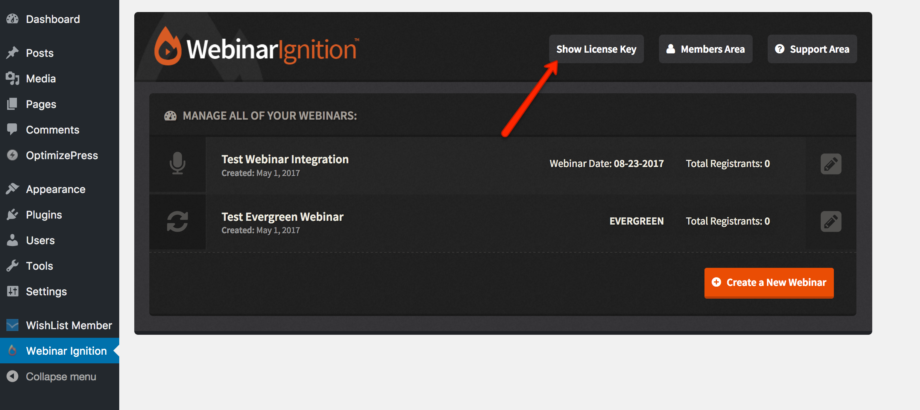
Step 1: Log in to the WordPress installation where you installed Webinar Ignition
Step 1: Log in to the WordPress installation where you installed Webinar Ignition
Click on Webinar Ignition, then click Show License Key.
Step 2: Go to Configure and click on Integrations
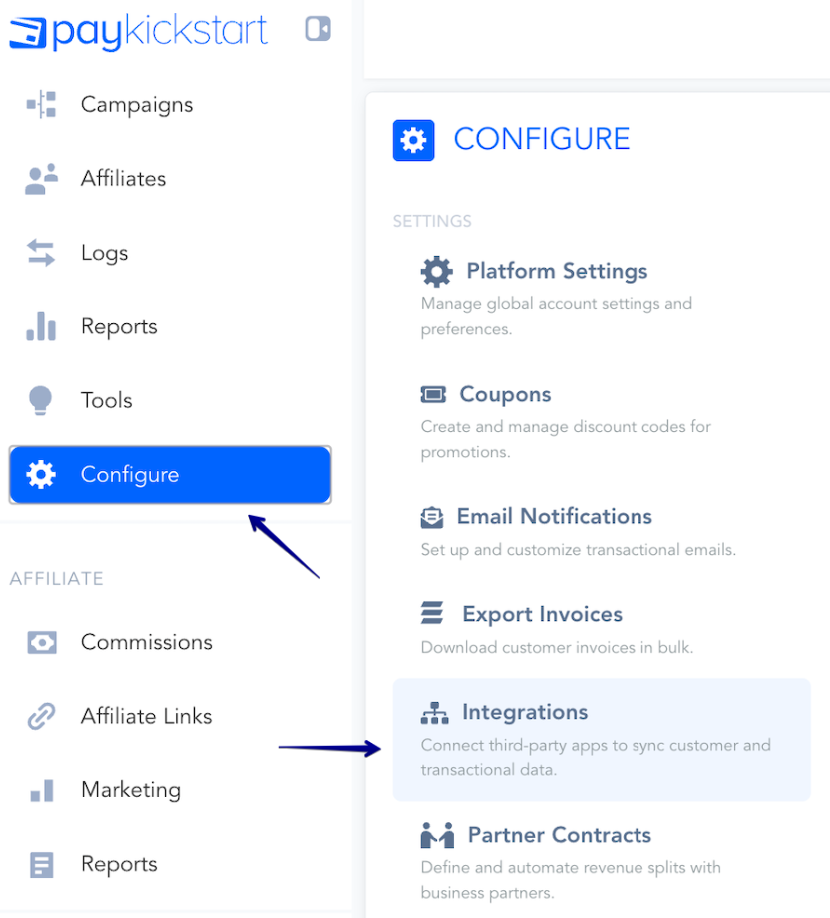
Step 2: Go to Configure and click on Integrations
In your PayKickstart account, go to Configure → Integrations.
Step 3: In the integration section, select Webinar and then select Webinar Ignition
Step 3: In the integration section, select Webinar and then select Webinar Ignition
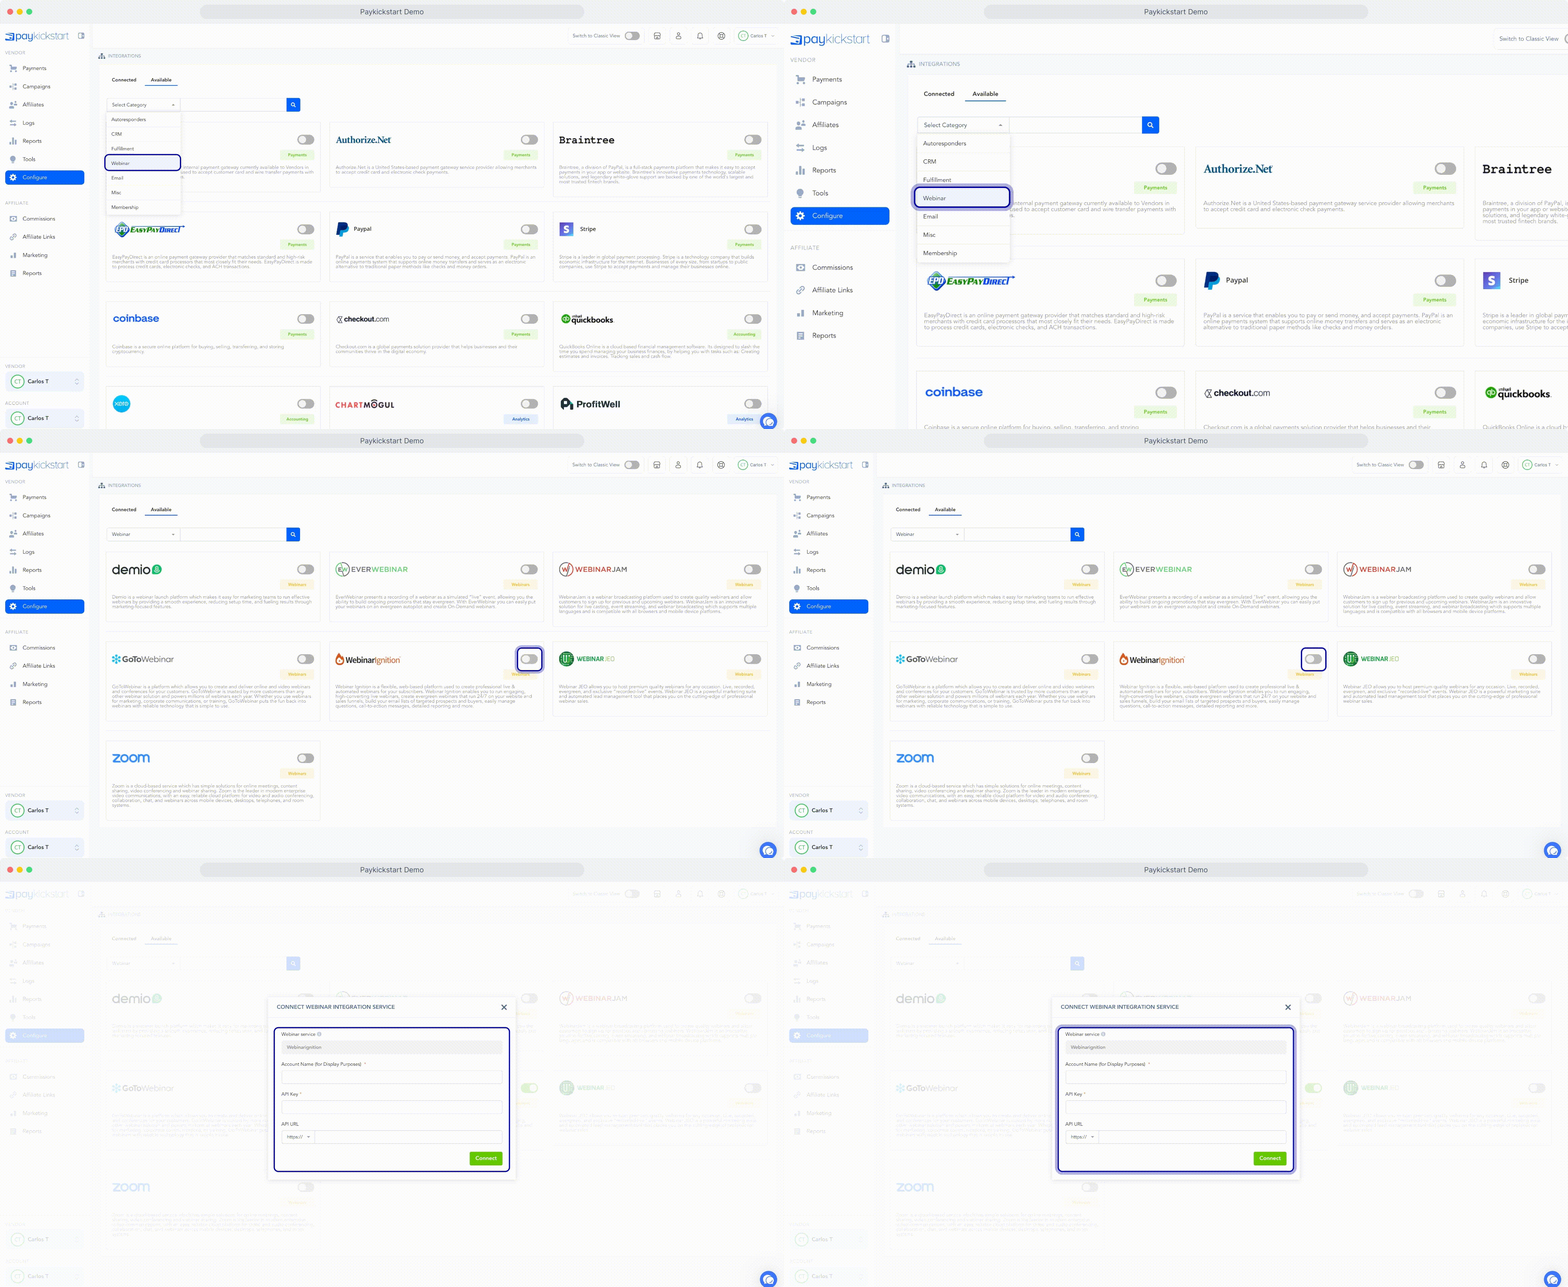
Give it a display name and enter the License Key provided to you from Webinar Ignition.
Step 4: Creating an Automation Trigger for your Product(s)
Step 4: Creating an Automation Trigger for your Product(s)
After connecting your account, you must set up a Trigger to tell PayKickstart when to
Register a new customer for a webinar.
In the PayKickstart dashboard, go to Configure and select Triggers
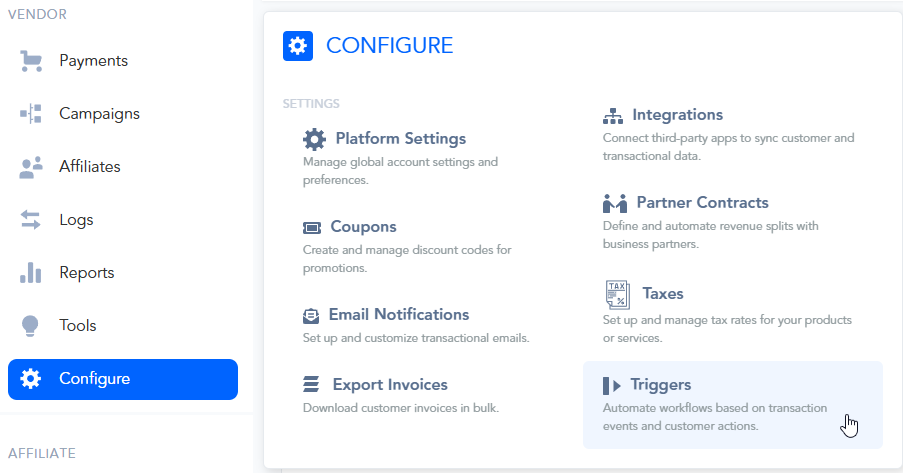
Click the + New Trigger button to create a new rule.

Configure the Trigger settings as follows:
Status:
First, toggle the switch at the top to make the trigger ACTIVE.Trigger Name:
Give your trigger a descriptive name so you can easily identify it later
(e.g., "Product 1 - New Sale to Webinar Ignition").
Select Event(s):
Choose the event that will fire this trigger.
For adding new customers, a New sale is the most common choice.
Please note:
Available event options will show clearly only after saving your first trigger.
We recommend choosing the New Sale event when setting up the integration for the first time, as it would trigger with any new transaction that is created for the product.
For Webinar Ignition, the currently available and supported events are:
New Sale/Rebill - triggers when a new transaction is created for the product
IF Condition (The Rule):
This defines the variable that must be included for the trigger to run.
Important: The IF condition must be set to a Product, for the integration to function.
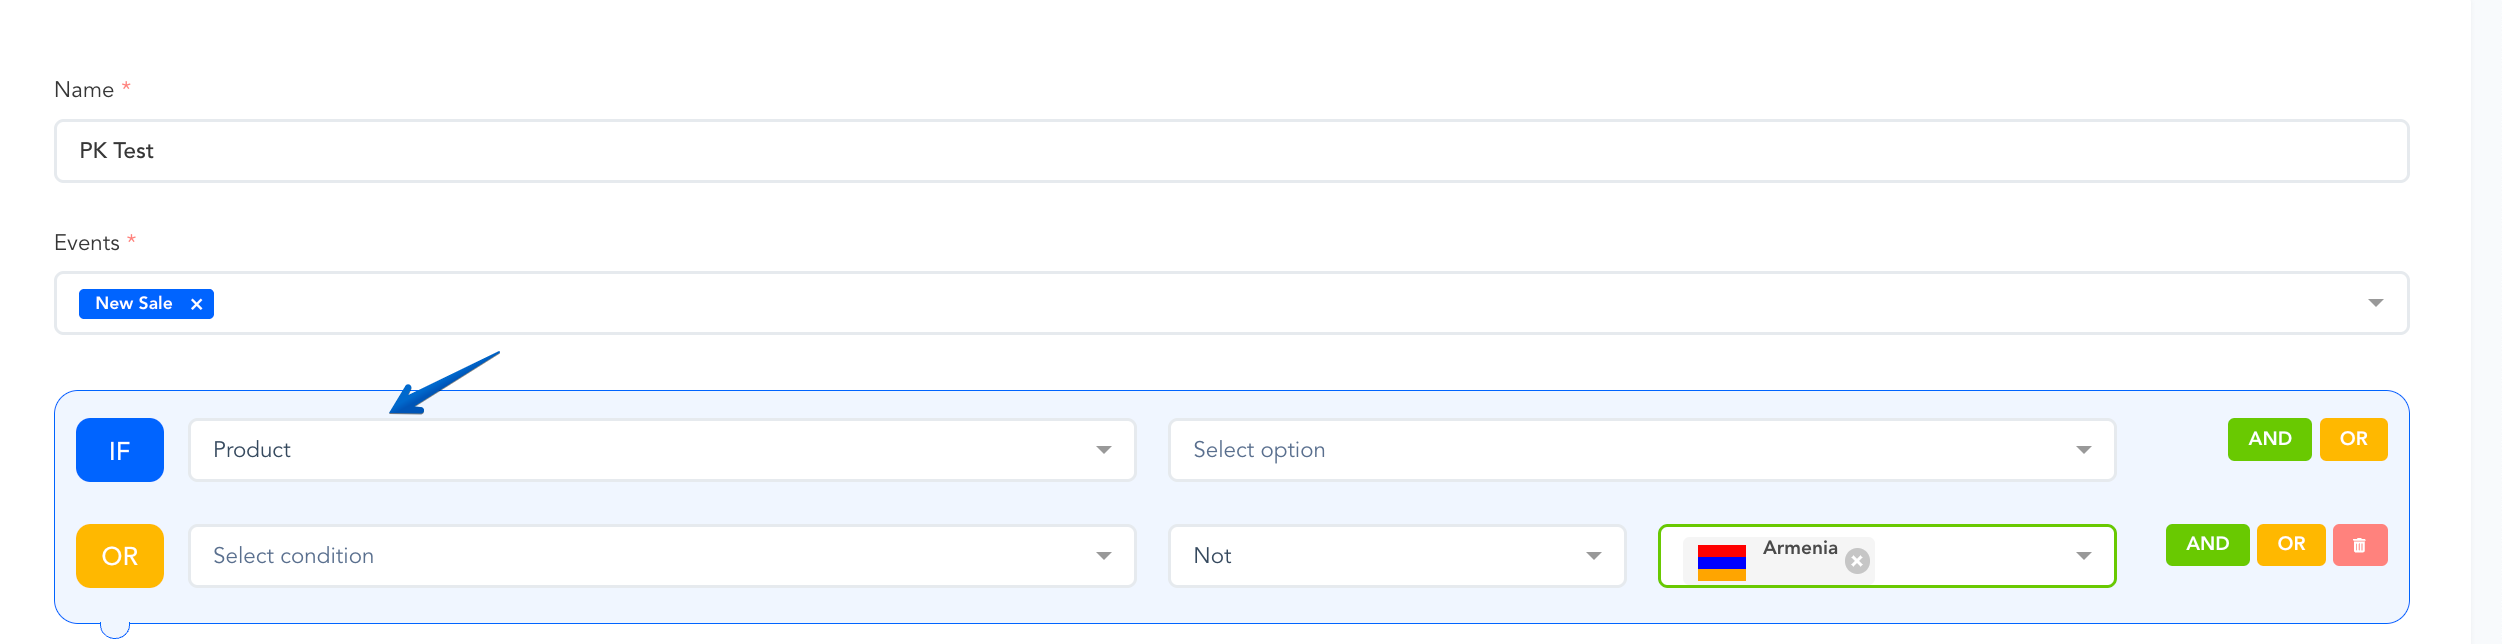
Best Practice Use Case:
We recommend creating a separate trigger for each product.
This makes it easier to manage and troubleshoot specific product integrations if needed, rather than having 1 trigger where all products are selected.
THEN Action (The Result):
This defines what will happen when the IF condition is met.

Select Service: The webinar service you use.
Select Account: The Webinar Ignition account you use.
Select Webinar: The webinar you’ve created on your WebinarJeo account.
Once you have configured the rule, click the Update Trigger button to save your automation.
You have now successfully integrated Webinar Ignition with your account and product. Customers who purchase the product will automatically be added to the specified webinar.
Was this helpful?
Still need help? Ask the team