Integrating MarketHero
Written By Stefan S.
Last updated 9 months ago

The MarketHero API integration allows PayKickstart vendors to automatically add their customers to a specific list/tag in the MarketHero account.
Step 1: Access the Configure → Integrations section
Step 1: Access the Configure → Integrations section
In your PayKickstart account, go to Configure → Integrations.
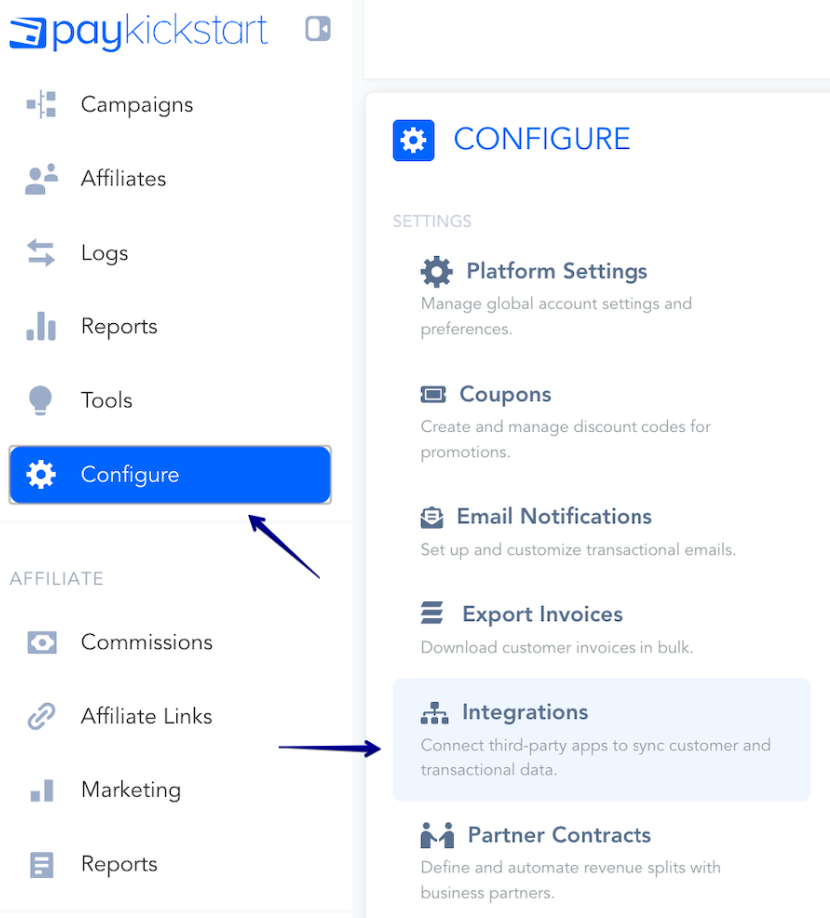
First, you’ll need to integrate on your main integration page.
Inside the Integrations menu, make sure to click on the Available tab.
Then find the Autoresponders category in the filter, and scroll down to locate MarketHero.
You can also search for MarketHero directly within the Search field:
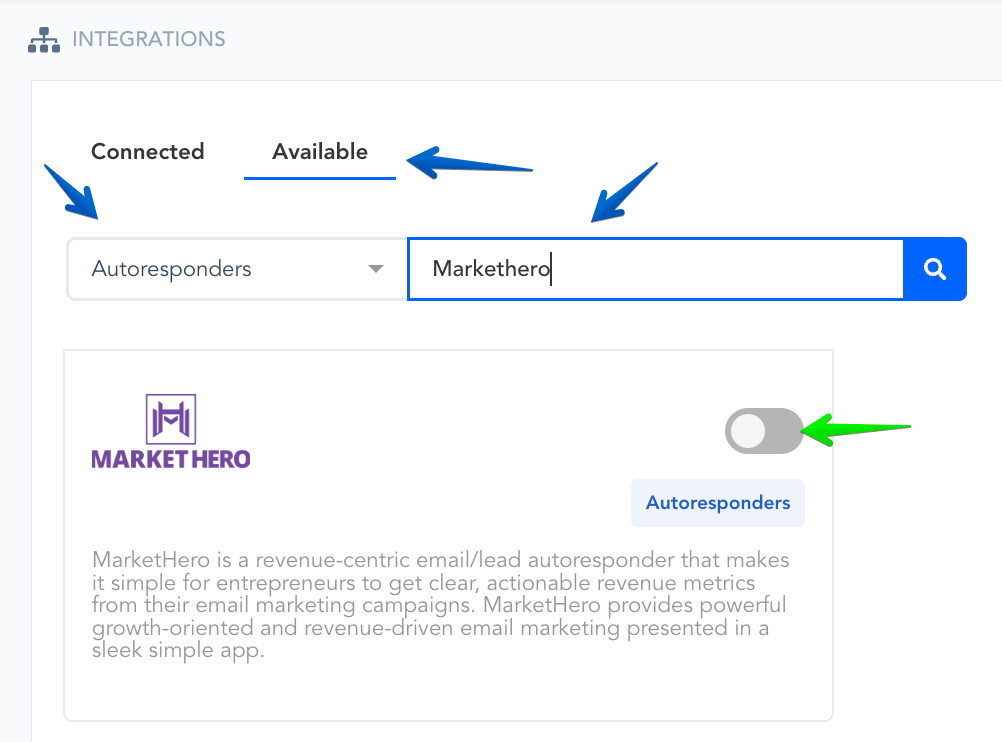
Enable MarketHero by clicking the toggle switch.
Step 2: Adding the API Key and Authorizing the MarketHero integration
Step 2: Adding the API Key and Authorizing the MarketHero integration
Enter your ActiveCampaign Account name, API URL, and API key, and click Connect.
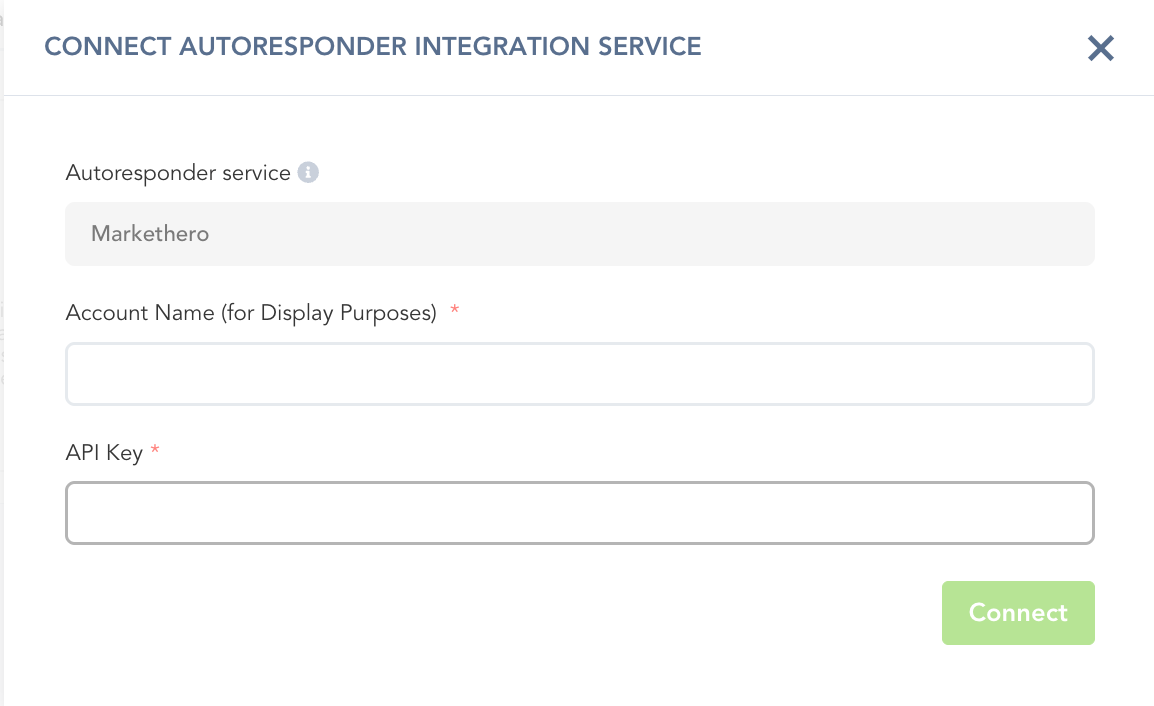
You will then be redirected to MarketHero to log in. Grab your API key that they provide.
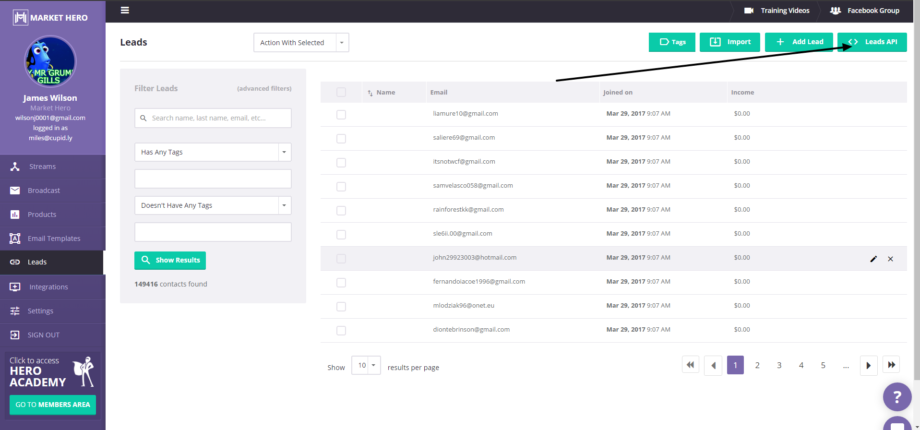
Step 3: Creating an Automation Trigger for your Product(s)
Step 3: Creating an Automation Trigger for your Product(s)
After connecting your account, you must set up a Trigger to tell PayKickstart when to send customer information to MarketHero.
In the PayKickstart dashboard, go to Configure and select Triggers →
https://app.paykickstart.com/vendor/configure/triggers
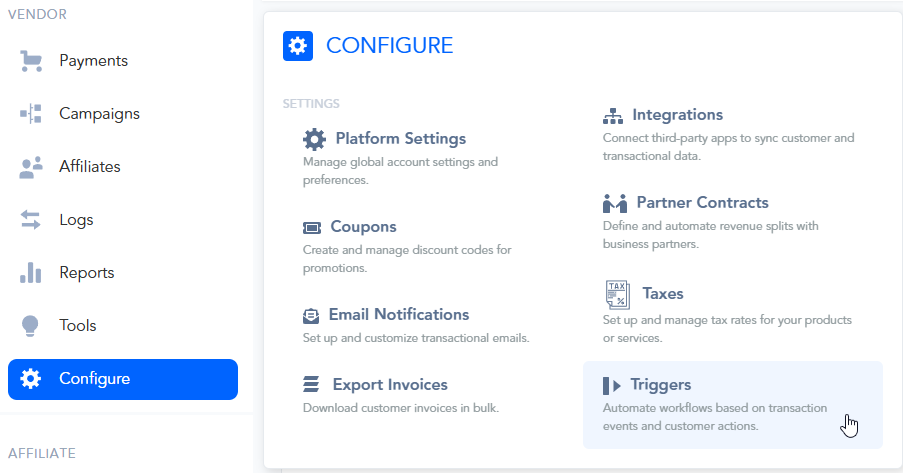
Click the + New Trigger button to create a new rule.

Configure the Trigger settings as follows:
Status:
First, toggle the switch at the top to make the trigger ACTIVE.Trigger Name:
Give your trigger a descriptive name so you can easily identify it later
(e.g., "Product 1 - New Sale to MarkeHero").
Select Event(s):
Choose the event that will fire this trigger.
For adding new customers, New sale is the most common choice.
Please note:
Available event options will show clearly only after saving your first trigger.
We recommend choosing the New Sale event when setting up the integration for the first time as it would trigger with any new transaction that is created for the product.
For MarketHero, the currently available and supported events are:
New Sale - triggers when a new transaction is created for the product
New Trial - triggers when a new trial is started for the product
Refund - triggers when a refund is issued to the customer, for the specific product
Subscription Cancellation - triggers when a Subscription is cancelled, for the product
Pending Cancellation - triggers when choosing to cancel the subscription at the end of the billing period, instead of immediately
Cart Abandonment - triggers 15 minutes after the checkout page has been abandoned
Subscription Changed - triggers whenever the subscription’s plan has been changed to a different one
IF Condition (The Rule):
This defines the variable that must be included for the trigger to run.
Important: The IF condition must be set to a Product, for the integration to function.
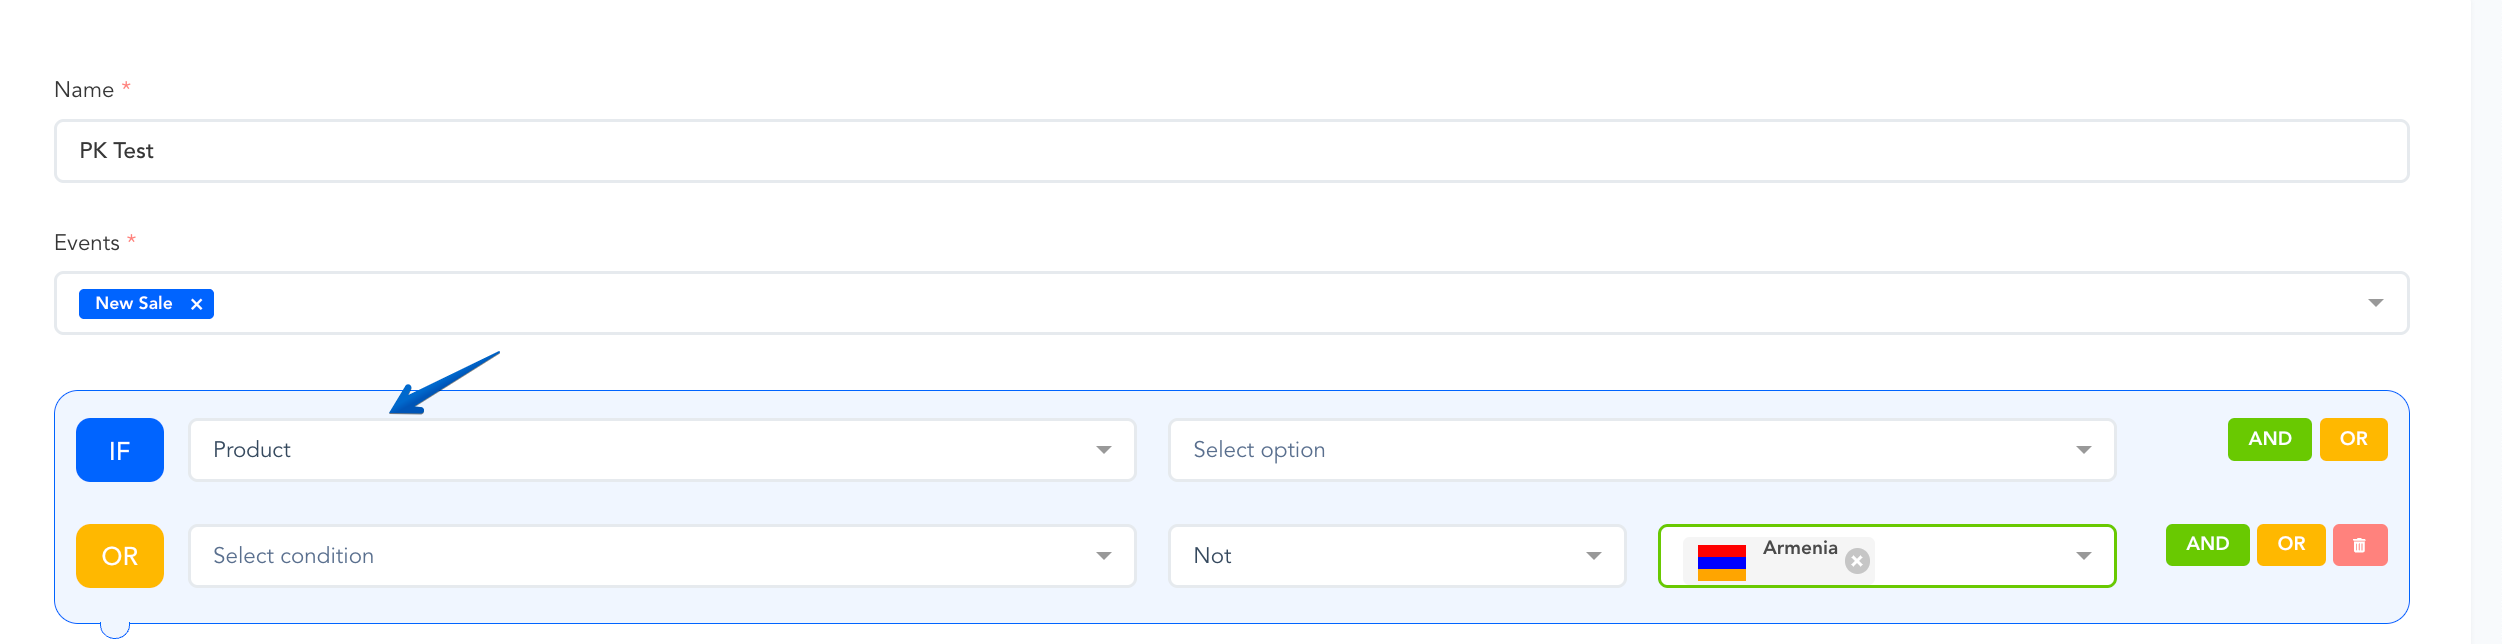
Best Practice Use Case:
We recommend creating a separate trigger for each product.
This makes it easier to manage and troubleshoot specific product integrations if needed, rather than having 1 trigger where all products are selected.
THEN Action (The Result):
This defines what will happen when the IF condition is met.
Please ensure that you have your Lists and Tags created in your MarketHero account.

Set the THEN action to: add customer to Email Marketing service.
Service: Select MarketHero from the dropdown.
Account: Choose the MarketHero account you connected in your Integrations section.
Select List: Choose the specific MarketHero list where you want to add the customer.
Add Tag: Select a Tag, or multiple Tags you want to apply to the customer in MarketHero (e.g.,
new customer,subscribed customer, etc.)
Once you have configured the rule, click the Update Trigger button to save your automation.
Now, when a customer purchases your main offer product, they’ll automatically be added to this MarketHero list that you’ve chosen.
Was this helpful?
Still need help? Ask the team