
Growth and Scale Plans
Automated Clearing House (ACH) payments allow you to receive debit payments directly from a customer’s bank account instead of using credit or debit cards.
PayKickstart provides the capability to handle ACH Wire Transfers via two payment gateways: STRIPE and our proprietary payment gateway known as CONNECT.
Important Notes:
Accepting ACH transfers requires a slightly different initial workflow than accepting credit cards:
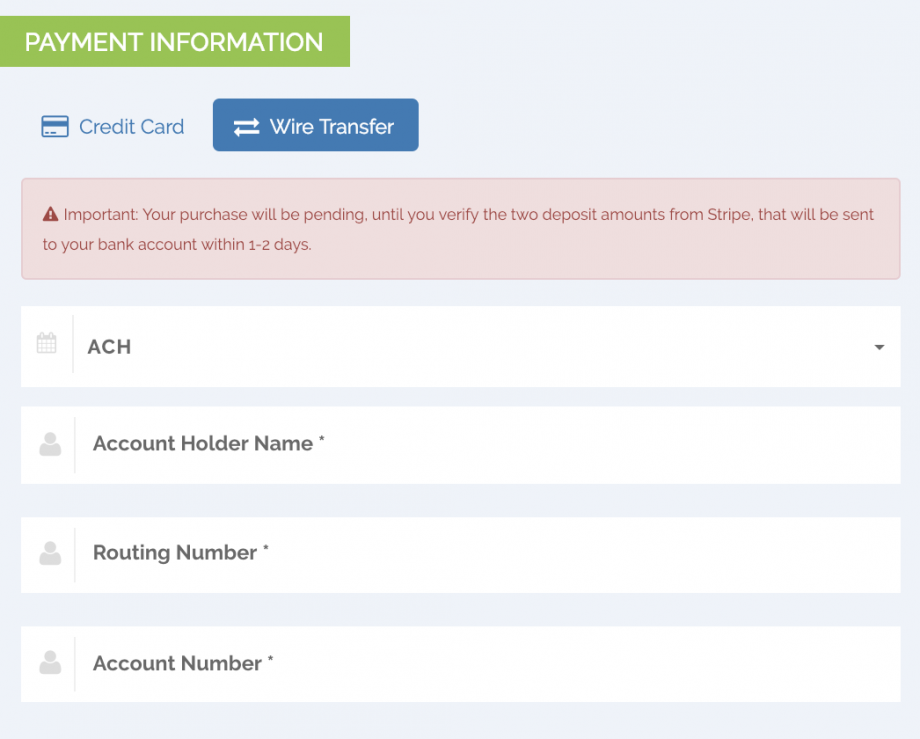
Bank accounts must first be verified on first payment attempt. Two small deposit amounts will be sent from the payment gateway to the customer’s bank account within 1-2 days.
The customer will be sent a link from PayKickstart in order to confirm the two deposits and finish verifying their bank account.
After verification, new purchases and charges for the customer will not require deposit verification.
Once both steps have been taken for a customer’s bank account, it can be used just like any other payment source, including for recurring charges.
The two key differences between using ACH and Credit Cards are:
– For Stripe, ACH payments take up to 5 business days to receive acknowledgment of their success or failure. Because of this, ACH payments take up to 7 business days to be reflected in your available Stripe balance.
– You can only accept funds in USD and only from U.S. bank accounts. In addition, your account must have a U.S./USD bank account to accept ACH payments.
– ACH refunds must be initiated within 90 days after the original payment. Similar to the delays introduced to payments with ACH, refunds will also require additional time to process—typically 4-5 business days.
Please Note: In order to activate ACH payments through Stripe, you will need to sign in to your Stripe Account and agree to their terms of service.
Inside your Stripe account, go to Settings > Payment Methods and activate ACH Credit Transfer.
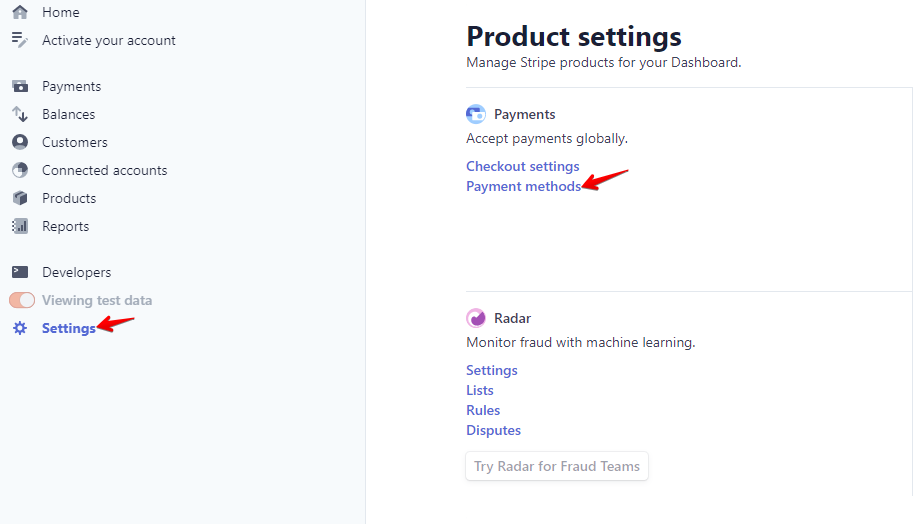
Click on the link to learn more about ACH Payments in Stripe’s ACH Guide: https://stripe.com/docs/ach
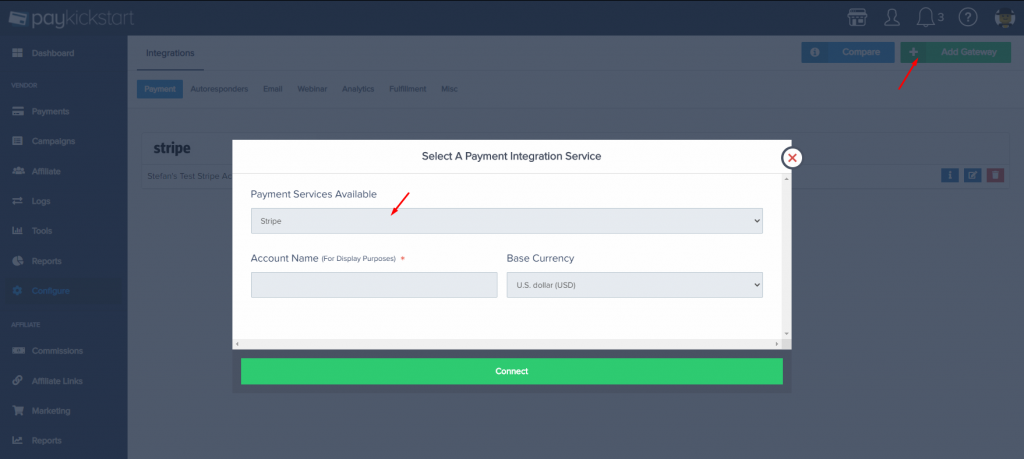
Add Stripe as a Payment Integration (only necessary if you didn’t already add payment gateway).
Go to Configure and click on Integrations > Payment > Activate Stripe
Make sure you select Stripe and follow the instructions to connect your account.
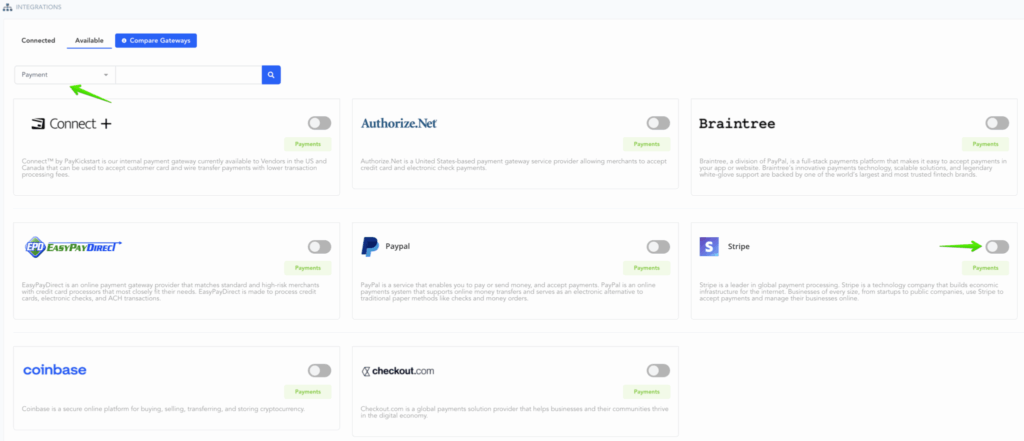
After integrating Stripe on Platform level, you can now associate the Stripe account with specific Campaigns.
Click on Campaigns then click on the Edit icon to get to the Campaign Settings page for the specific Campaign you are integrating with.
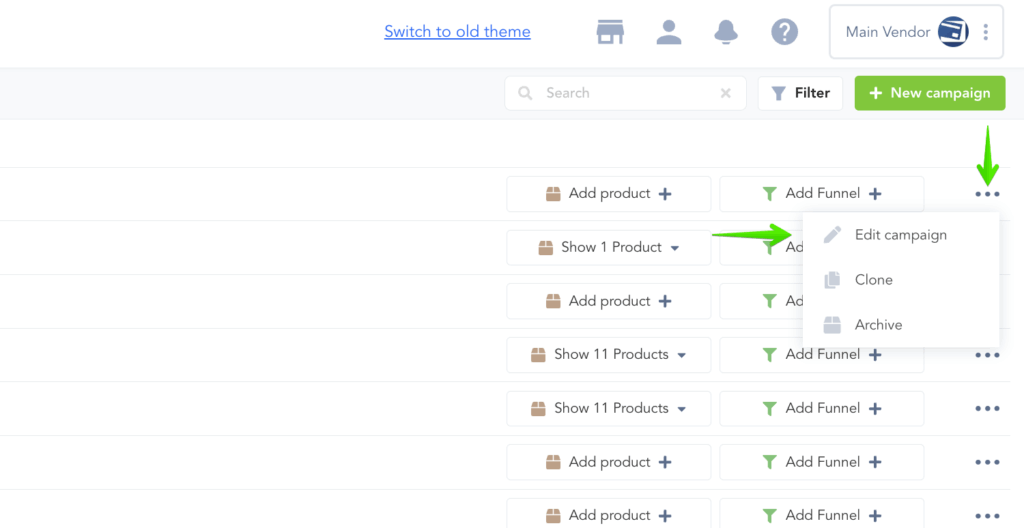
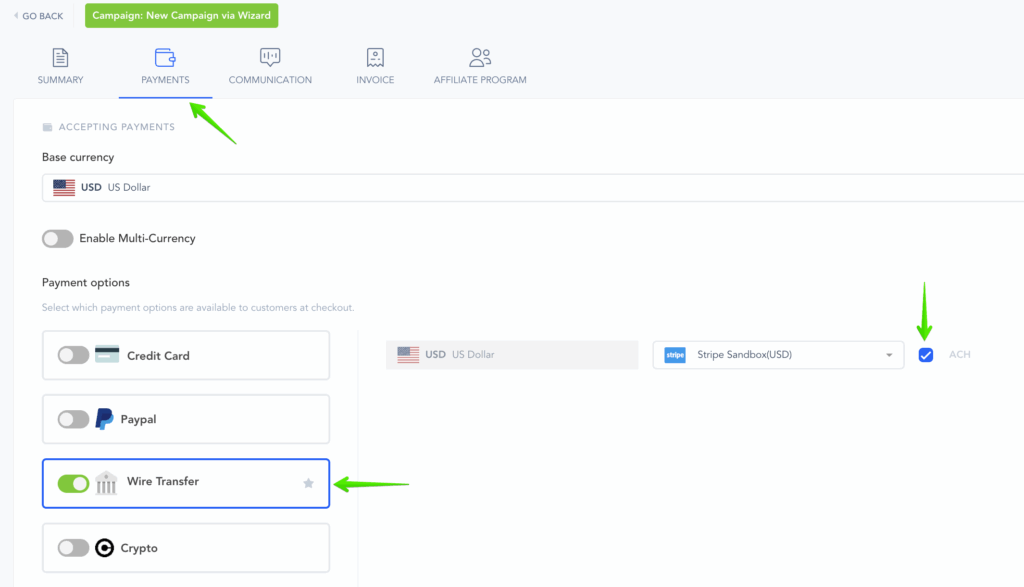
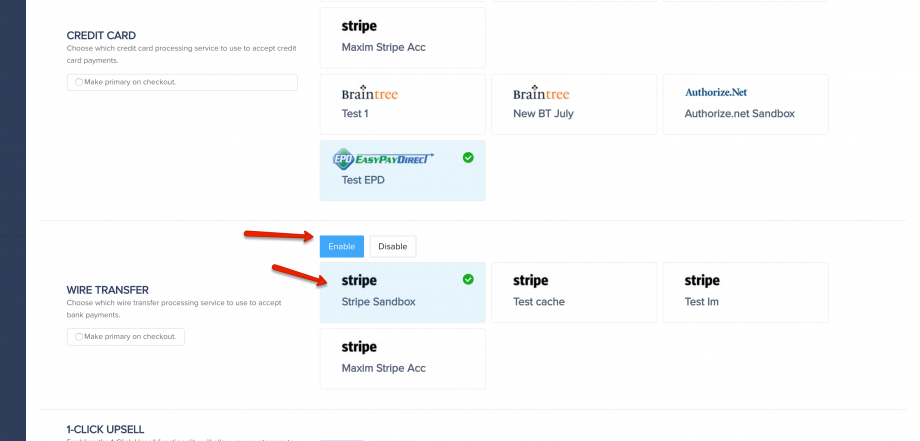
In the Campaign Settings, Enable Wire Transfer and select the payment gateway account you just added on the Integrations page.
Make sure to Save the Campaign Settings.

If you do not want to accept ACH, you can disable the payment type as shown below.
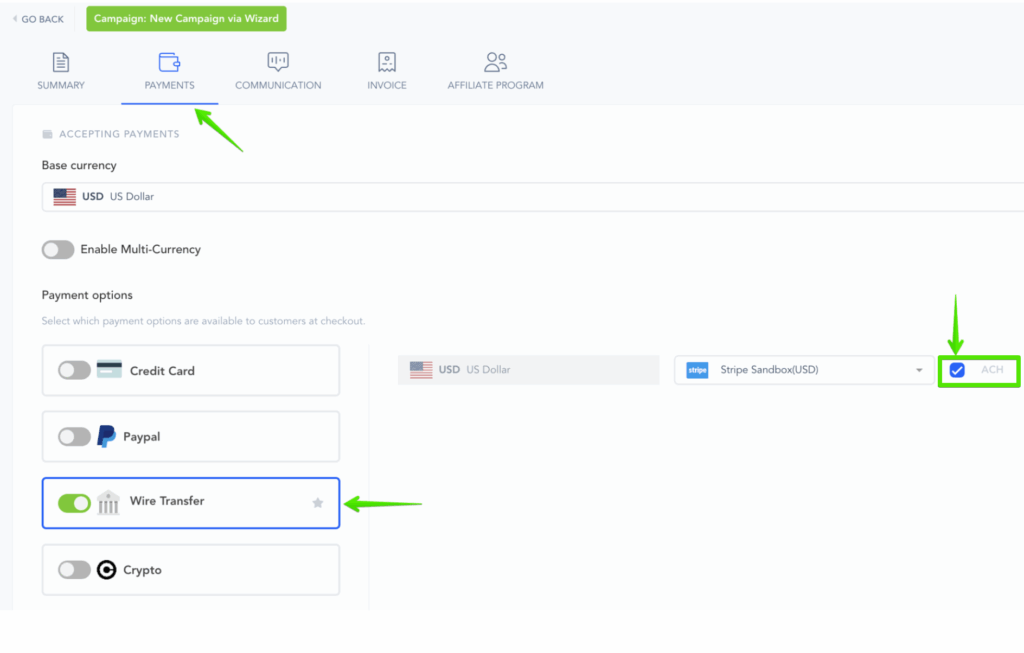
That’s it. Your checkout page will now have the wire transfer option for your customers to pay for product purchases.
Expand this section to view the guide
for the Previous User Interface Theme:
Prior to enabling ACH Wire transfers via CONNECT, it is essential to integrate CONNECT with your PayKickstart account. For detailed information on how to integrate with CONNECT, please visit https://support.paykickstart.com/knowledge-base/integrating-and-using-connect-by-paykickstart-to-process-payments/.
Once done, you can now proceed with these steps below:
Go to the Campaigns section and access the Campaign settings of the campaign that you’d like to configure.
Within the campaign settings, navigate to PAYMENT GATEWAY > WIRE TRANSFER. From there, choose your base currency and the CONNECT integration, and proceed with enabling the ACH Wire Transfer option

That concludes the process. Your checkout page will now include the wire transfer option, allowing your customers to make payments for product purchases.
Step 1:
Inside your Stripe account, go to Settings >> Payment Methods and activate ACH Credit Transfer.
Learn more about ACH payments in Stripe’s ACH Guide: https://stripe.com/docs/ach
Step 2:
Add “Stripe” as a Payment Integration (only necessary if you didn’t already add payment gateway).
Go to Configure and click on “Integrations” >> Payment >> Add Gateway
Make sure you select Stripe and follow the instructions to connect your account.
After integrating Stripe on a platform level, you can now associate the Stripe account with specific campaigns.
Step 3:
Click on “Campaigns” then click on the Edit icon to get to the Campaign Settings page for the specific campaign you are integrating with.

In the Campaign Settings, Enable Wire Transfer and select the payment gateway account you just added on the Integrations page.
Step 4: (optional)
Vendors can accept both ACH and SEPA payments from customers.
If you do not want to accept either ACH or SEPA, please disable the payment type.

To learn more about accepting SEPA payments, click here.
That’s it. Your checkout page will now have the wire transfer option for your customers to pay for product purchases.