

Please note this Payment Gateway Integration is newly built.
In case you notice any nuances or issues, please reach out to us via Live Chat or at support@paykickstart.com and we’d be happy to investigate any specific case further.
We recommend testing this integration in a separate or new campaign first, before switching all campaigns to the Checkout.com integration.
WARNING! Altering your Checkout.com Public and Secret Keys, and/or Processing Channel ID after the connection with PayKickstart has been made is strongly discouraged.
After integrating with Checkout.com, changing your Public and Secret keys, and/or the Processing Channel ID, will prevent our system from attempting rebills for any existing subscriptions created before the key or ID change.
If you change these credentials, existing customer subscriptions created prior to the change will require customers to update their billing via the Billing Portal. This is necessary to create a new token with the new keys or ID and continue subscription billings.
The first step is to integrate Checkout.com with your entire account. Once you have connected your account, you will be able to enable or disable it for each product or service that you are selling.
Note: You can integrate Multiple Checkout.com Accounts within your single PayKickstart account to allow the use of different Checkout.com accounts with different Campaigns.
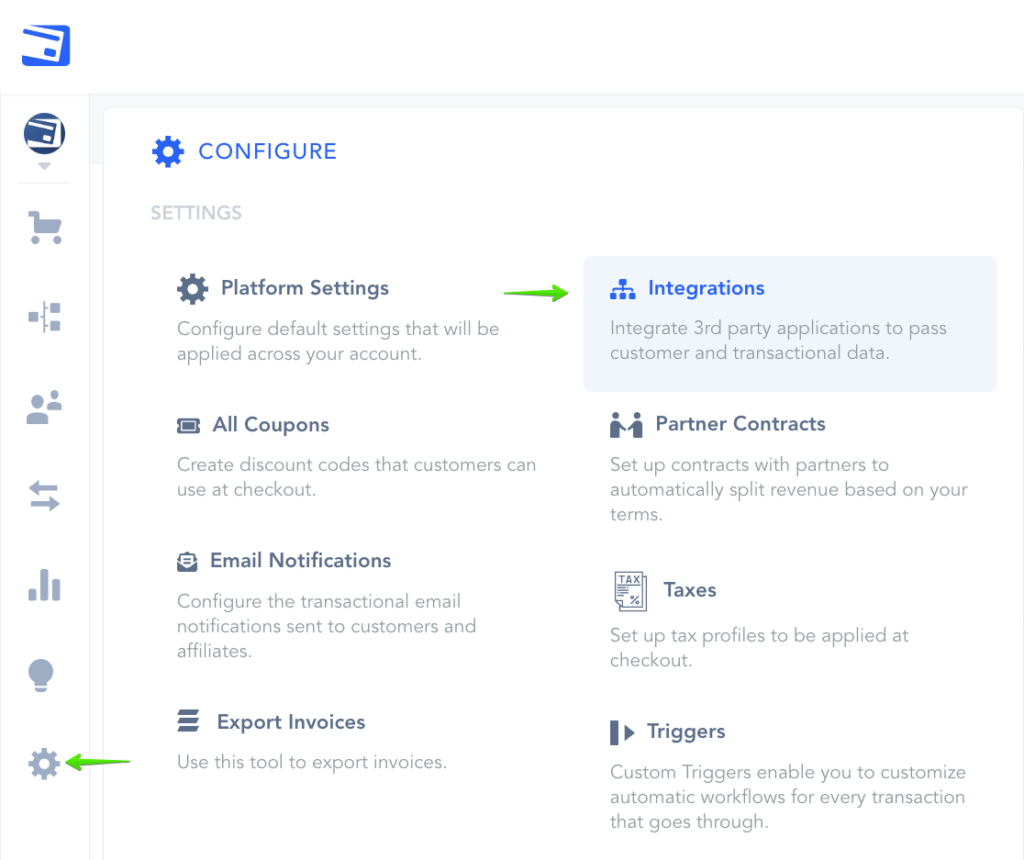
In the Configure ⚙️ Menu select Integrations.
Select Payment in the drop down Menu and activate Checkout.com.
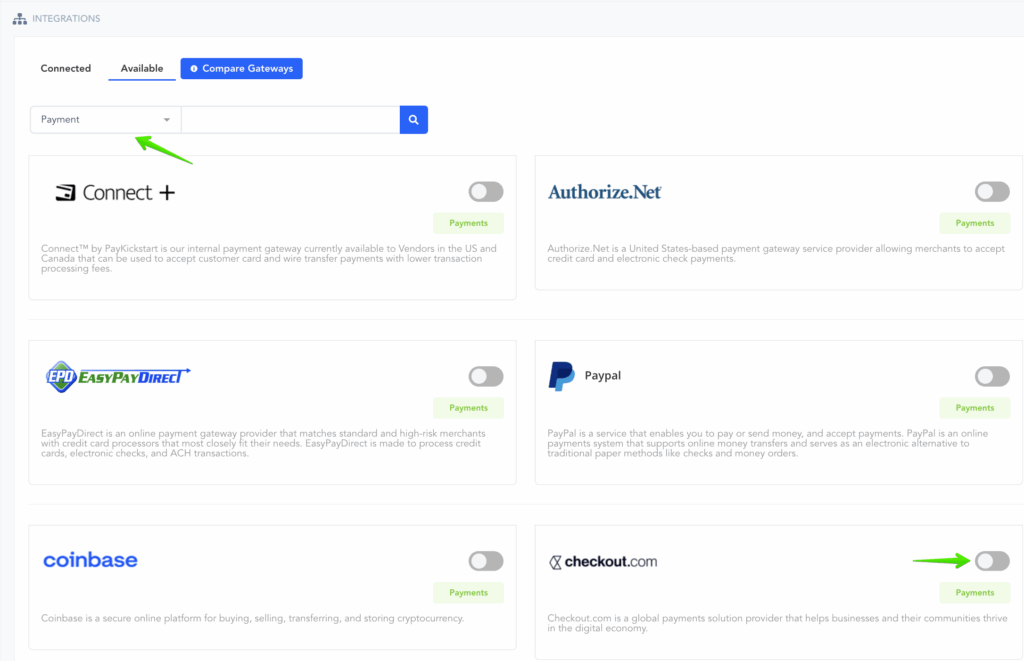
A Pop-up will appear.
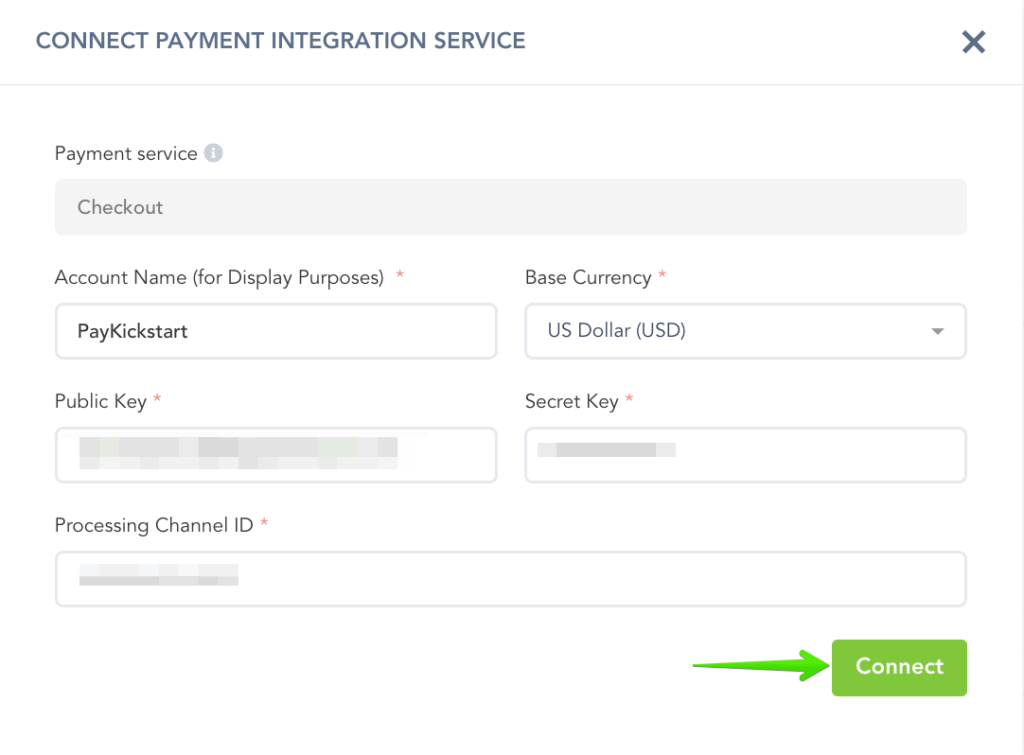
- Set an Account Display Name for the account to use as a reference in your PayKickstart account.
- Select the Base Currency in which customer payments are sent to you.
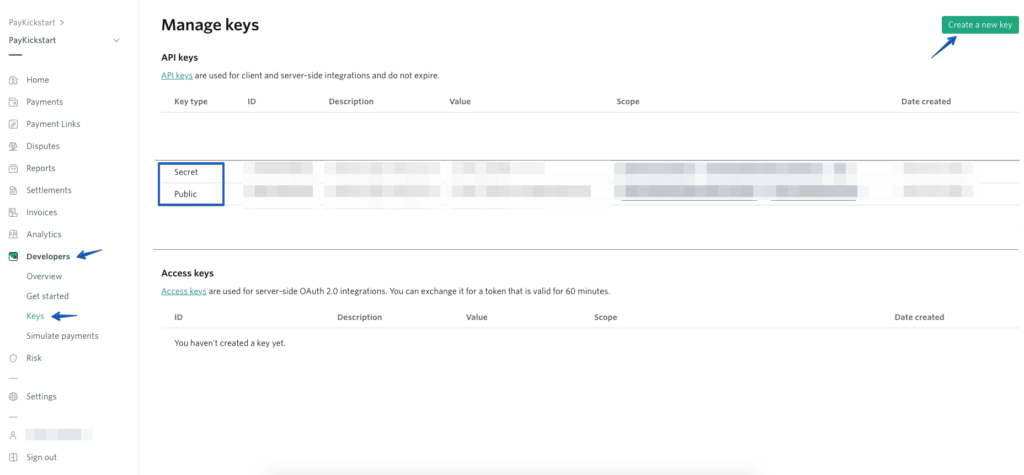
- Public Key – Located within your Checkout.com Developers tab, under the Keys section
- Secret Key – Located within your Checkout.com Developers tab, under the Keys section
- Processing Channel ID – provided by Checkout.com

Your Public and Secret keys can be obtained by accessing your Checkout.com Dashboard, under Developers tab and accessing the Keys section.
This is where you can view and manage your keys:
More information can be found at Checkout.com Knowledge Base.
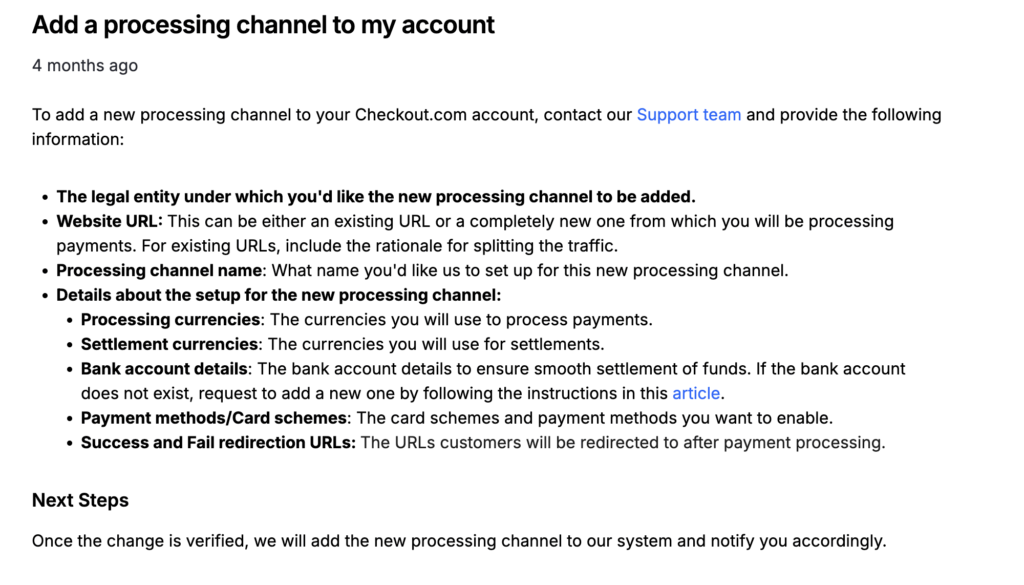
The Processing Channel ID corresponds to a specific merchant category code (MCC) that you are set up to process payments for.
Your processing channel IDs will be provided to you after we have completed your Checkout.com setup.
If you do not have a Processing Channel ID yet, you can email Checkout.com’s team at support@checkout.com with your request including your example of the sales page URL, your channel name, and redirection paths after a purchase attempt has occurred:
More information can be found at Checkout.com Knowledge Base.
Once you have entered the keys and the ID into the corresponding fields, click on Connect.
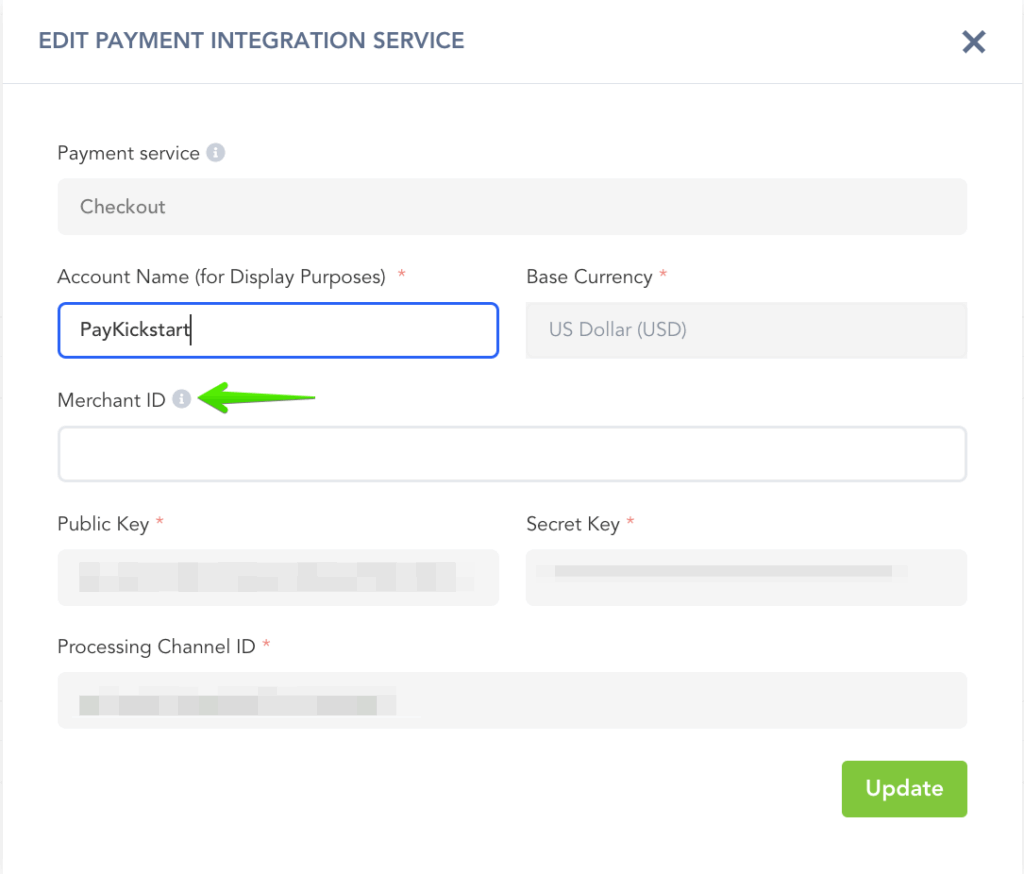
(OPTIONAL) Activate Google Pay: After filling out all the fields, enable Google Pay in the Integrations Section and input your Merchant ID.
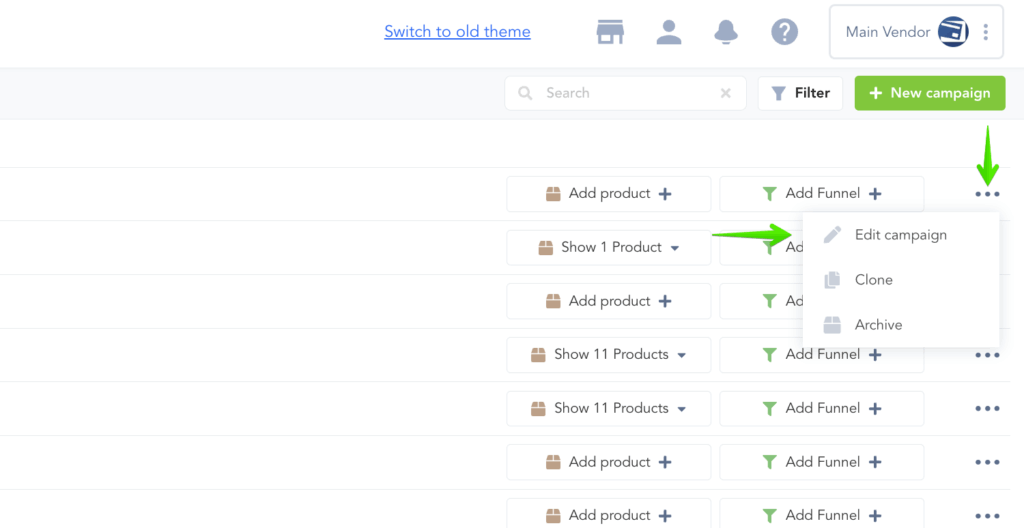
The next step will be Enabling Checkout.com for Campaigns if you choose to take Checkout.com as a payment option for those particular Products in the Campaign.
To do this, go to the Campaign’s Settings for the Campaign you want to enable Checkout.com with to accept customer payments.
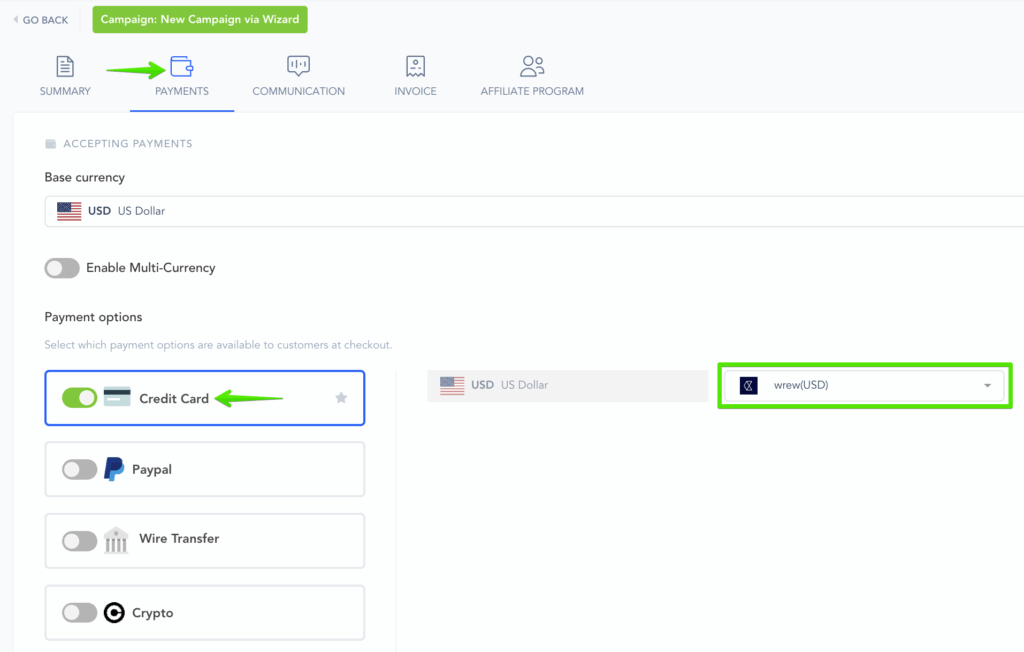
Then, go to Payments section and Enable Checkout.com as your Payment Gateway and select the account you wish to use:
That’s it. You’re done integrating with Checkout.com with your Vendor Account.
Customers can now purchase Products in this Campaign via Credit Card.
Note: Checkout.com’s test keys and test cards will not function on PayKickstart’s checkout forms. For security reasons, you will need to use the built-in PaykIckstart Test Mode to test your transactions.
Checkout.com is SCA and 3DS compliant.
More information can be found at: https://www.checkout.com/docs/payments/regulation-support/sca-compliance-guide
More information about handling Strong Customer Authentication and 3DS authorization via PayKickstart can be found at: https://support.paykickstart.com/knowledge-base/vendor-strong-customer-authenticationsca-and-3d-secure3ds-vendors/
WARNING! Altering your Checkout.com Public and Secret Keys, and/or Processing Channel ID after the connection with PayKickstart has been made is strongly discouraged.
After integrating with Checkout.com, changing your Public and Secret keys, and/or the Processing Channel ID, will prevent our system from attempting rebills for any existing subscriptions created before the key or ID change.
If you change these credentials, existing customer subscriptions created prior to the change will require customers to update their billing via the Billing Portal. This is necessary to create a new token with the new keys or ID and continue subscription billings.