
PayKickstart offers vendors the ability to integrate transactional email notifications with SendGrid to use their own email services and deliver email notifications via their own domains.
To integrate with SendGrid to deliver transactional email notifications, please follow the steps below:
Important to Note
PayKickstart cannot guarantee the deliverability of all email notifications outside of our email servers. Vendors would need to monitor email delivery via their email host.
Due to the complexity of the various SMTP platforms on the web PayKickstart is only able to offer minimal support with 3rd party SMTP connections. If integration connection issues occur, it is best to contact your Email host provider.
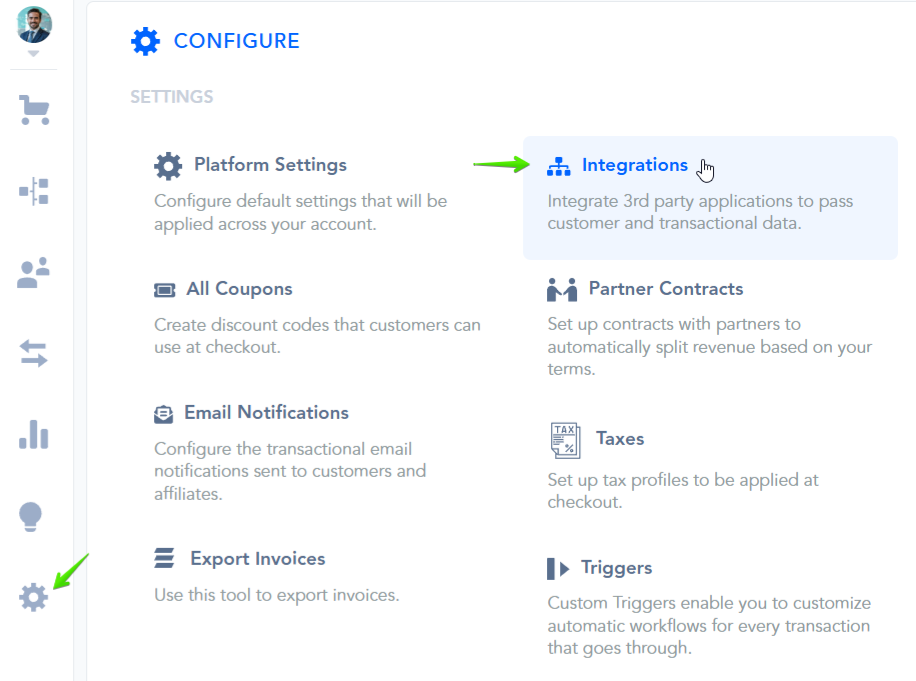
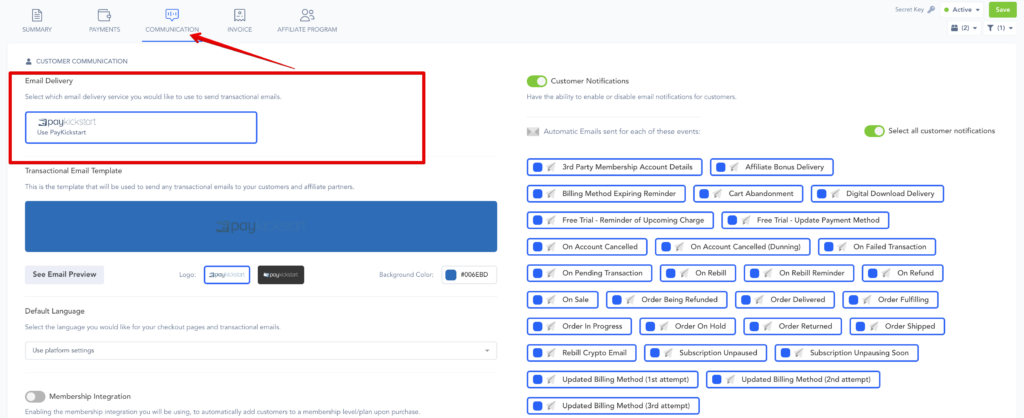
In the integrations section, select Email in the dropdown, then select SendGrid.

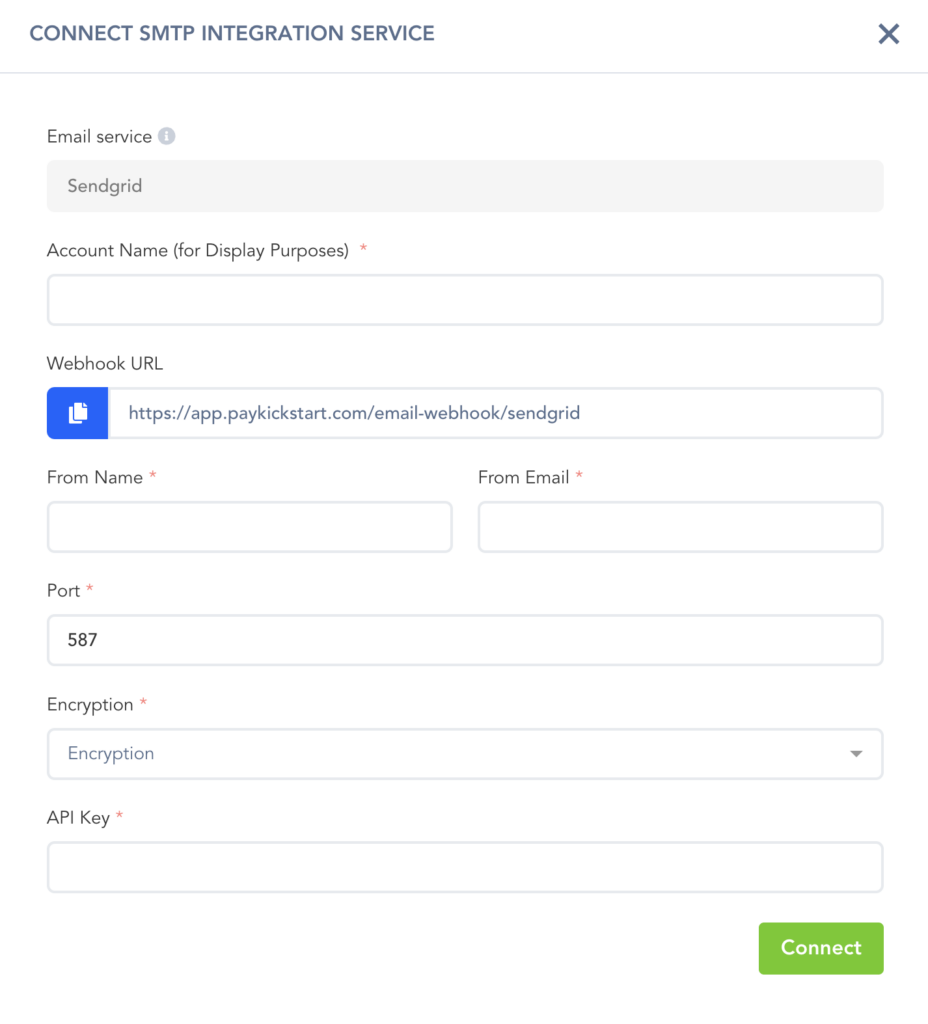
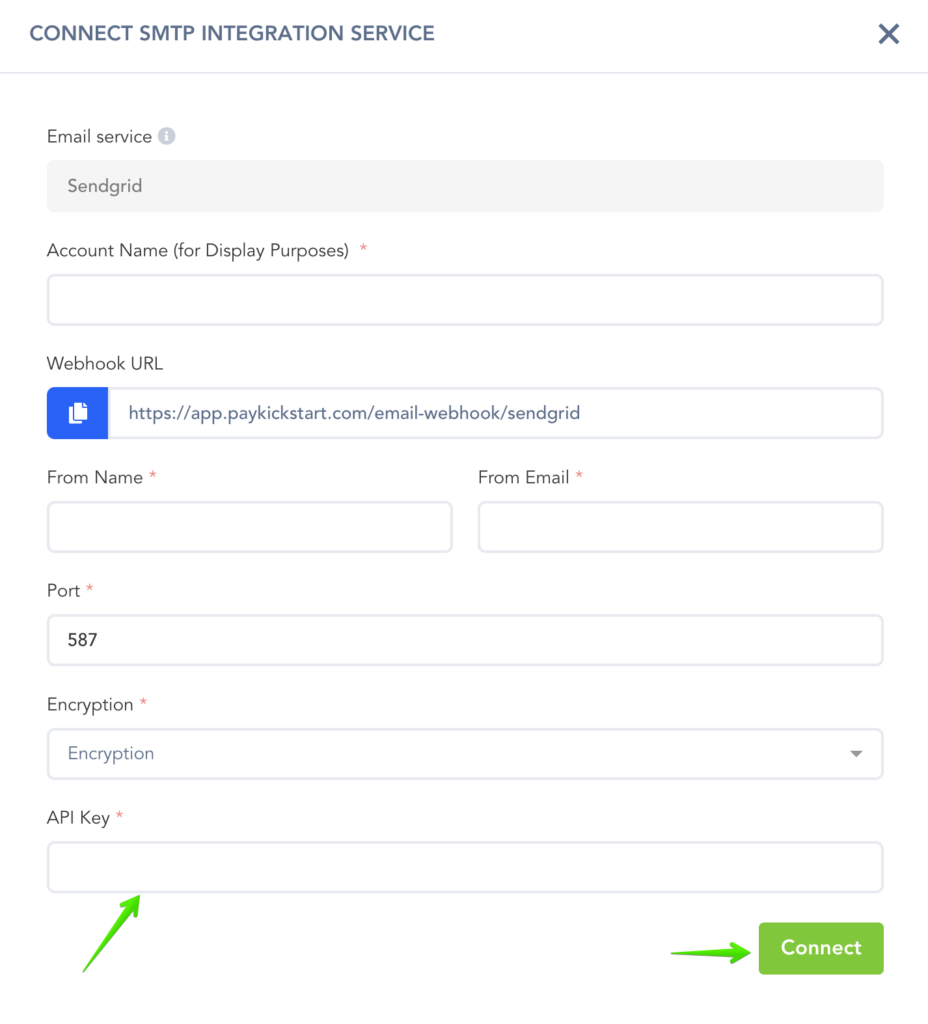
Then, copy the Webhook URL:
Important to Note
Please note that we have added the ability to change the Port and Encryption used for the integration, if needed.
The default settings (Port: 25) and Encryption (TLS) can be used to integrate SendGrid without making any changes.
For the integration fields below, please refer to SendGrid’s support team.
- Account Name: For your display purposes
- From Name: The name the emails will be sent from
- From Email: The email address the emails will be sent from
- Webhook URL: Automatically generated link used to create the integration
- Host: Your domain name. Example: smtp.gmail.com
- Port: You can check your service provider for the port number
- SSL/TLS: If your email service provider provides this option in your 3rd party account settings, you can enable this option.
- API Key: Unique API key for your SendGrid account
Once the fields have been entered, select Connect.
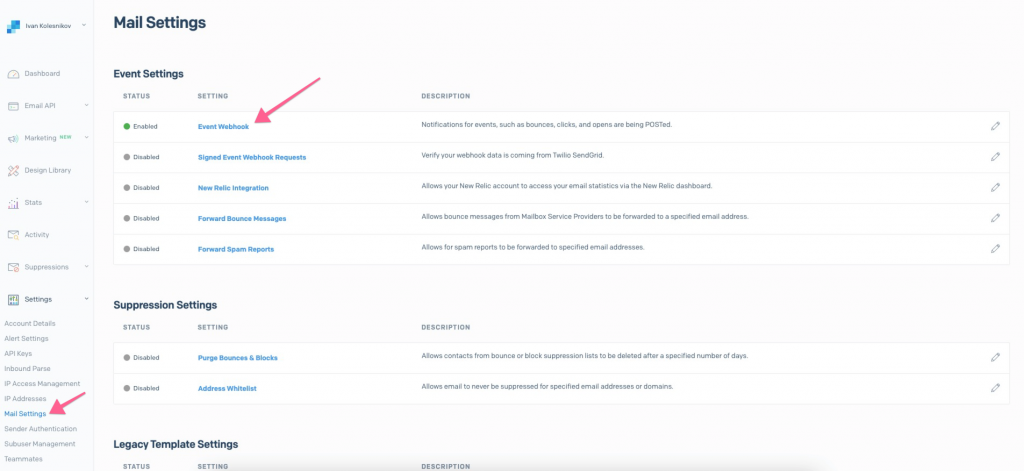
Access your SendGrid account, then go to Settings > Mail Settings and click on the Event Webhook button.
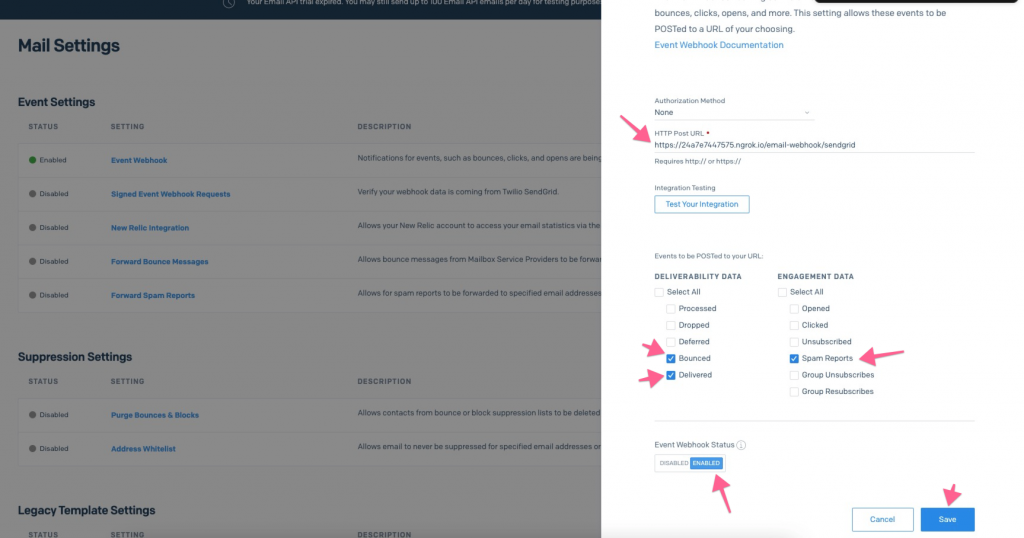
In the opened side-tab, paste the copied Webhook URL in the HTTP Post URL field.
In the Events to be posted to your URL section, make sure the following options are selected:
- Delivered
- Bounced
- Spam Report
Then, change the “Event Webhook Status” to Enabled and click the “Save” button.
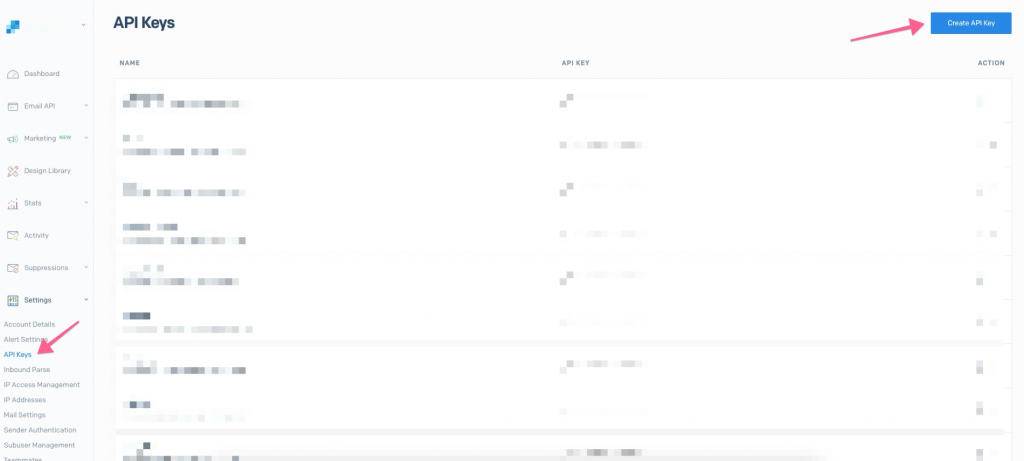
To obtain your API Key, you would need to go to Settings > API Keys and click on the Create API key button in your SendGrid account.
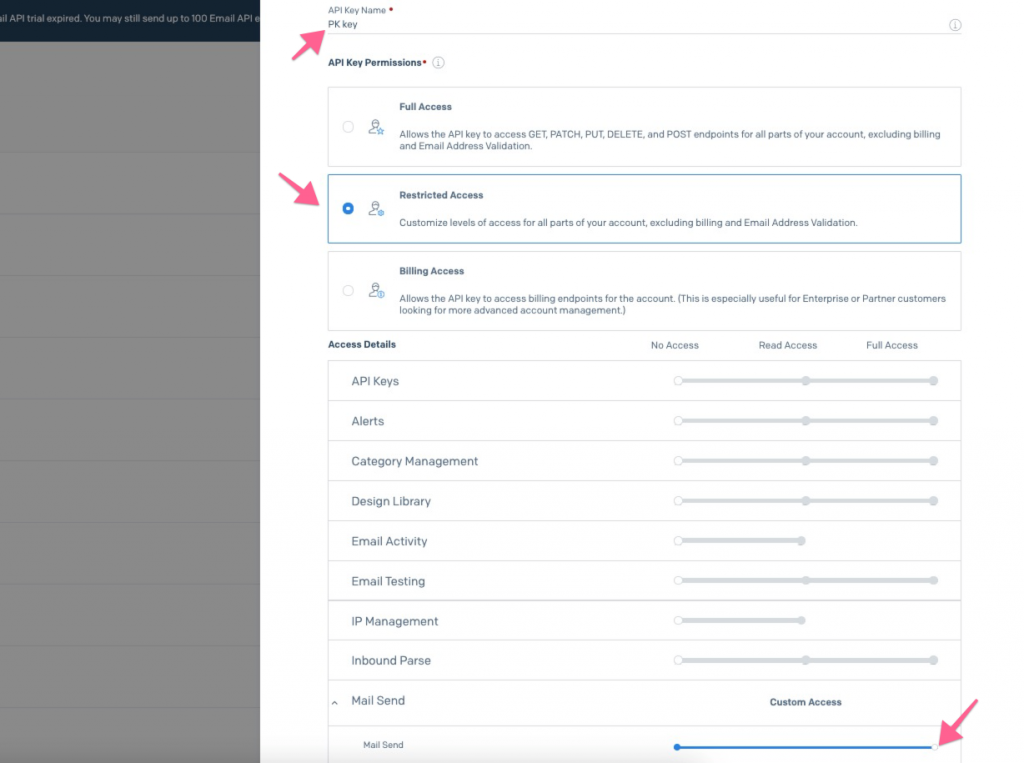
In the opened side tab enter the following information:
Add your API Key Name; the name of your API Key is only used to differentiate between multiple API Keys; you can enter any name you prefer.
Then, select the Restricted Access option.
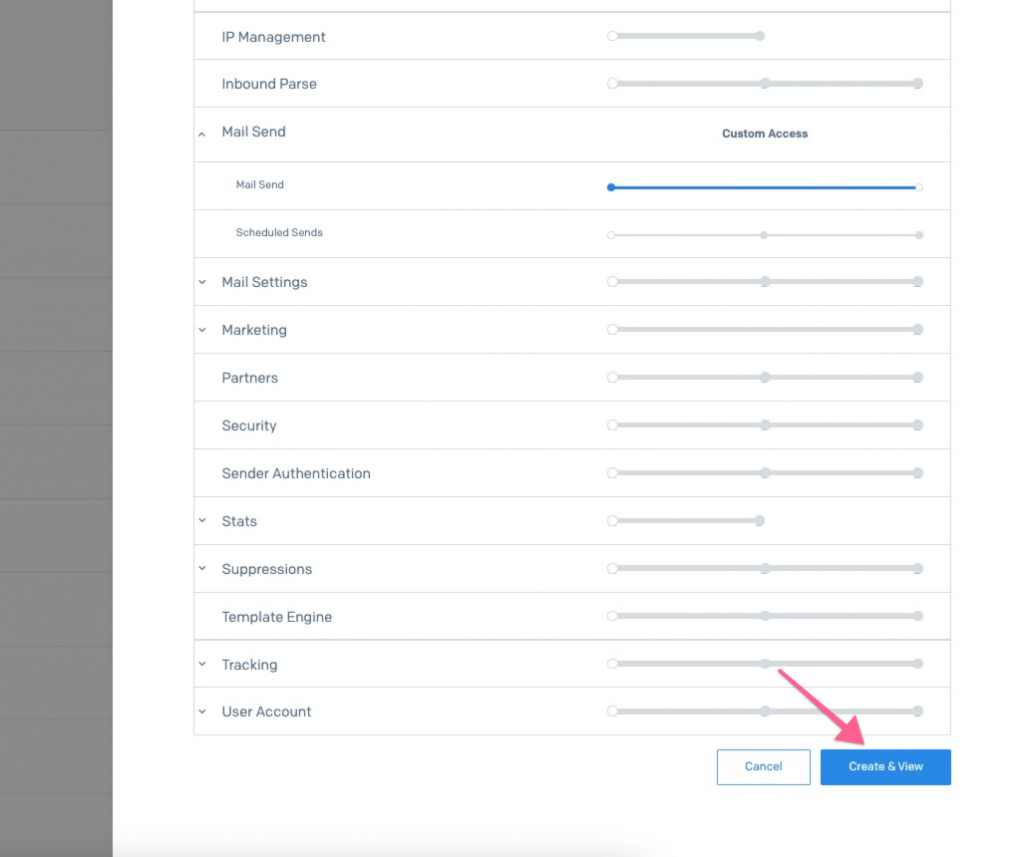
In the Access Details section, enable the Mail Send option.
Afterward, click the Create & View button.
On the next page, copy your unique API Key.
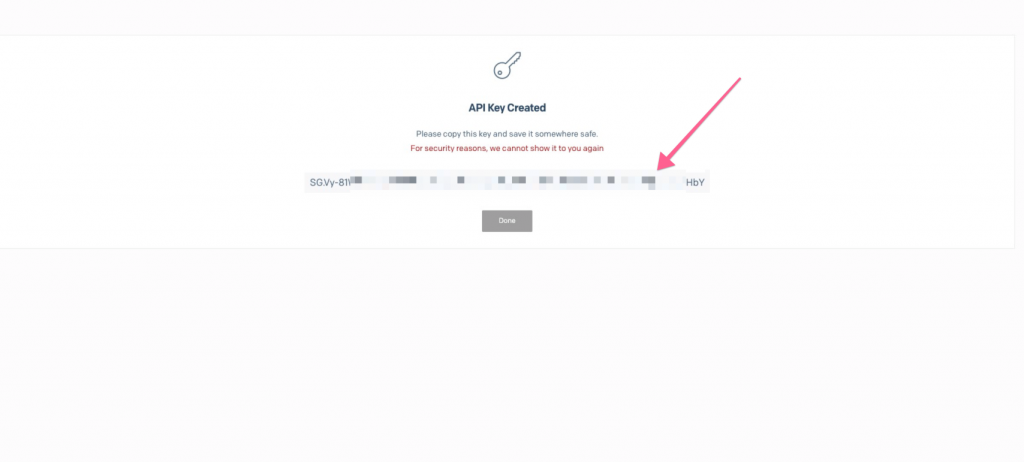
Go to your PayKickstart account and paste the API Key into the API Key field.
Then, click on Connect to integrate your SendGrid account with PayKickstart.
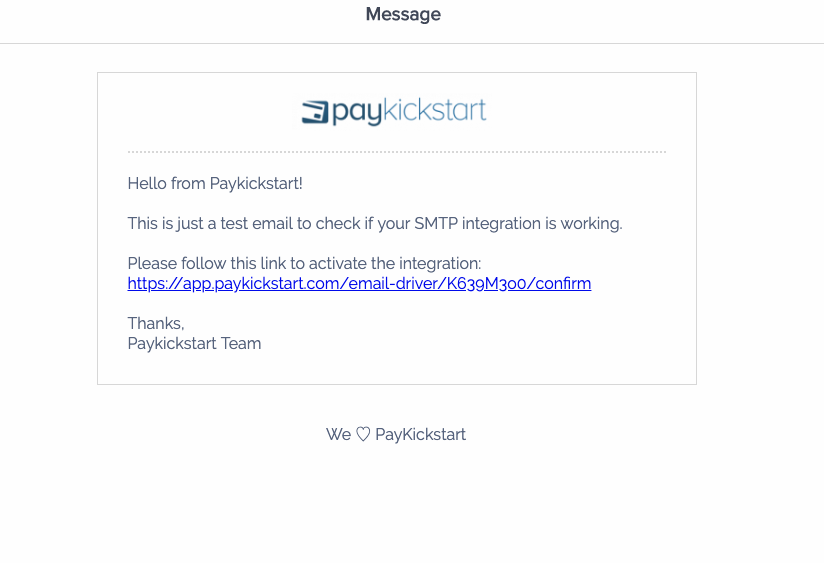
After connecting the SMTP integration, you will receive an email via the FROM email address used to verify and activate the integration at the platform level.
Once enabled and saved on the campaign level, you are now integrated to send transaction emails via SendGrid for the selected campaign.
You can connect SMTP integrations with all campaigns you want to use SMTP services for delivering your transactional emails.
You can also select the SMTP service to be used for sending out emails related to your Embeddable Customer Billing Portal.
To maximize your delivery rate of your email notifications, we strongly recommend you set up Domain, SPF & DKIM verification. Below are some useful resources to help you with this:
What is SPF?
How to setup SPF on your server.
What is DKIM?
How to set DKIM on your server.
MXToolBox is a great resource for monitoring the health of your domain.
SMTP Diagnostics
Blacklist Check
Free Monitoring
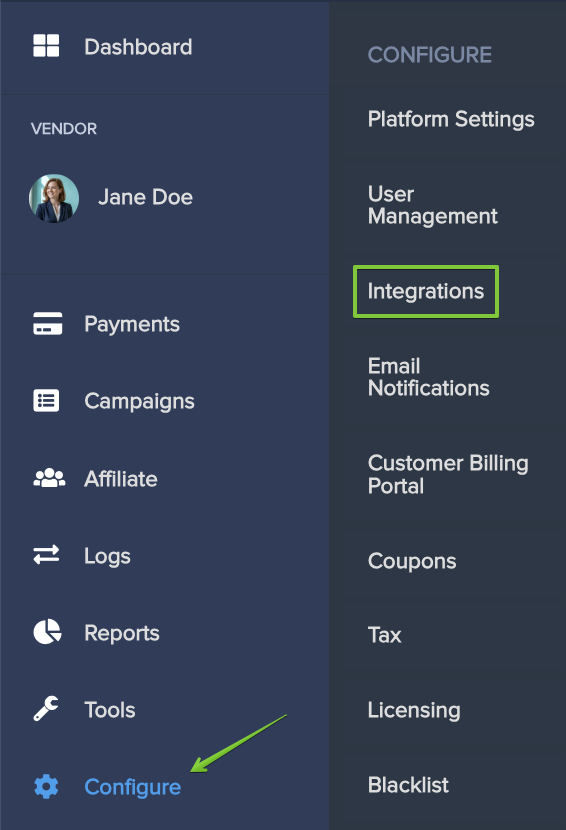
In the integrations section, select Email in the dropdown, then select SendGrid
Then, copy the Webhook URL:
NOTE: Please note that we have added the ability to change the Port and Encryption used for the integration, if needed.
The default settings (Port: 25) and Encryption (TLS) can be used to integrate SendGrid without making any changes.
For the integration fields below, please refer to SendGrid’s support team.
- Account Name: For your display purposes
- From Name: The name the emails will be sent from
- From Email: The email address the emails will be sent from
- Webhook URL: Automatically generated link used to create the integration
- Host: Your domain name. Example: smtp.gmail.com
- Port: You can check your service provider for the port number
- SSL/TLS: If your email service provider provides this option in your 3rd party account settings, you can enable this option.
- API Key: Unique API key for your SendGrid account
Once the fields have been entered, select “Connect“.
Access your SendGrid account, then go to Settings -> Mail Settings and click on the “Event Webhook” button
In the opened side-tab, paste the copied Webhook URL in the “HTTP Post URL” field.
In the “Events to be POSTed to your URL” section, make sure the following options are selected:
- Delivered
- Bounced
- Spam Report
Then, change the “Event Webhook Status” to “Enabled” and click the “Save” button.
To obtain your API Key, you would need to go to Settings > API Keys and click on the Create API key button in your SendGrid account.
In the opened side-tab enter the following information:
Add your API Key Name, the name of your API Key is only used to differentiate between multiple API Keys, you can enter any name you prefer.
Then, select the Restricted Access option.
In the “Access Details” section, enable the Mail Send option.
Afterward, click the Create & View button
On the next page, copy your unique API Key.
Go to your PayKickstart account and paste the API Key into the API Key field.
Then, click on “Connect” to integrate your SendGrid account with PayKickstart.
After connecting the SMTP integration you will receive an email via the FROM email address used to verify and activate the integration at the platform level.
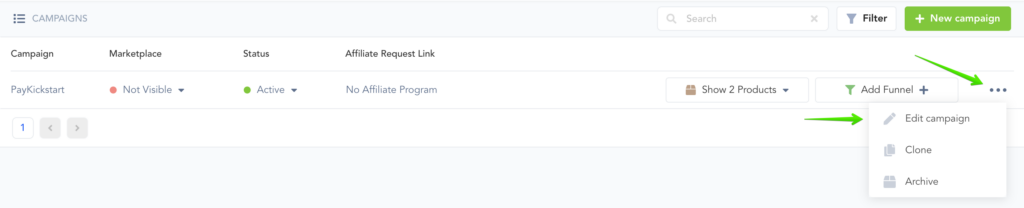
After integrating at the platform level with SendGrid, you can go to the specific campaign you want to use SMTP notification delivery with and enable the SMTP feature in the campaign settings.
Once enabled and saved on the campaign level, you are now integrated to send transaction emails via SendGrid for the selected campaign.
You can connect SMTP integrations with all campaigns you want to use SMTP services for delivering your transactional emails.
You can also select the SMTP service to be used for sending out emails related to your Embeddable Customer Billing Portal.
To maximize your delivery rate of your email notifications, we strongly recommend you set up Domain, SPF & DKIM verification. Below are some useful resources to help you with this:
What is SPF?
How to setup SPF on your server.
What is DKIM?
How to set DKIM on your server.
MXToolBox is a great resource for monitoring the health of your domain.
SMTP Diagnostics
Blacklist Check
Free Monitoring