

Integrating Your Braintree Account To Accept Customer Payments.
IMPORTANT NOTE
In compliance with Strong Customer Authentication (SCA), PayKickstart utilizes the 3D Secure versions 1 & 2 card authentication method.
Vendors using Braintree will need to ensure 3DS is Enabled in their account.
You can check if your Braintree account has 3DS enabled by following the guide at: https://articles.braintreepayments.com/guides/fraud-tools/3d-secure#confirm-setup
If 3DS is not enabled for your Braintree account, please contact their support team to get it enabled.
Learn More About SCA/3DS
WARNING! Altering your Braintree API keys after the connection with PayKickstart has been made is strongly discouraged!
After integrating with Braintree, changing your API keys in Braintree would prevent our system from being able to send requests to Braintree to attempt rebills for any existing subscriptions before the Braintree API key was changed.
If you change the API keys, existing subscriptions created prior to the change will need to update their billing via the billing portal in order to connect with the new Braintree API key and continue the subscription billings.
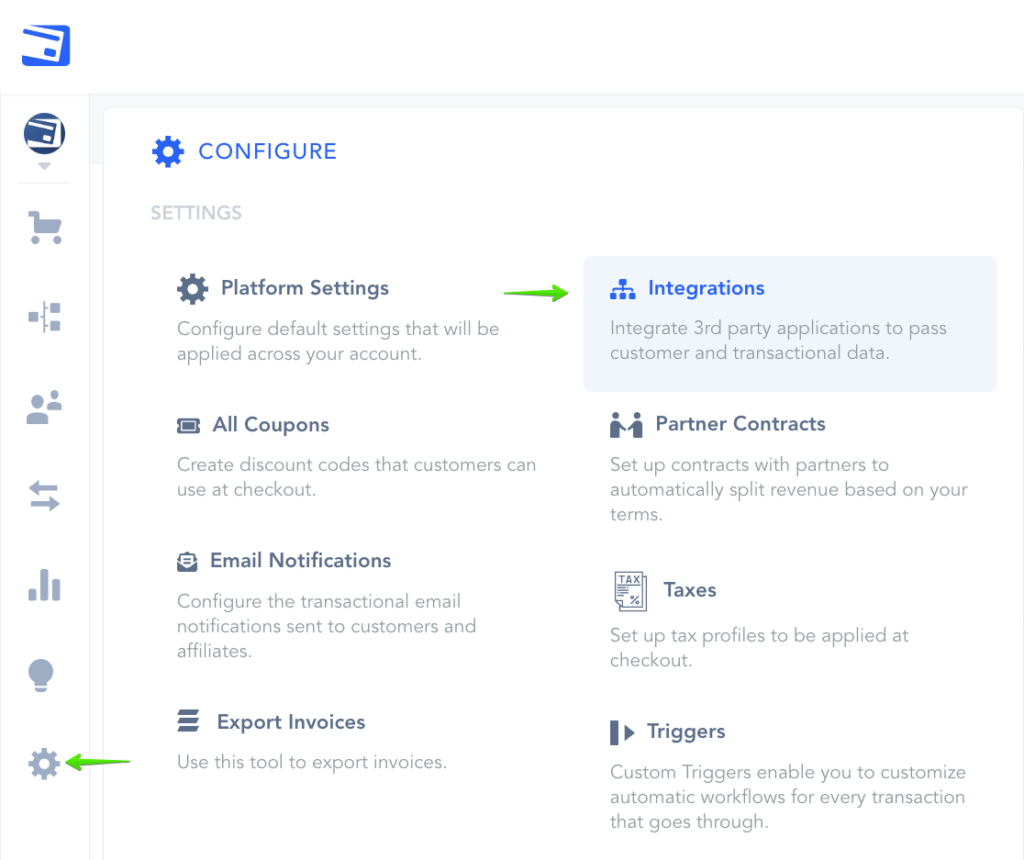
In the Configure ⚙️ Menu select Integrations.
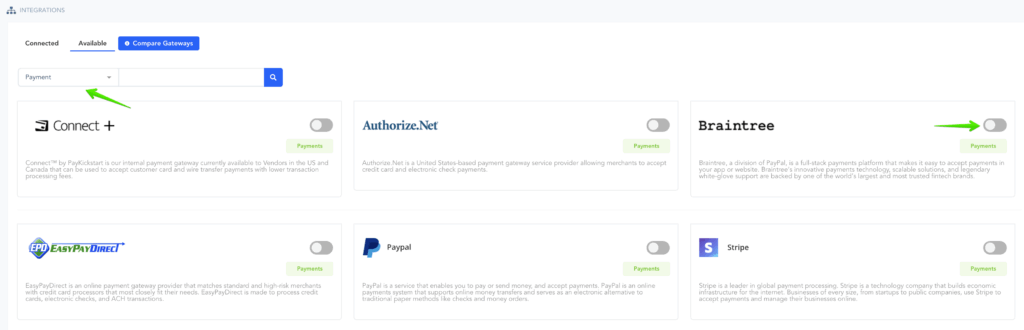
Select Payment in the drop down Menu and activate Braintree.
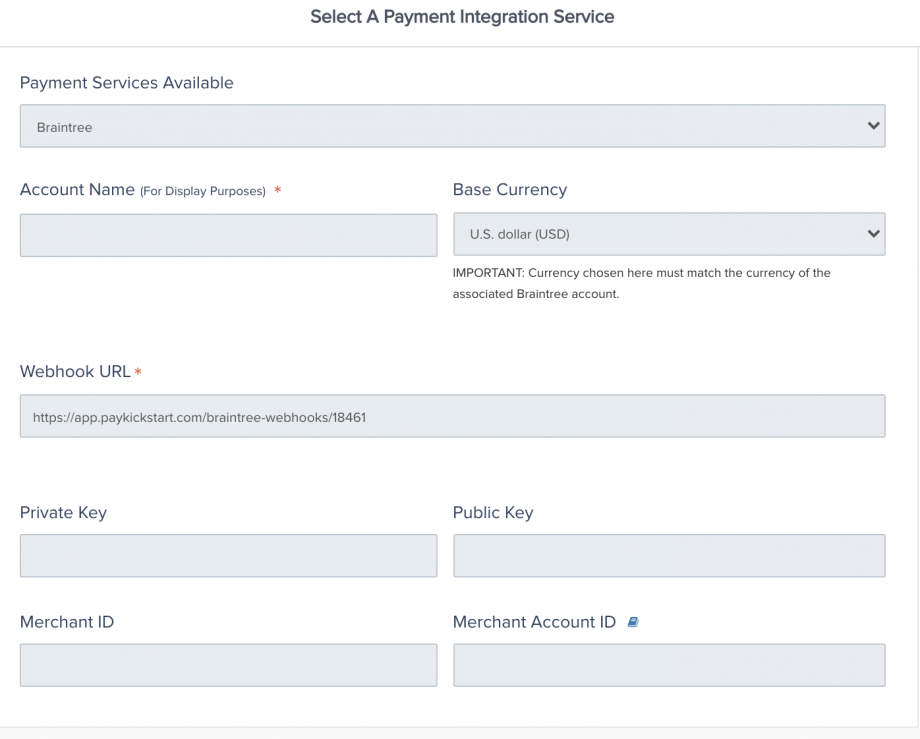
A Pop-up will appear.
- Account Name: For display purposes
- Base Currency: This must match the base currency the Braintree account accepts.
- Private Key: See instructions below.
- Public Key: See instructions below.
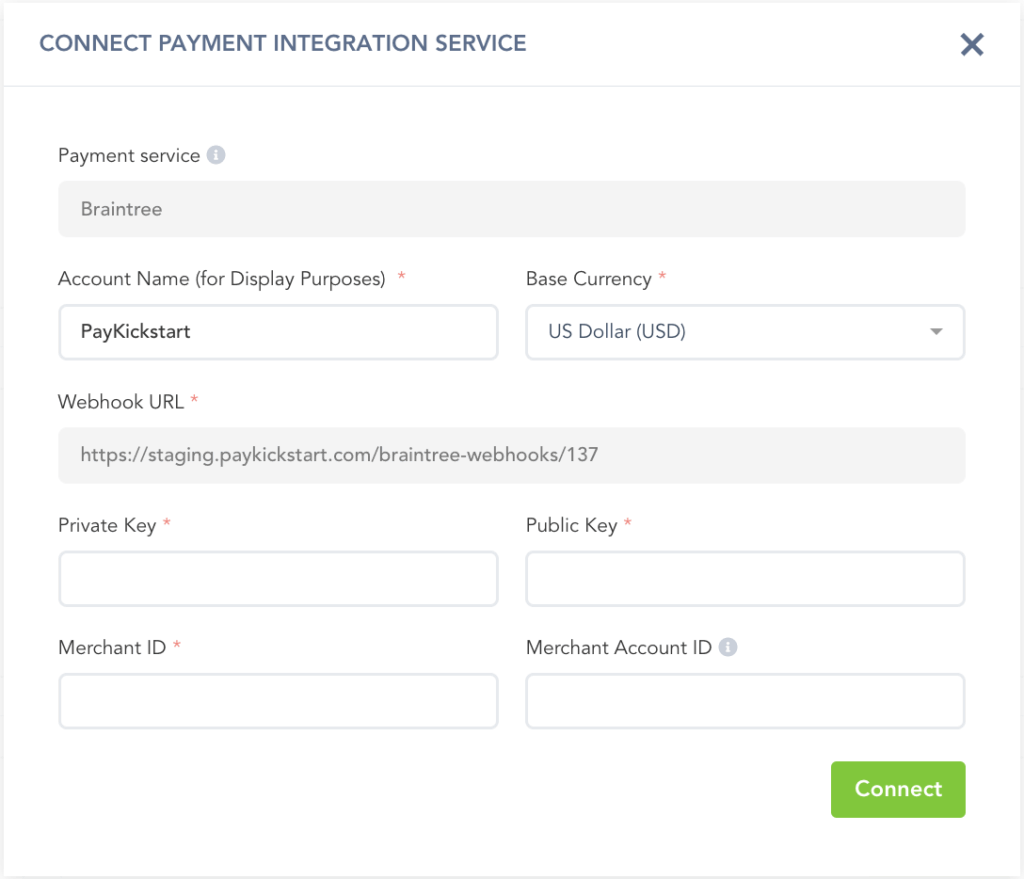
Webhook URL (Optional): If you want to send transactional data back to your Braintree Account you can use the webhook option to fire the webhook data after a transaction action.
To gather the remaining account details, login to you Braintree Control Panel.
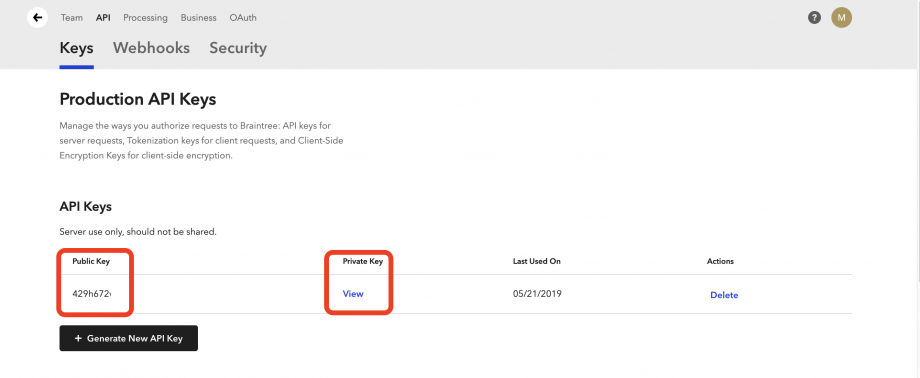
1. Navigate to Settings > API

2. Under the API Section you can view the Public and Private API Keys.
If no API Keys appear, click Generate New API Key
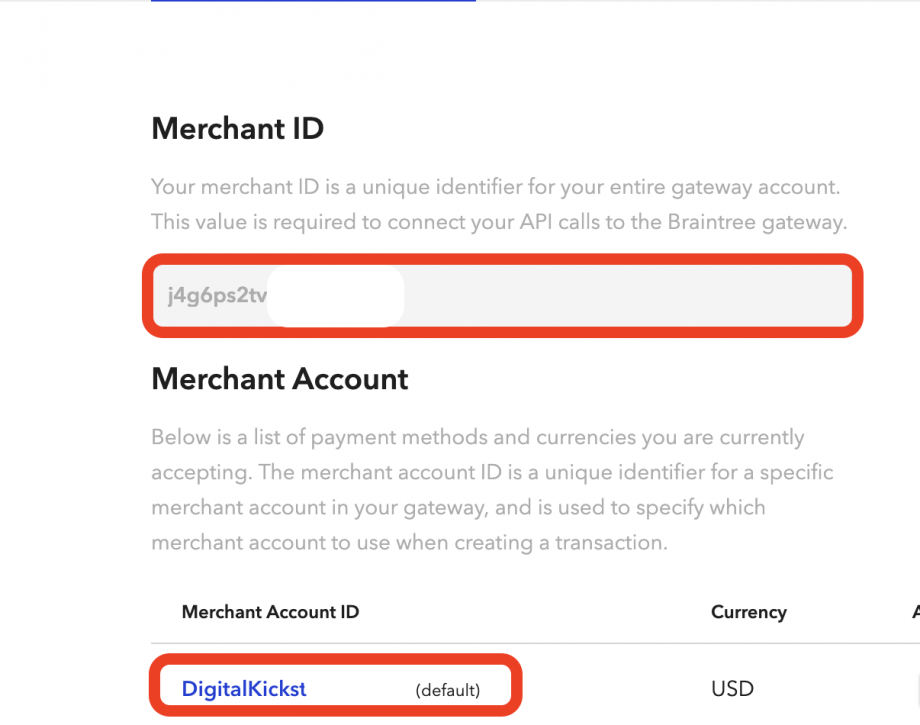
3. To find the Merchant ID and Merchant Account ID go to Settings > Business
After entering all needed details, click Connect to save the integration at the Platform level.

🥳You have now integrated Braintree at the platform level.🥳
The next step will be Enabling Braintree for Campaigns if you choose to take Braintree as a payment option for those particular Products in the Campaign.
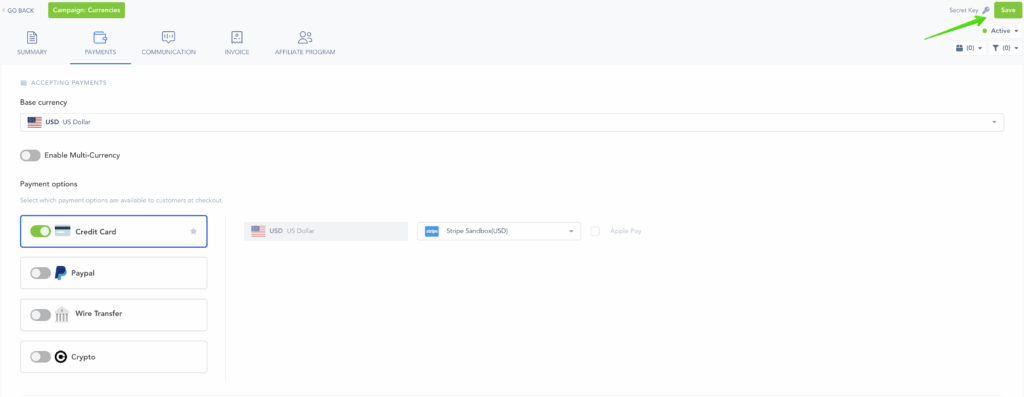
To do this, go to the Campaign’s Settings for the Campaign you want to enable Braintree with to accept customer payments.
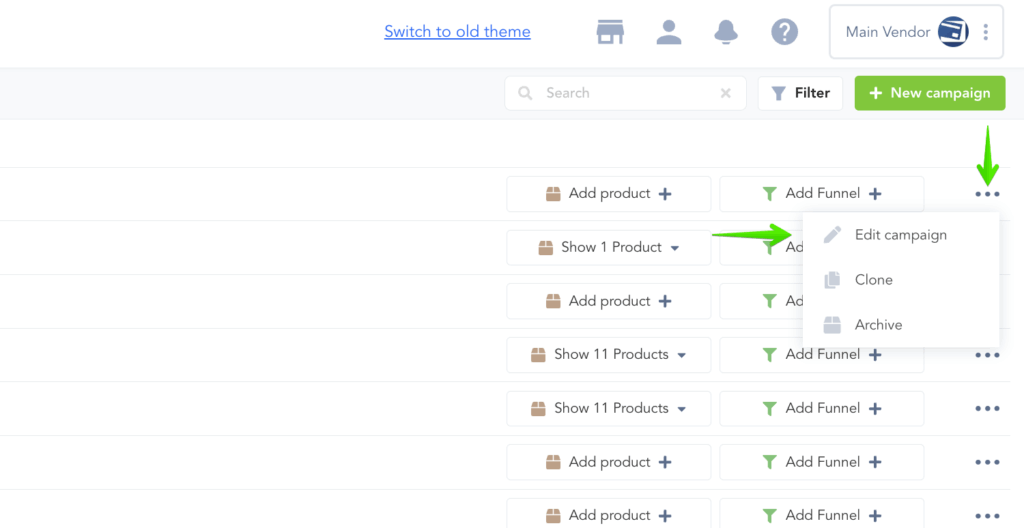
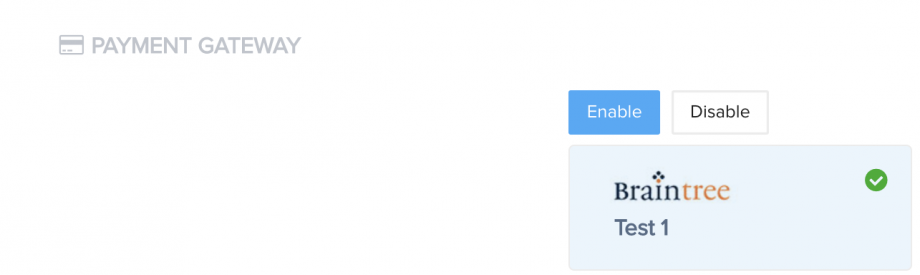
Then, go to Payments section and enable Braintree as your Payment Gateway and select the account you wish to use:
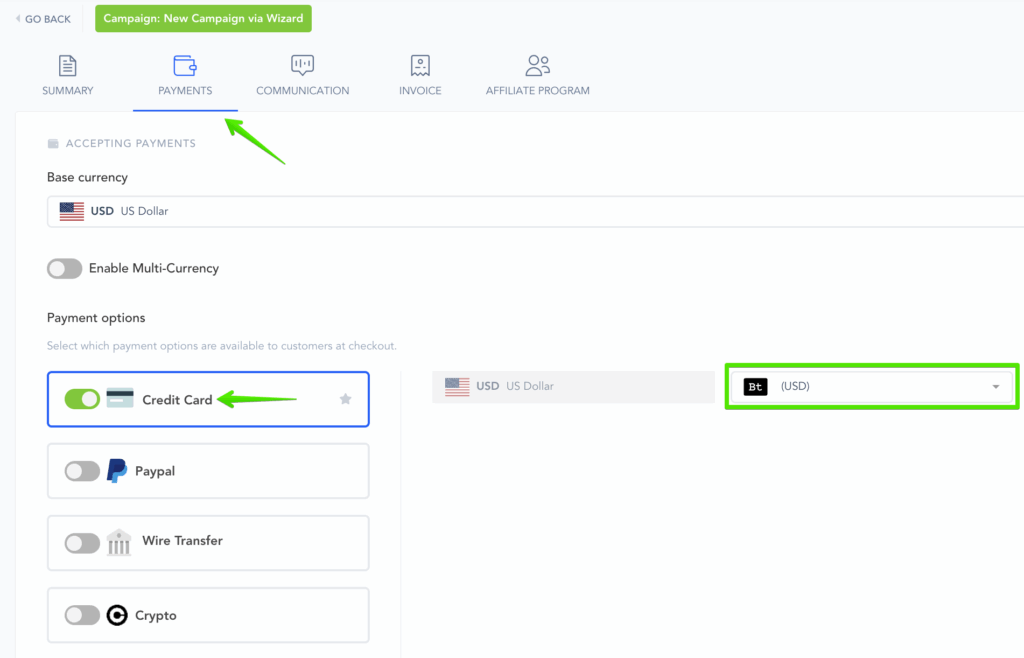
Make sure to Save the Campaign Settings.
That’s it. You’re done integrating with Braintree with your Vendor Account.
Customers can now purchase Products in this Campaign via Credit Card.
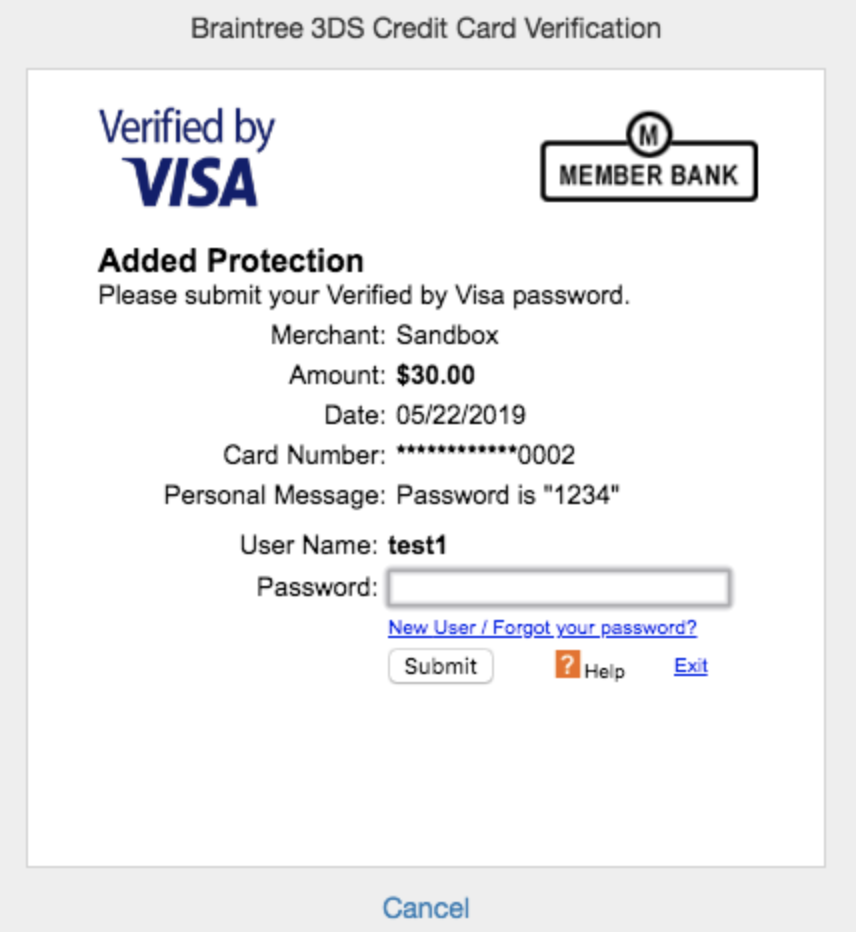
3D Secure Verification: The 3DS verification is an additional security check imposed by some banks, particularly most recently in compliance with Strong Customer Authentication regulations for European citizens.
- You must enable this option in your Braintree Account by contacting Braintree Support.
- After enabling 3DS the customer may see an additional security block before completing the purchase if SCA/3DS is triggered for the purchase.
- PLEASE NOTE: The 3DS security box is created by Braintree and cannot be edited at this time.
- To learn more about Braintree 3D Secure Verification click here.
If you want to use Braintree to accept Paypal payments, you have to enable that option inside of your Braintree account before Paykickstart can process Paypal payments through Braintree for you. Please follow the instructions in their documentation to do this.
WARNING! Altering your Braintree API keys after the connection with PayKickstart has been made is strongly discouraged!
After integrating with Braintree, changing your API keys in Braintree would prevent our system from being able to send requests to Braintree to attempt rebills for any existing subscriptions before the Braintree API key was changed.
If you change the API keys, existing subscriptions created prior to the change will need to update their billing via the billing portal in order to connect with the new Braintree API key and continue the subscription billings.
Expand this section to view the guide
for the Previous User Interface Theme:
Step 1:
In the Configure menu select Integrations.
Step 2:
Go to the payment integrations tab and select “Add a payment gateway“.
Step 3:
Select Braintree, enter the following details and click Connect.
- Account Name: For display purposes
- Base Currency: This must match the base currency the Braintree account accepts.
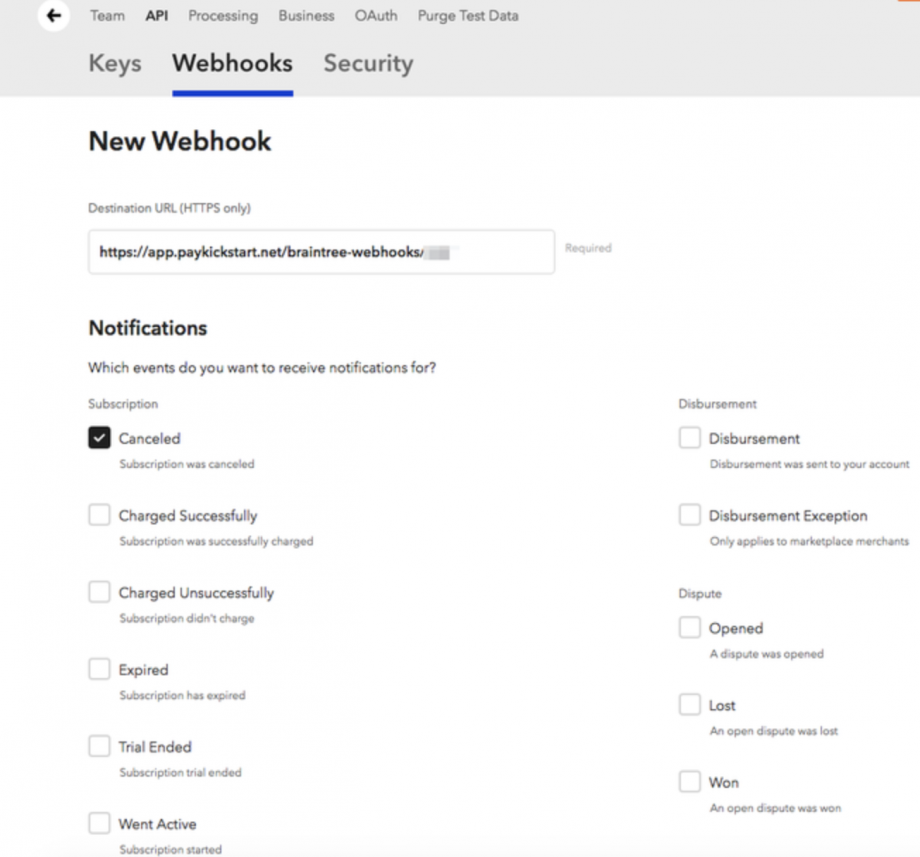
- Webhook URL(optional): If you want to send transactional data back to your Braintree account you can use the webhook option to fire the webhook data after a transaction action.
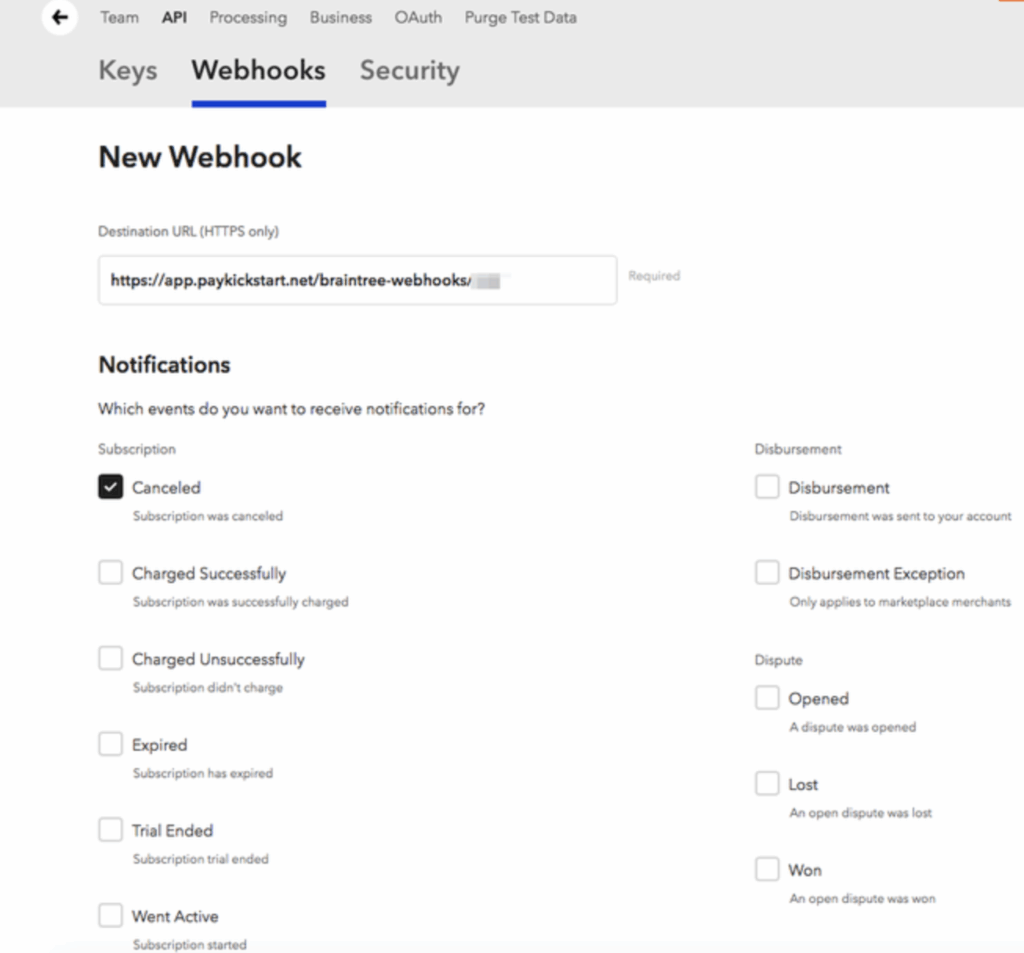
- Copy the webhook from the integration section and got to Braintree > API > Webhooks to create the webhook.
- Copy the webhook from the integration section and got to Braintree > API > Webhooks to create the webhook.
- Private Key: See below
- Public Key: See below
To gather the remaining account details, login to you Braintree Control Panel.
1. Navigate to Settings > API
2. Under API section you can view the Publick and Private API Keys and the Merchant ID and Merchant account ID.
If no API keys appear, click Generate New API Key
- Merchant ID: See below
- Merchant Account ID: See below
- To find the Merchant ID and Merchant Account ID go to Settings > Business.
- After entering all needed details, click connect to save the integration at the platform level.
🥳You have now integrated Braintree at the platform level.🥳
You can now connect the payment gateway on the campaign level for all products in that campaign to use for purchase charges.
Step 4:
The next step will be Enabling Braintree for campaigns and the products in those campaigns.
Select the specific Campaign settings

Enable Braintree and select the specific Braintree account.
Step 5:
Save the campaign settings.