
Custom Triggers enable you to customize automatic workflows for every transaction that goes through.
This feature helps automate several processes, such as sending out a customized email notification, creating or redirecting an IPN request to a specific route, refunding transactions, and changing subscriptions.
To create a Custom Trigger, simply follow the steps provided below:
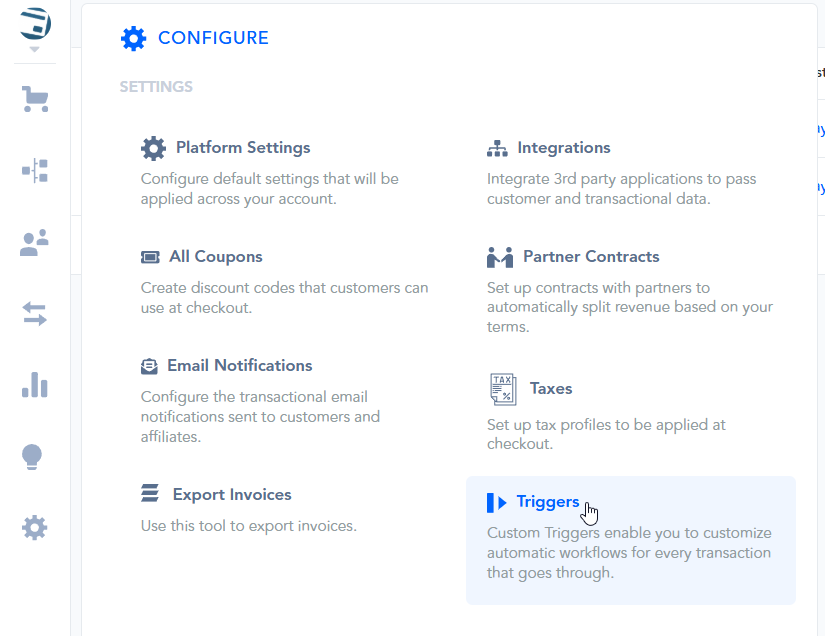
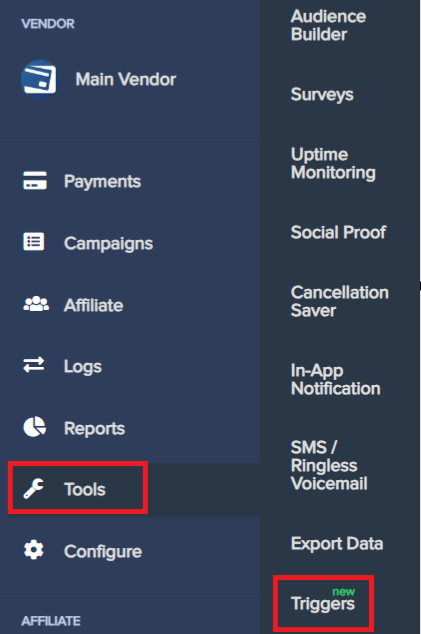
In your account locate the Tools icon ⚙️, then click on the Triggers option.
Or access the section by following this link: https://app.paykickstart.com/vendor/configure/triggers
To create a new trigger, click on the New Trigger button:

The New Trigger button can be found at the top right corner of the section:

Enter the name of the trigger.

When creating a trigger, the “if” establishes a condition that must be true for the trigger to perform a specific action. This is like a requirement that, when fulfilled, activates the trigger.
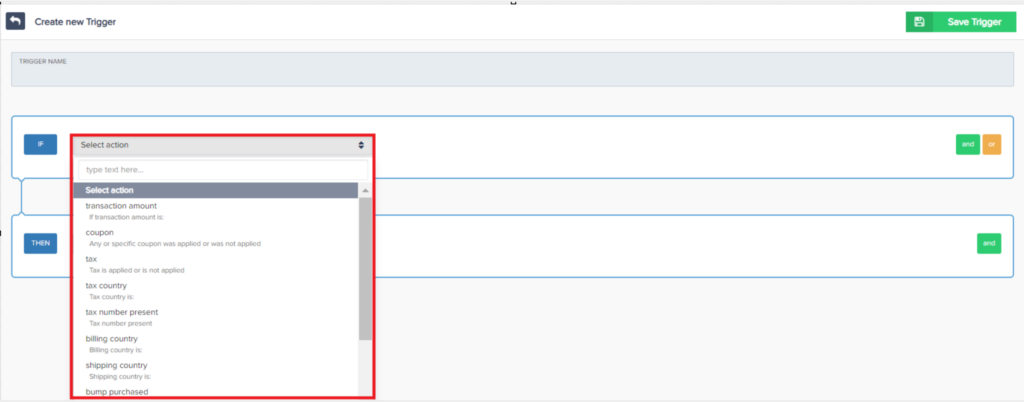
Vendors can choose from the following conditions:
– transaction amount
– coupon
– tax
– tax country
– tax number present
– billing country
– shipping country
– bump purchased
– affiliate
– payment method
– quantity
– checkout type
– transaction type
– product
– campaign
– funnel
– phone number present
– custom field
Select which events to trigger when the specified “if” condition is met. The subsequent event will be triggered, initiating the desired action or response.
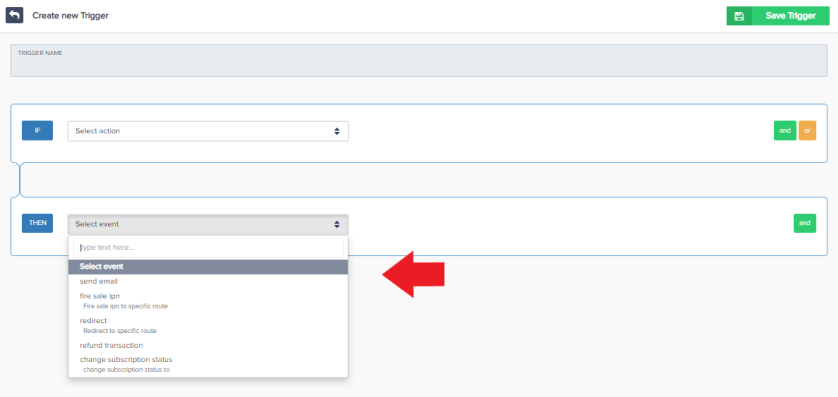
You can choose from the following events:
– send email
– first sale ipn (send first sale IPN to a specific route)
– redirect (redirect IPN to a specific route)
– refund transaction
– change subscription status
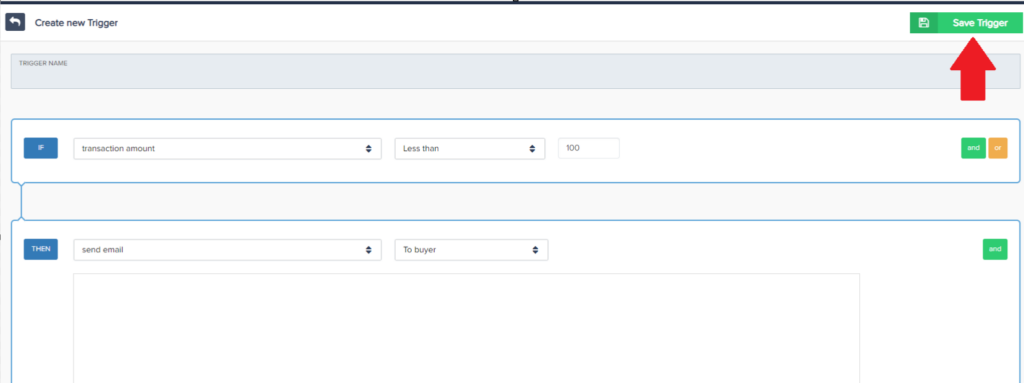
Click on the “Save Trigger” button located in the top-right corner of the page.
Once saved, you’ll see the trigger on this page.

IMPORTANT NOTE
When vendors set up triggers in their systems, they can use the “and” and “or” options to decide how conditions should work together. If vendors choose “and”, all specified conditions must be true at the same time for the trigger to activate.
On the other hand, if they opt for “or,” the trigger will activate as long as any one of the specified conditions is true. This flexibility allows vendors to fine-tune their automated processes.
In your account locate the Tools section, then click on the Triggers option.
You can also access the section by following this link: https://app.paykickstart.com/vendor/configure/triggers
Enter the name of the trigger.
When creating a trigger, the “if” establishes a condition that must be true for the trigger to perform a specific action. This is like a requirement that, when fulfilled, activates the trigger.
Vendors can choose from the following conditions:
– transaction amount
– coupon
– tax
– tax country
– tax number present
– billing country
– shipping country
– bump purchased
– affiliate
– payment method
– quantity
– checkout type
– transaction type
– product
– campaign
– funnel
– phone number present
– custom field
Select which events to trigger when the specified “if” condition is met. The subsequent event will be triggered, initiating the desired action or response.
You can choose from the following events:
– send email
– first sale ipn (send first sale IPN to a specific route)
– redirect (redirect IPN to a specific route)
– refund transaction
– change subscription status
Click on the “Save Trigger” button located in the top-right corner of the page.
Once saved, you’ll see the trigger on this page.