
This article will cover how to integrate MailerLite with your PayKickstart account and specific products to add customers to MailerLite Email Lists based on related action events.
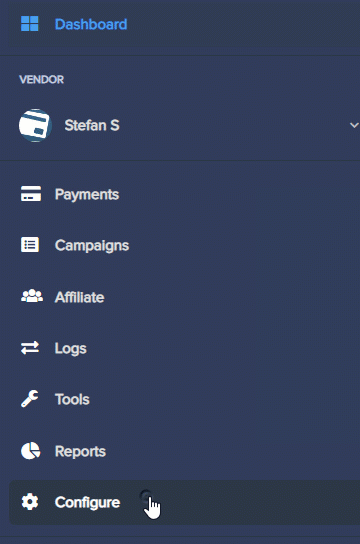
In your Vendor Dashboard, access the Configure ⚙️ menu and select Integrations.
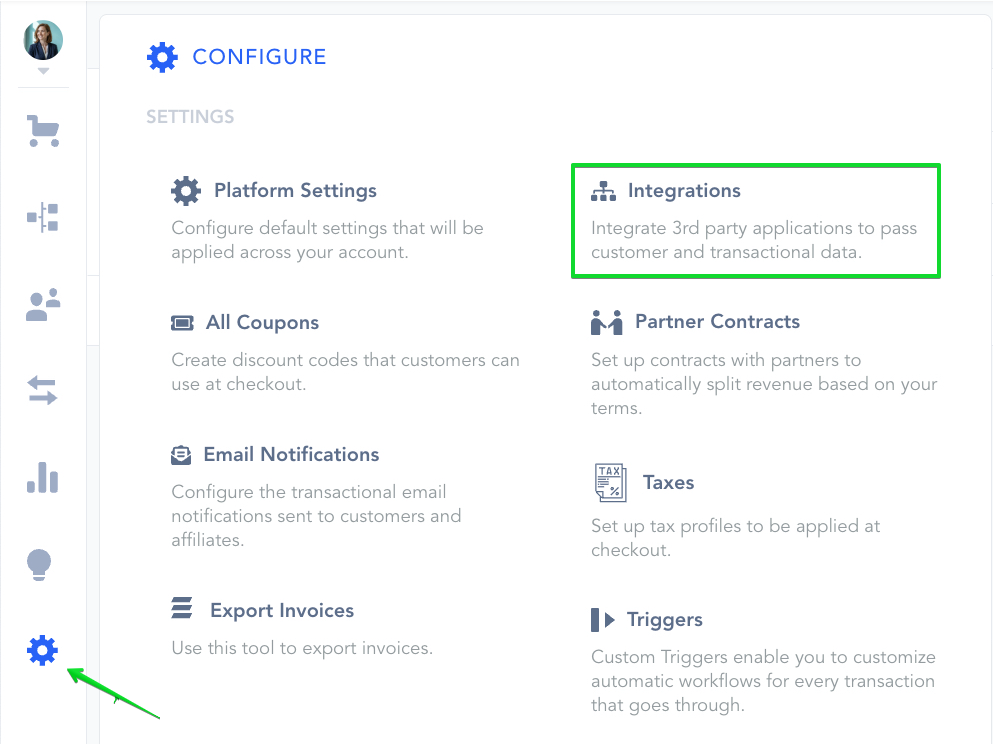
First, you’ll need to integrate MailerLite on the platform level.
Select Auto Responder in the drop-down selection, then search for MailerLite.
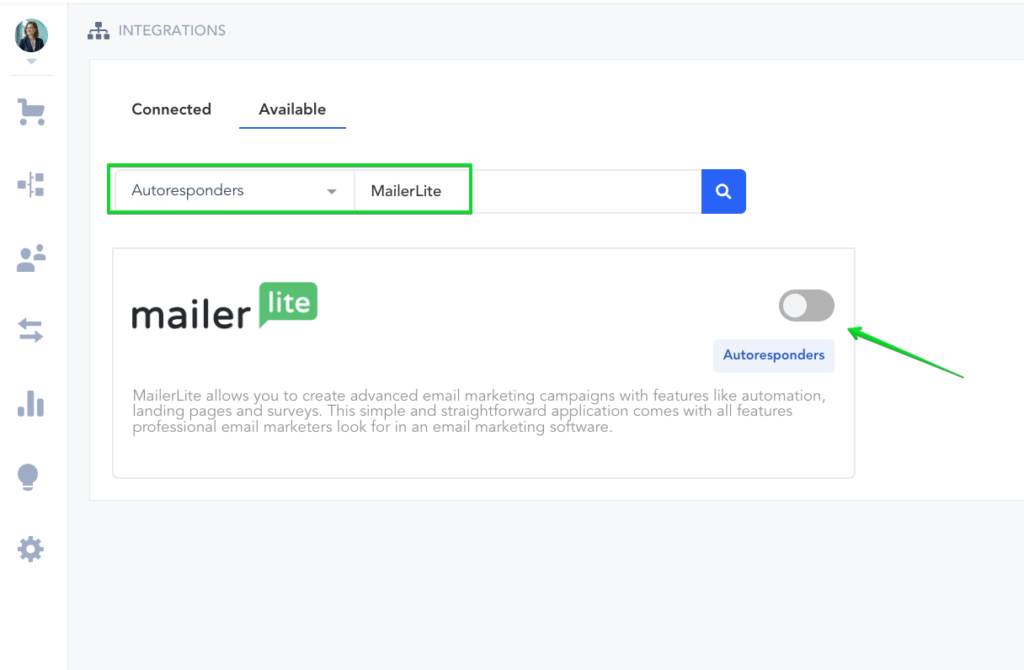
Enter an Account Name (for display purposes) and API Key, and click Connect.
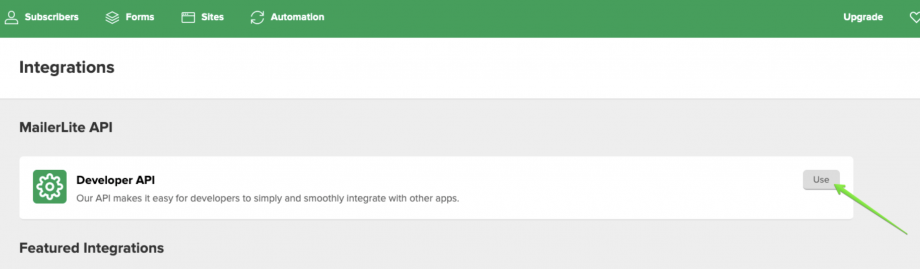
To Find your MailerLite API Key: Go to MailerLite Account → Integration.
Inside the MailerLite Integration section, click on the Use button for the Developer API section.
Then copy your API Key.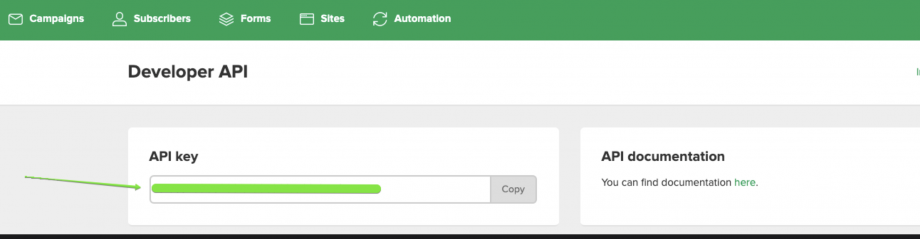
After adding the API Key to the PayKickstart settings, click Connect and PayKickstart will use the API key to create the platform-level integration connection.
Important to Note
You should have at least 1 Group created under your Subscriptions section in your MailerLite account in order to select it as a list in your product’s settings and integrate with MailerLite.
You’ve successfully connected MailerLite at the platform level.
Now, you can link MailerLite to individual products as well.
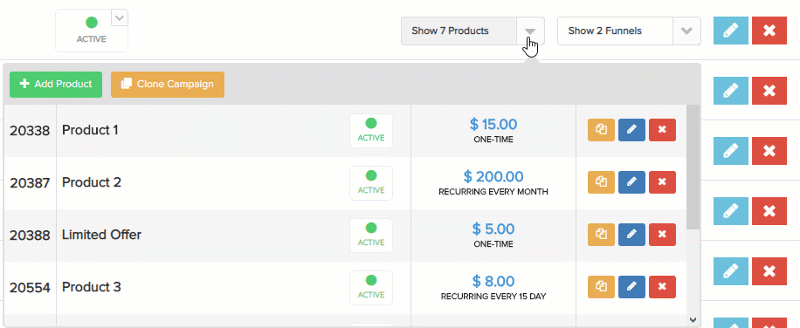
Go to Campaigns on the left sidebar of your dashboard. Here, you’ll see your campaigns listed.
Choose the Campaign and Product that you want to integrate MailerLite with and select Edit Product Settings.
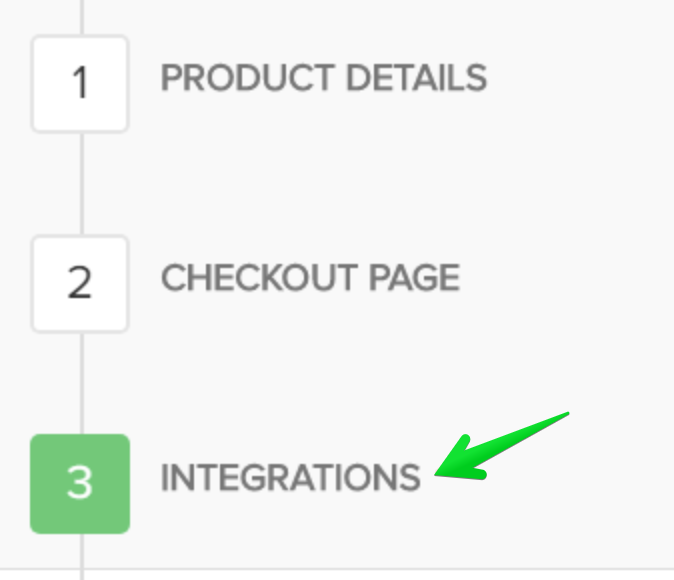
In the Product Settings, select Step 3 (Integrations) to open up your integrations information.
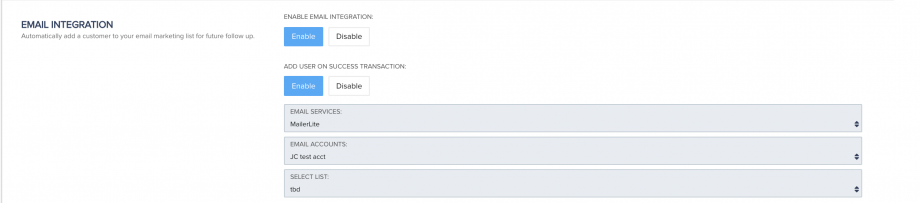
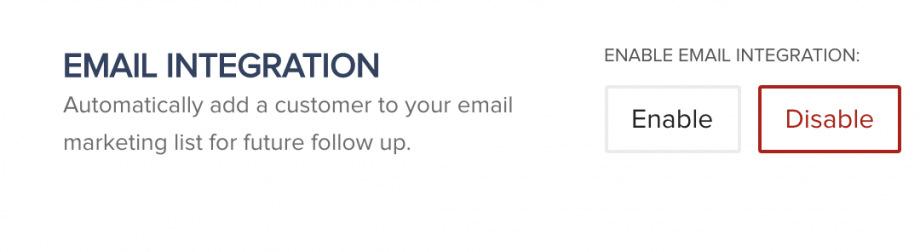
In the Product settings (Integration section), please enable the Email Integration field.

If you’ve correctly integrated with the main area (steps 1-6 in this tutorial), then you can now select MailerLite in the Email Integrations.
- Choose MailerLite as your email service.
- Select your account under Accounts
- Select the list you want for this product under Lists. Lists are optional and not required to add the customer to the MailerLite account.
- MailerLite does not currently allow for tagging options.
Important to Note
– You may have a list for every one of your products, so you’d want to choose the list associated with the product in this particular campaign.
– Vendors can pass custom checkout fields they have added to their checkout pages, to their email auto-responder (as long as the email service supports it).
Now, when a customer purchases your product, they’ll automatically be added to the related MailerLite account and the list you’ve chosen.
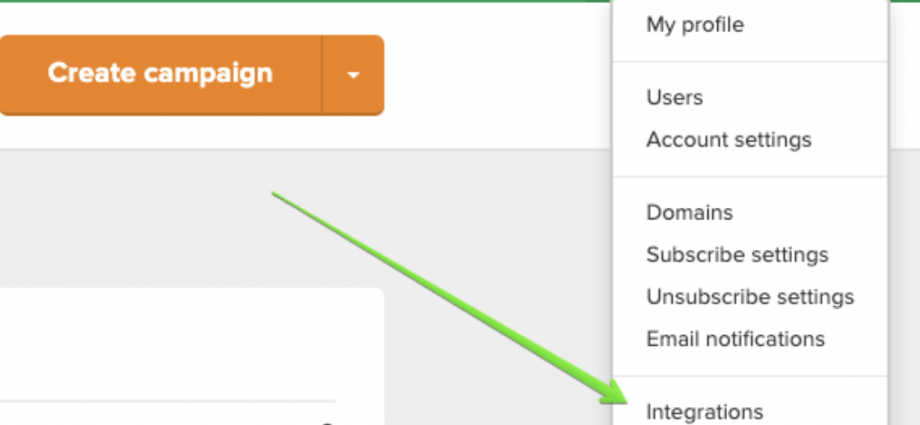
In your Vendor Dashboard, access the Configure menu and select Integrations.
First, you’ll need to integrate MailerLite on the platform level. To do so, click on Auto Responder at the top of this page, then click Add an Email Integration.
Choose MailerLite from the drop-down menu for Email Services Available.
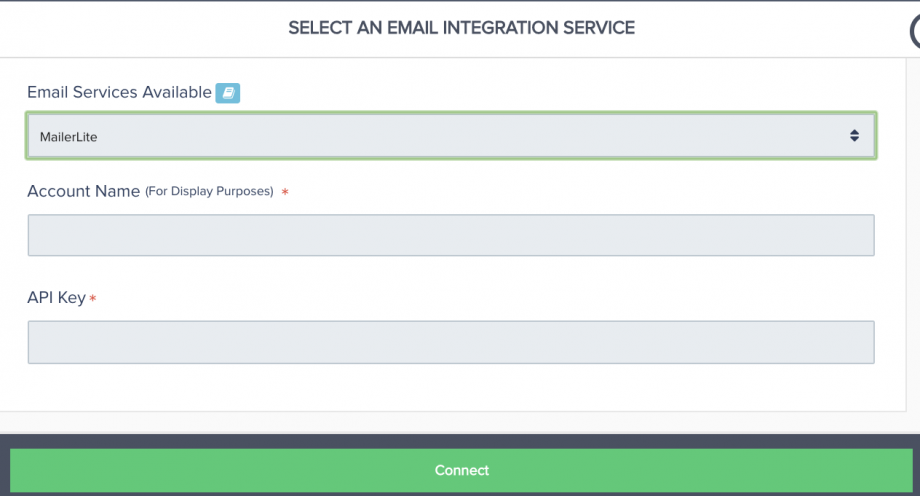
Enter an account name(for your display purposes) and API Key, and click Connect.
To Find your MailerLite API Key: Go to MailerLite Account → Integration.
Inside the MailerLite Integration section, click on the Use button for the Developer API section.
Then copy your API Key.
After adding the API Key to the PayKickstart settings, click Connect, and PayKickstart will use the API key to create the platform-level integration connection.
Important to Note
You should have at least 1 Group created under your Subscriptions section in your MailerLite account in order to select it as a list in your product’s settings and integrate with MailerLite.
Go to Campaigns on the left sidebar of your dashboard. Here, you’ll see your campaigns listed.
Choose the campaign and Product that you want to integrate MailerLite with and select Edit Product Settings.
In the Product Settings, select Step 3 (Integrations) to open up your integrations information.
In the Product settings (Integration section), please enable the Email Integration field.
If you’ve correctly integrated with the main area (steps 1-6 in this tutorial), then you can now select MailerLite in the Email Integrations.
- Choose MailerLite as your email service.
- Select your account under Accounts
- Select the list you want for this product under Lists. Lists are optional and not required to add the customer to the MailerLite account.
- MailerLite does not currently allow for tagging options.
Important to Note
– You may have a list for every one of your products, so you’d want to choose the list associated with the product in this particular campaign.
– Vendors can pass custom checkout fields they have added to their checkout pages, to their email auto-responder (as long as the email service supports it).
Now, when a customer purchases your product, they’ll automatically be added to the related MailerLite account and the list you’ve chosen.