
For Shipping Fulfillment
With our native Shopify integration, vendors working with physical products that are shipped can now integrate Shopify to automatically send the shipping fulfillment order to Shopify.
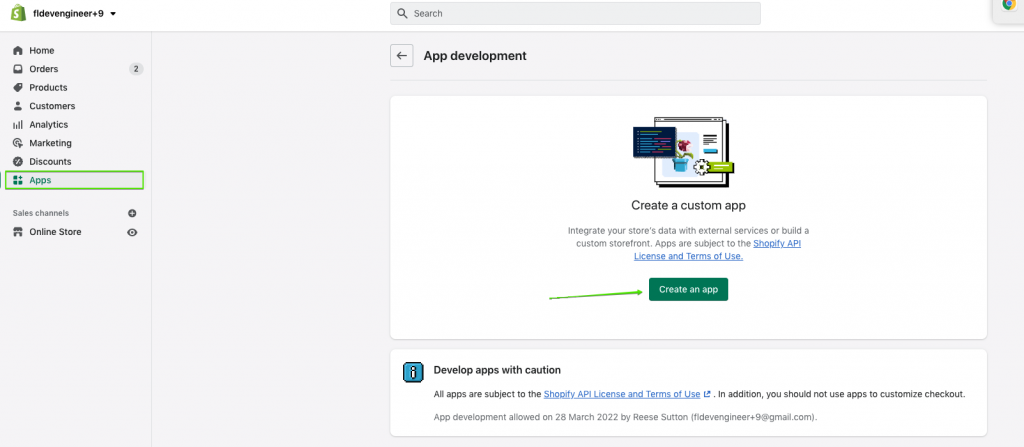
1. Access your Shopify account.
2. In the selection menu, choose Apps and then the option to Create an app:
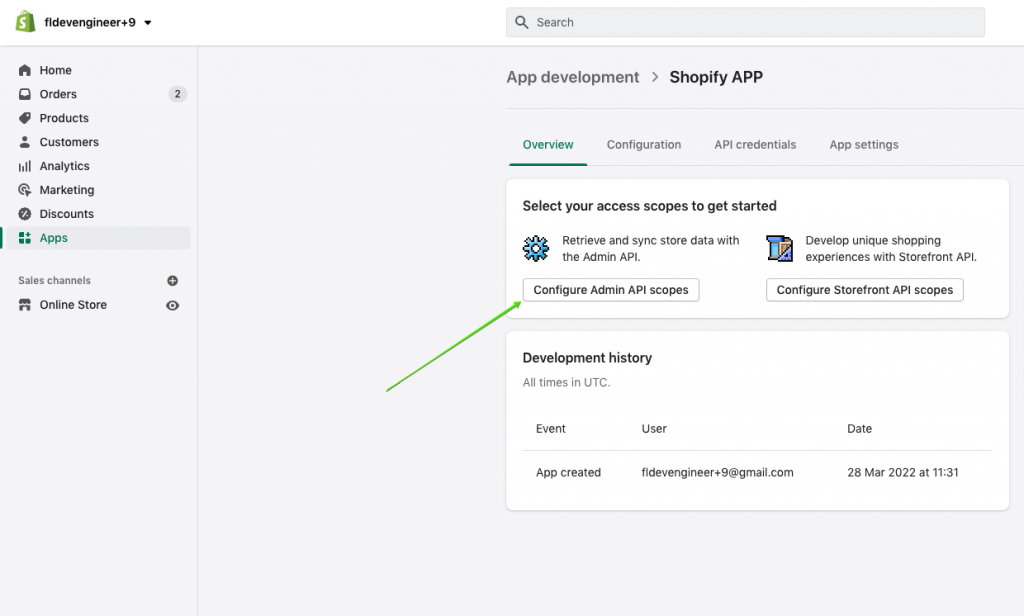
3. Choose the option to Configure Admin API Scopes
4. Then, allow Read and Write access for the following scopes:
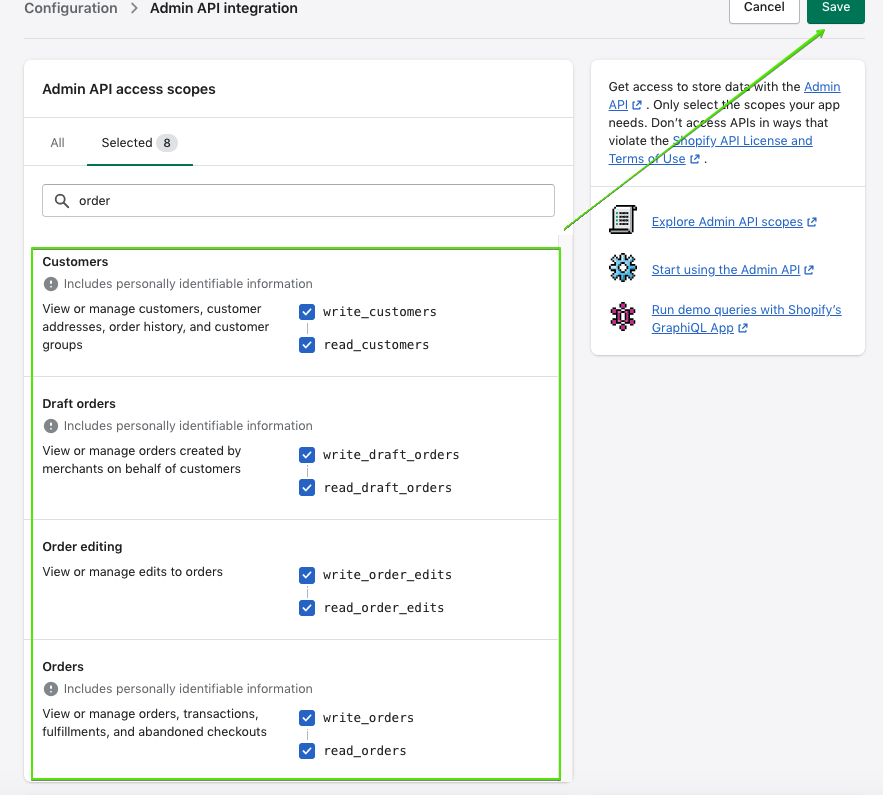
5. After clicking on Save, the next step is to install the app:

6. Copy your Access Token, as you will need to enter it into the Integrations section in PayKickstart
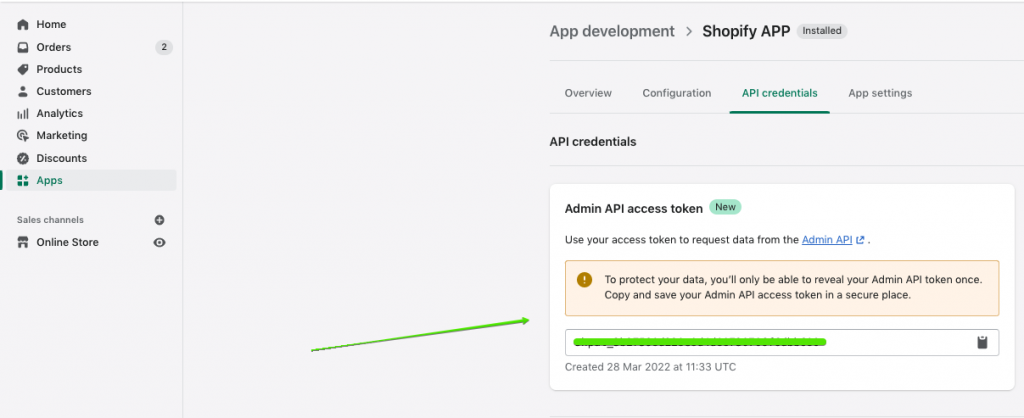
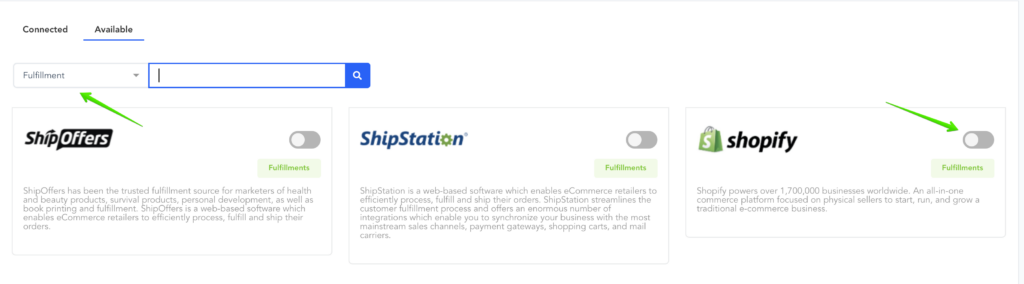
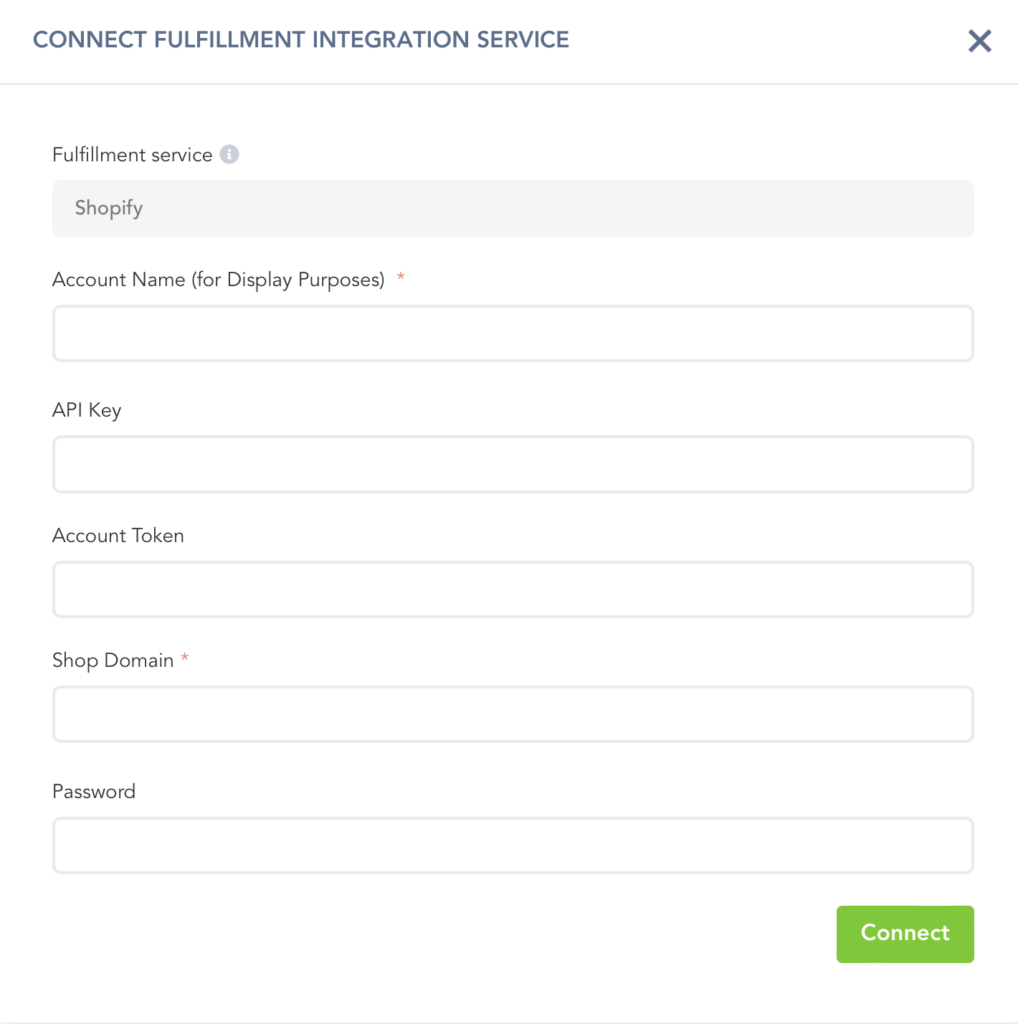
7. Paste the Access Token in the Configure ⚙️ > Integrations, under the Fulfillment section for your Shopify integration, as well as your Shop Domain, and click on Save to integrate with Shopify.
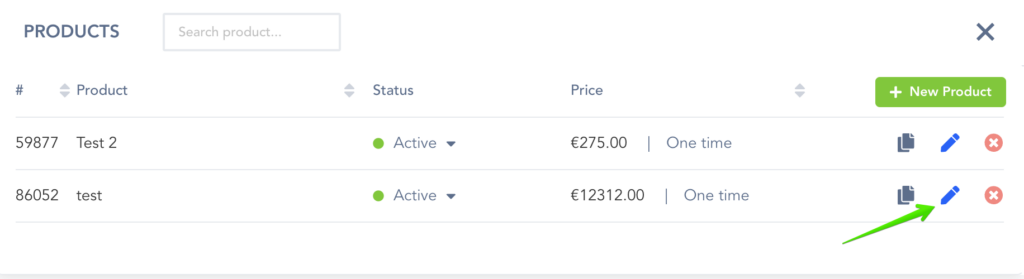
Go to the Edit Product page (found on the Campaigns page > Edit Product icon
Once you are in the Product settings, click on the IPN Integrations section.
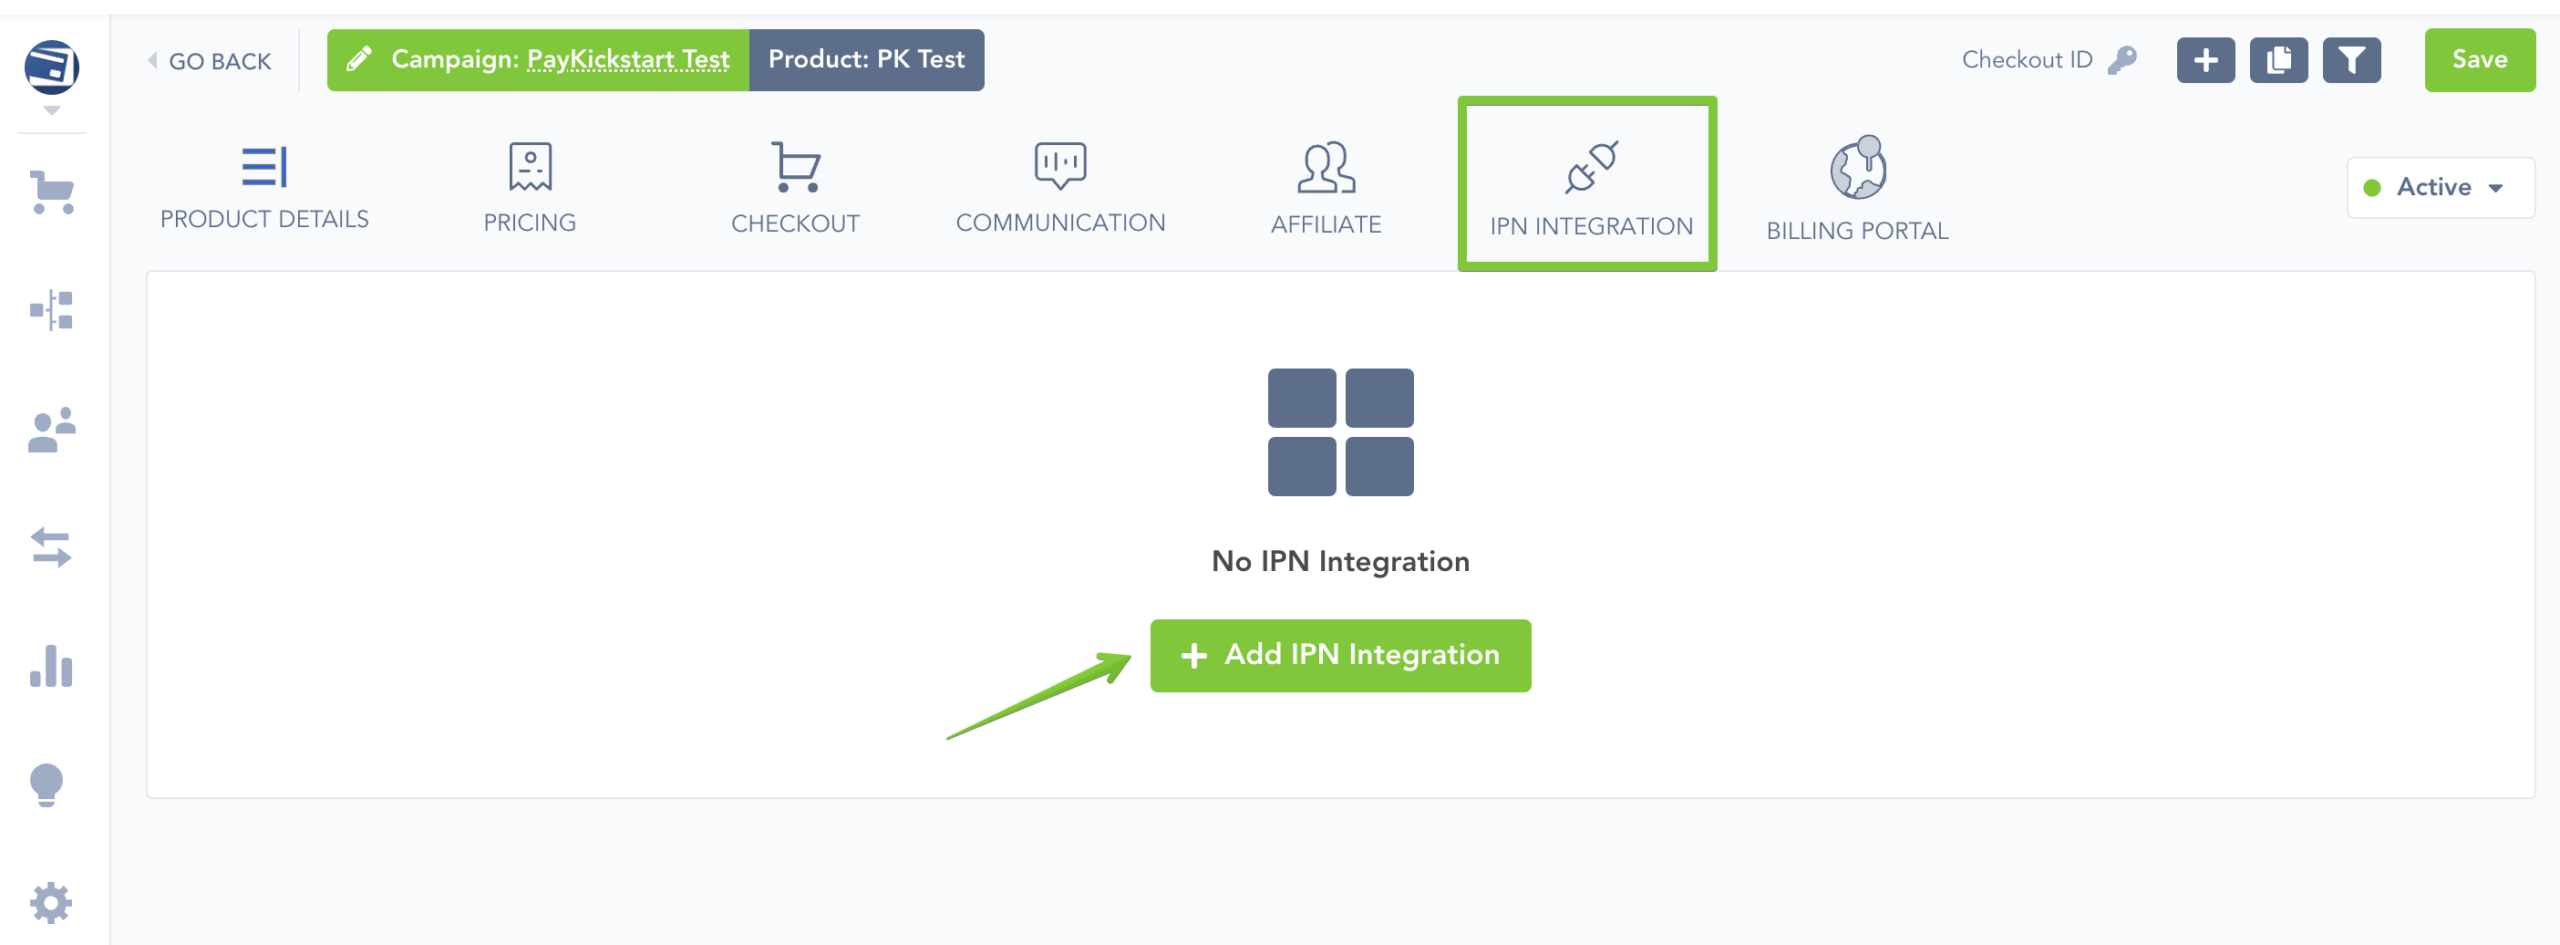
Then, enable Fulfillment Integration and select the Shopify Integration you just added.

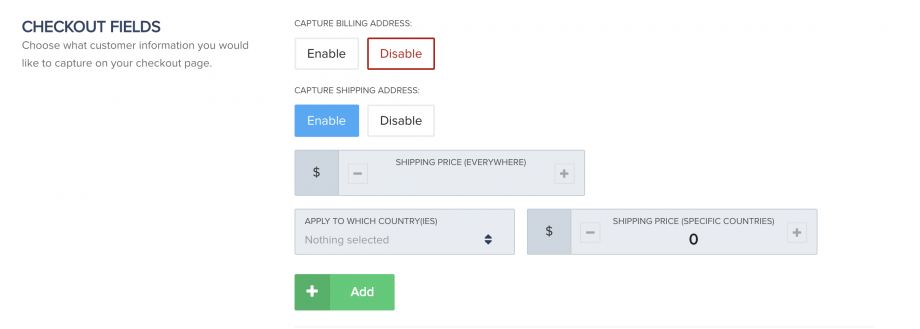
On that Edit Product page, go to (Section 2) Checkout Page and enable Capture Shipping Address in the Checkout Fields area, then set the shipping details you would like.
The Shipping Address must be enabled for the product in order to send it to Shopify.
Important to Note
This integration method is now outdated, please use the Custom Apps method above if you are setting up a new integration.
Integrations with Shopify that have used this method will continue to function ordinarily.
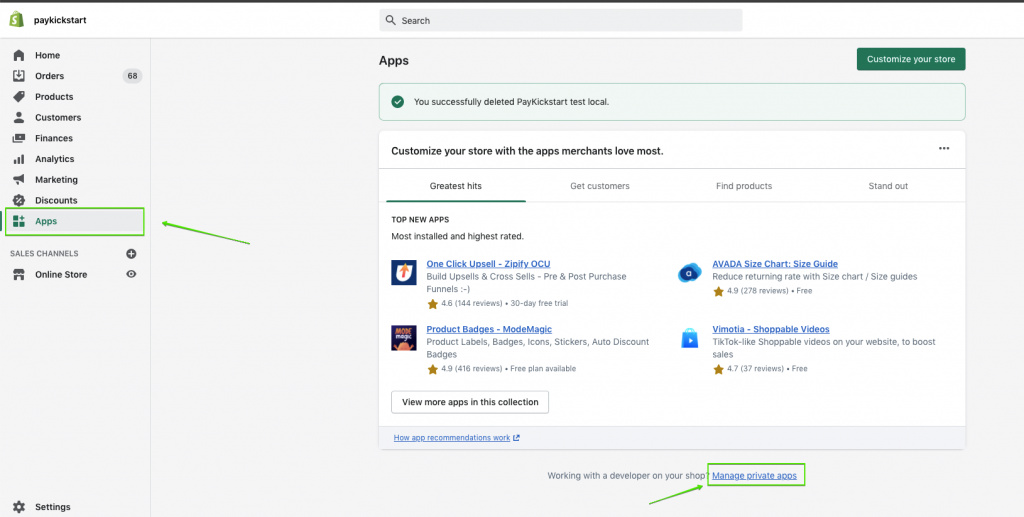
1. Go to your Shopify Shop (example: http://paykickstart.myshopify.com/)
2. Select Apps > Manage Private Apps.
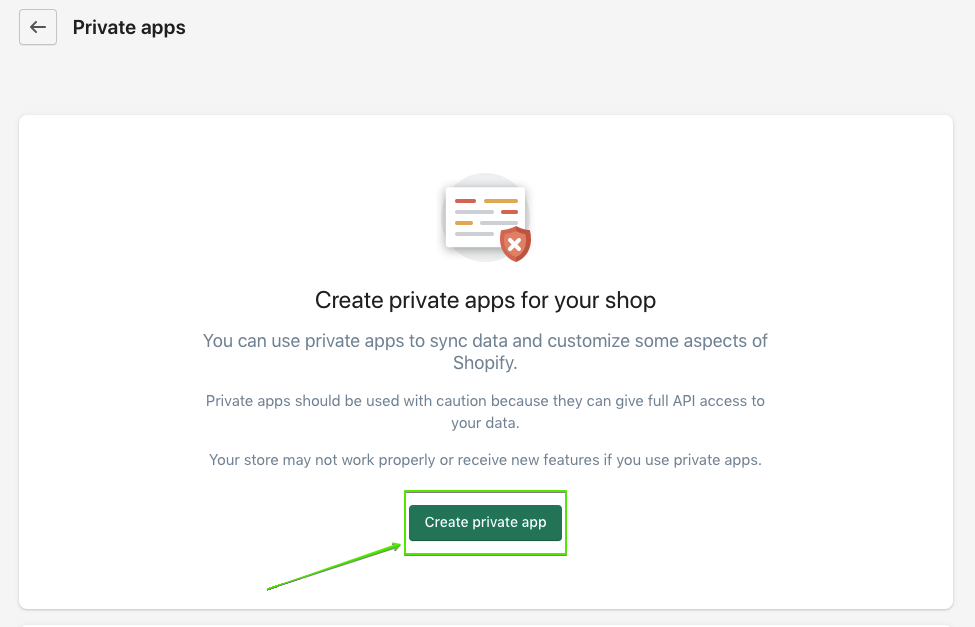
3. Then, choose the Create Private App option.
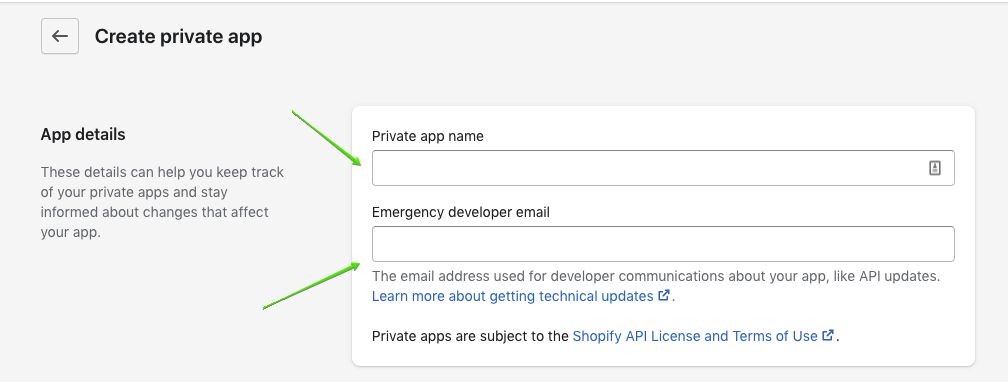
4. Add the Private App Name and the Support (Developer Emergency) related email
PayKickstart will send the following data points to Shopify:
- Product name
- Product ID (SKU is equal to the product ID in PayKickstart)
- Shipping details
- Billing details
- Customer name
- Customer email
- Transaction amount
- Tax amount
- Discount amount
- Quantity
- Refunded amount
- Checkout custom fields data
PayKickstart will send related shipping emails to your customers based on the status of their order with you.
If you would like to disable or edit these related shipping emails, please review our article on controlling and editing email notifications.
https://support.paykickstart.com/knowledge-base/editing-transactional-email-templates/
That’s it! You are ready to go.
To learn more about managing order fulfillment, please see: https://support.paykickstart.com/knowledge-base/how-to-manage-physical-products-and-fulfillment/
1. Access your Shopify account.
2. In the selection menu, choose Apps and then the option to Create an app:
3. Choose the option to Configure Admin API Scopes
4. Then, allow Read and Write access for the following scopes:
5. After clicking on Save, the next step is to install the app:
6. Copy your Access Token, as you will need to enter it into the Integrations section in PayKickstart
7. Paste the Access Token in the Configure ⚙️ > Integrations, under the Fulfillment section for your Shopify integration, as well as your Shop Domain, and click on Save to integrate with Shopify.
Go to the Edit Product page (found on the Campaigns page > Edit Product icon
Once you are in the Product settings, click on the IPN Integrations section.
Then, enable Fulfillment Integration and select the Shopify Integration you just added.
On that Edit Product page, go to (Section 2) Checkout Page and enable Capture Shipping Address in the Checkout Fields area, then set the shipping details you would like.
The Shipping Address must be enabled for the product in order to send it to Shopify.