
In this tutorial, learn how to integrate with Ontraport autoresponder service using PayKickstart’s API integration.
Step 1: Log into your PayKickstart App
Step 2: In your Vendor Dashboard, click on Configure and select ‘Integrations’.
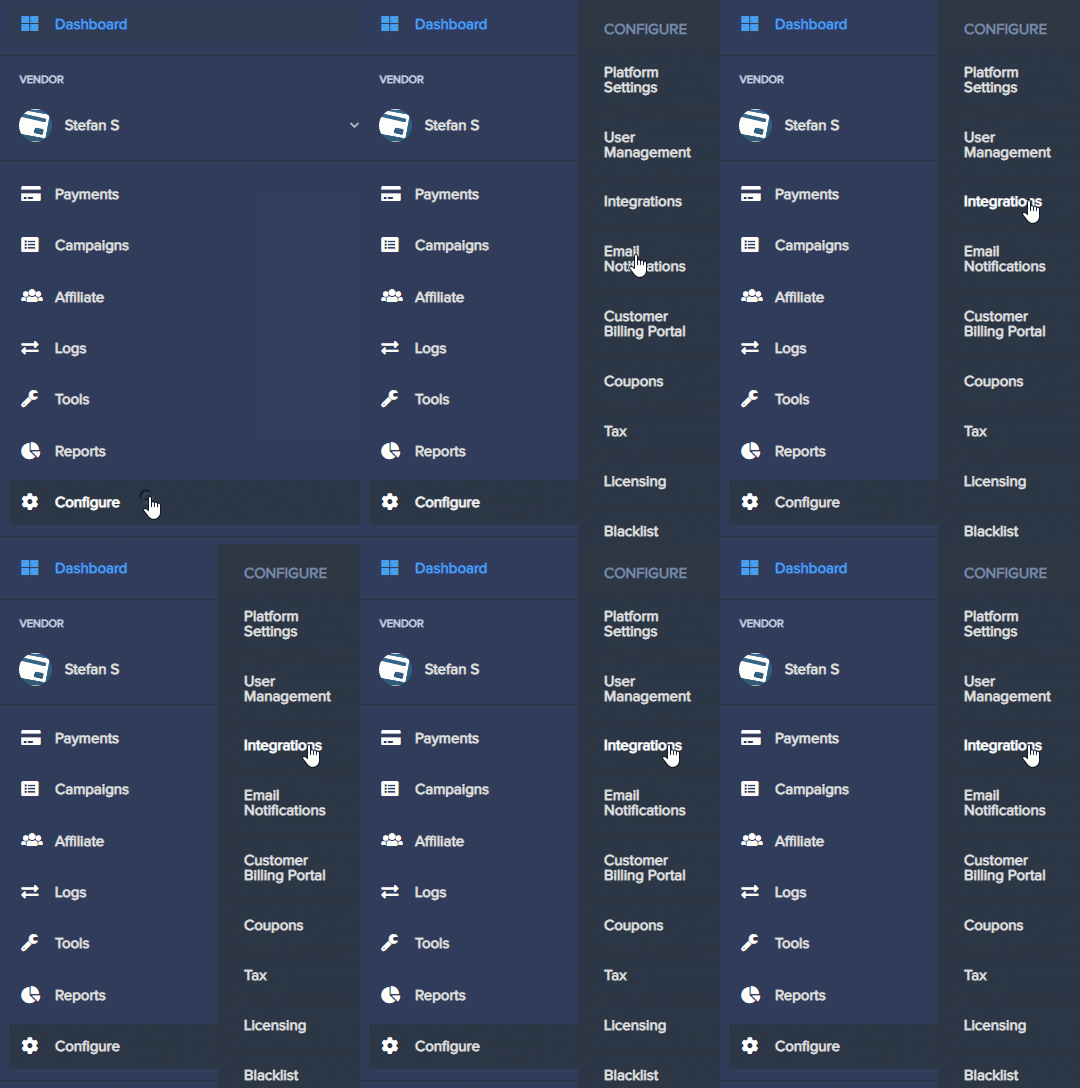
First, you’ll need to integrate on your main integration page.
Step 3: First, you’ll need to integrate on your main integration page. To do so, click on ‘Auto Responder’ at the top of this page, then, Click ‘Add an Email Integration’.
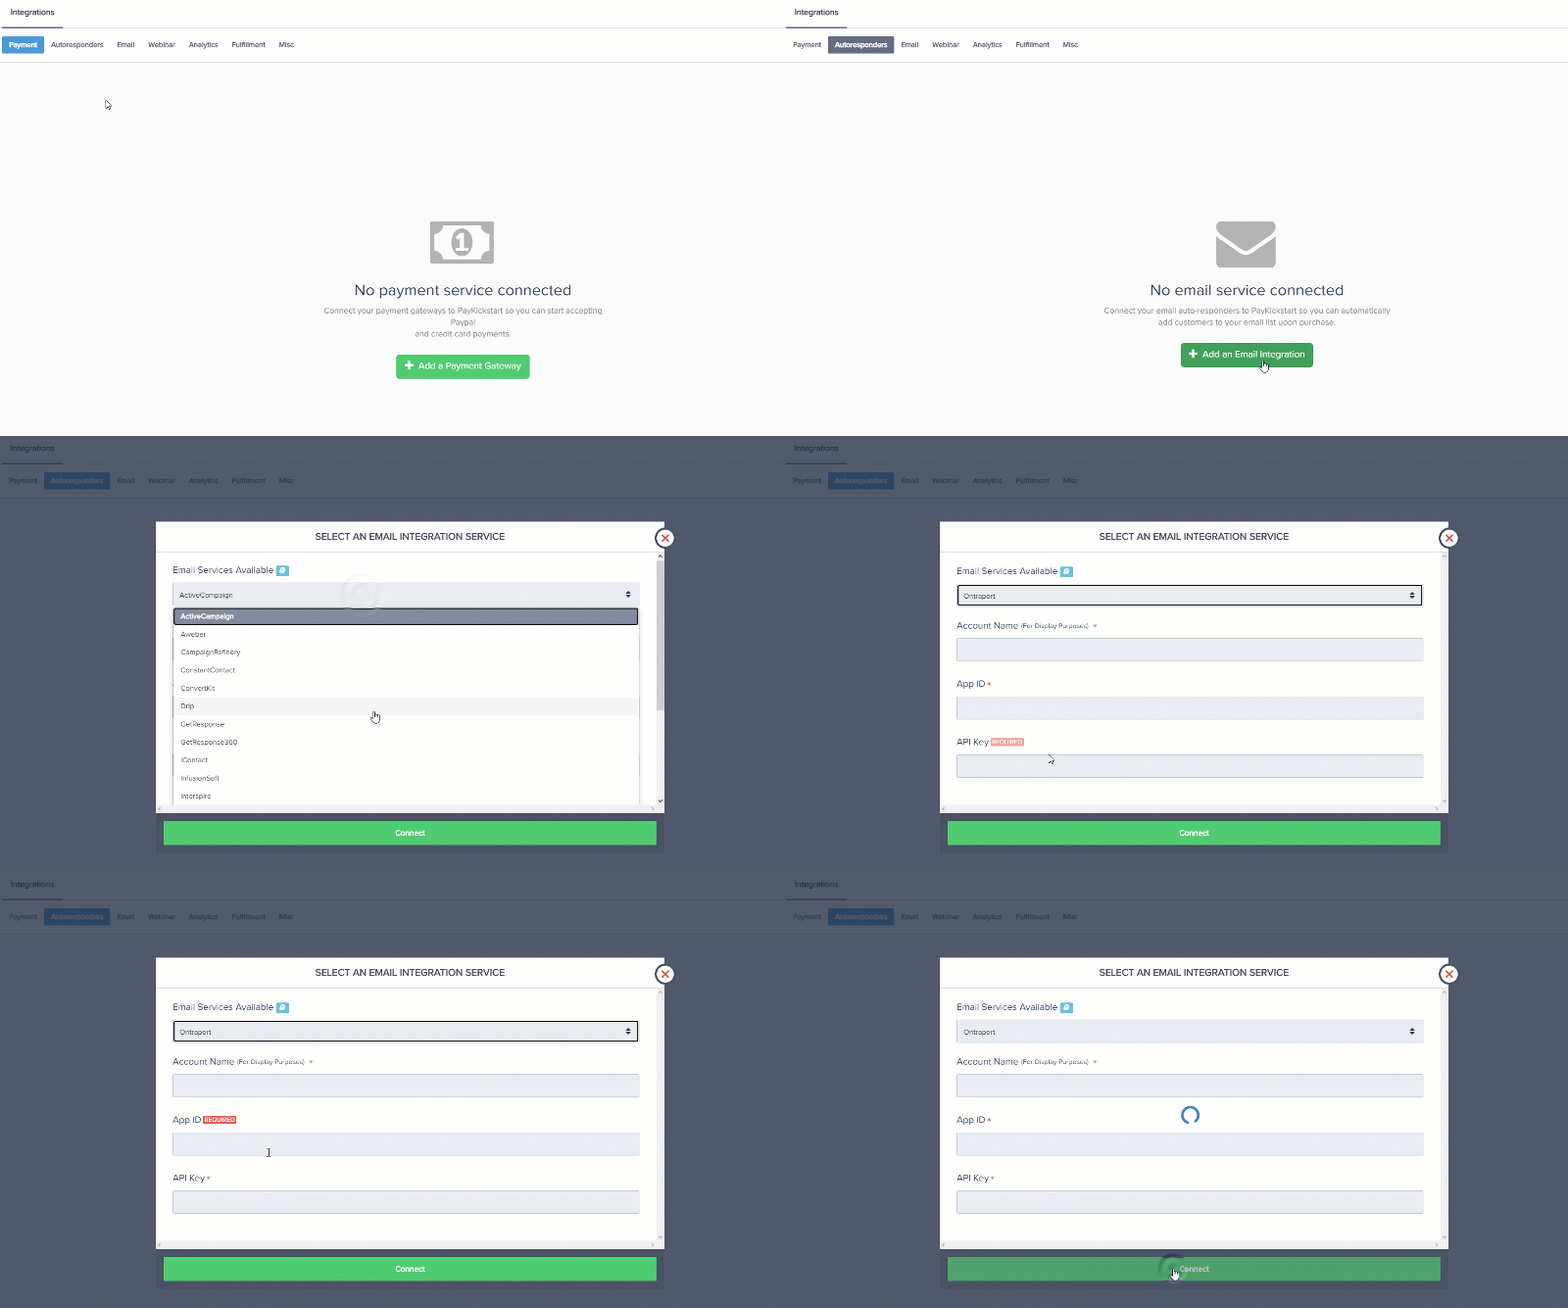
Step 4: Choose ‘Ontraport’ on the dropdown menu for ‘Email Services Available’.
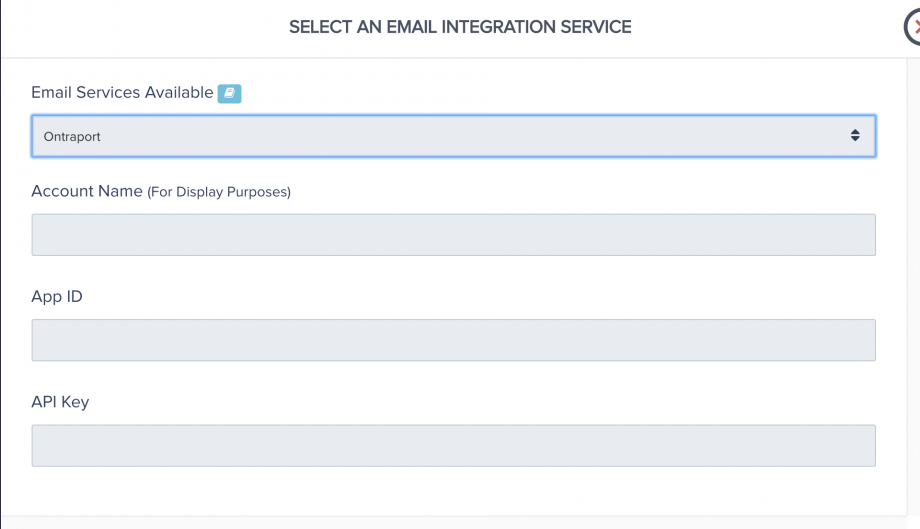
Step 5: Enter your Ontraport account name, APP ID, and API Key and click ‘Connect’.
To find the APP ID and API key, follow these steps:
- Use of the Forms API requires an API App ID and API Key. These can be generated within your ONTRAPORT account by going to your Account drop-down menu > Administration > Integrations > ONTRAPORT API Instructions and Key Manager.
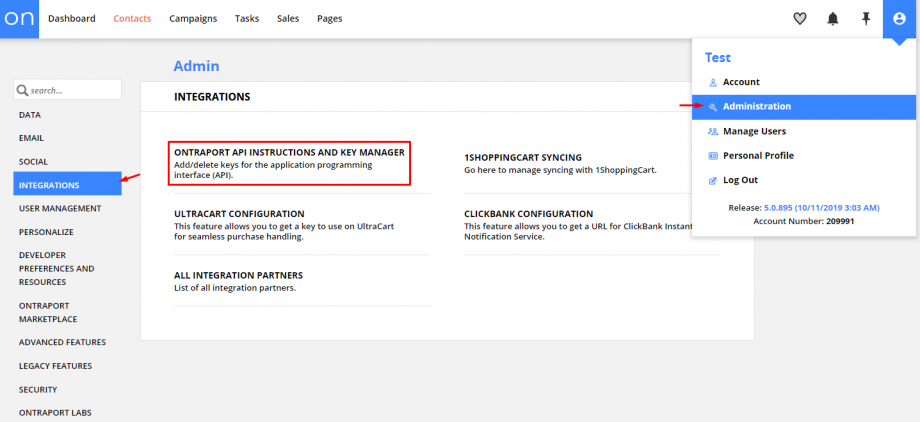
- Also, be sure to select the appropriate permissions for the key you are about to generate (for example, if a key does not have “add” permissions selected, it will not be able to be used to add type requests.)
Note that if you have not done so already, you will need to submit a request for access to the API. Once access is granted, you can generate as many API App ID/API Key combinations as you want. For more information on how to generate a key or how to request access, please view their Knowledgebase article.
Step 6:
Once you’ve connected, you’ll need to go to ‘Campaigns’ on the left sidebar of your dashboard. Here, you’ll see your campaigns listed.
Choose the PRODUCT that you want to integrate OntraPort with and select “edit product settings“.
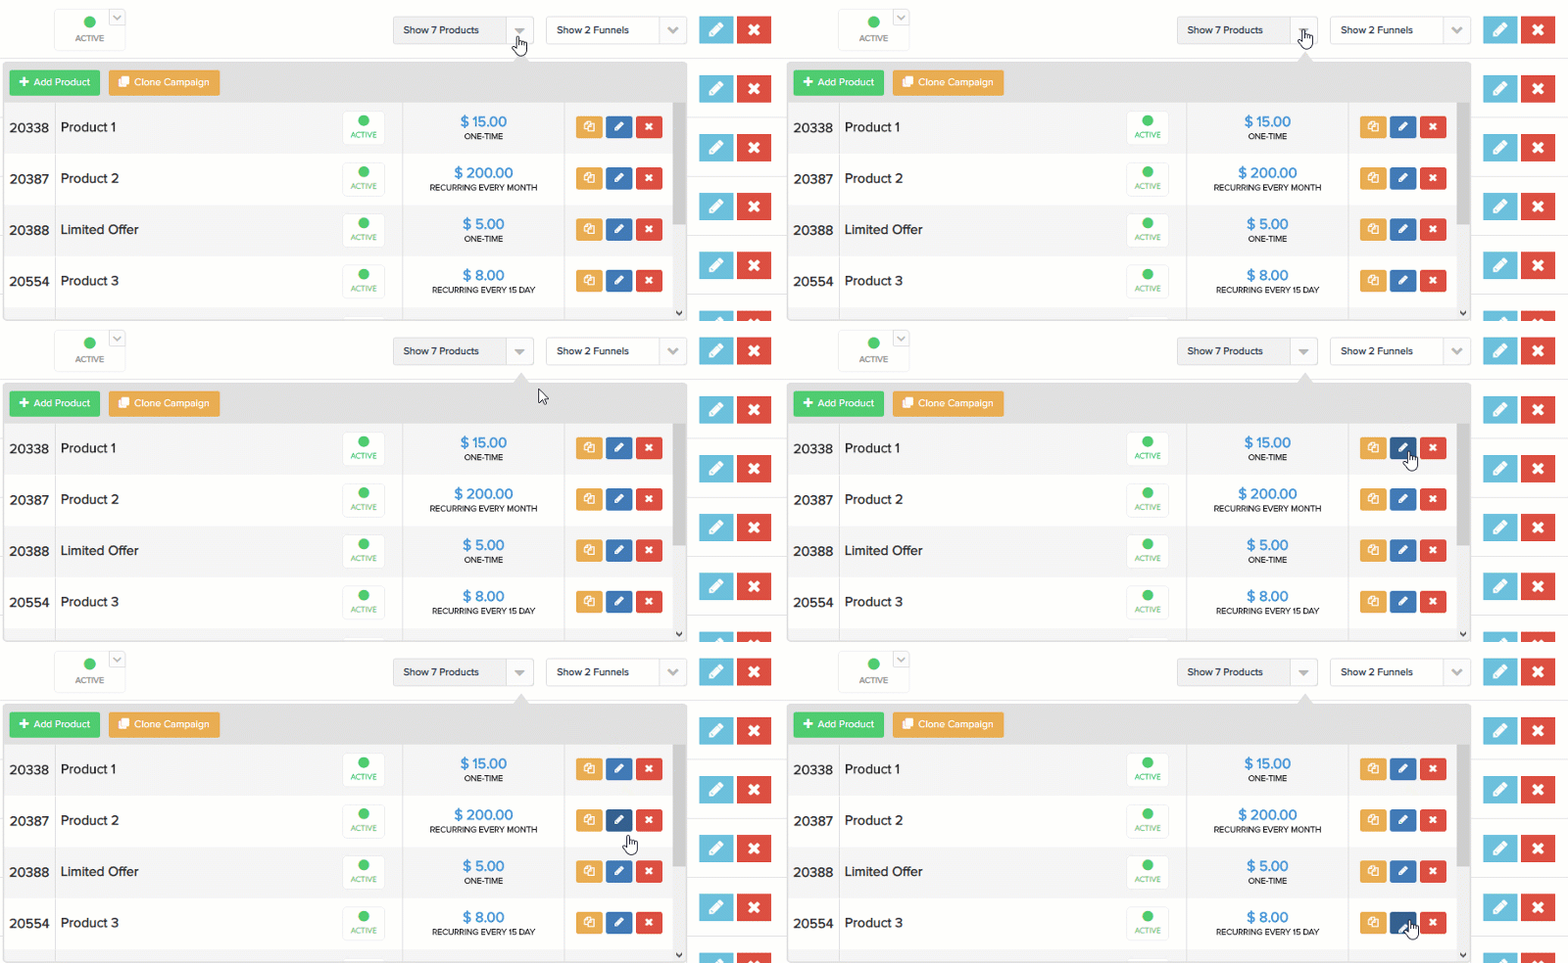
Note: if you don’t have a product added to PayKickstart yet, follow these steps.
Step 7: On the Edit Product page, scroll down to locate “Integrations“.
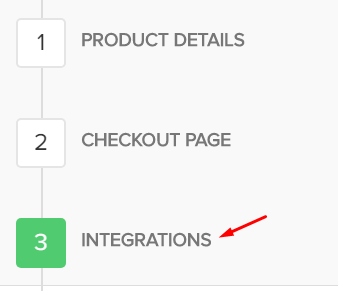
Step 8: In the product settings(integration section), please enable the email integration field and the action triggers you want to use with the product.

Step 9: If you’ve correctly integrated with the main area (steps 1-6 in this tutorial), then you can now select ‘OntraPort’ in the Email Integrations.
- Choose ‘OntraPort’ as your email service.
- Select your account under ‘Accounts’
- Select the list you want for this campaign under ‘lists’.
- Select ‘tags’ you want to add based on the customer action the integration is set up to trigger for.
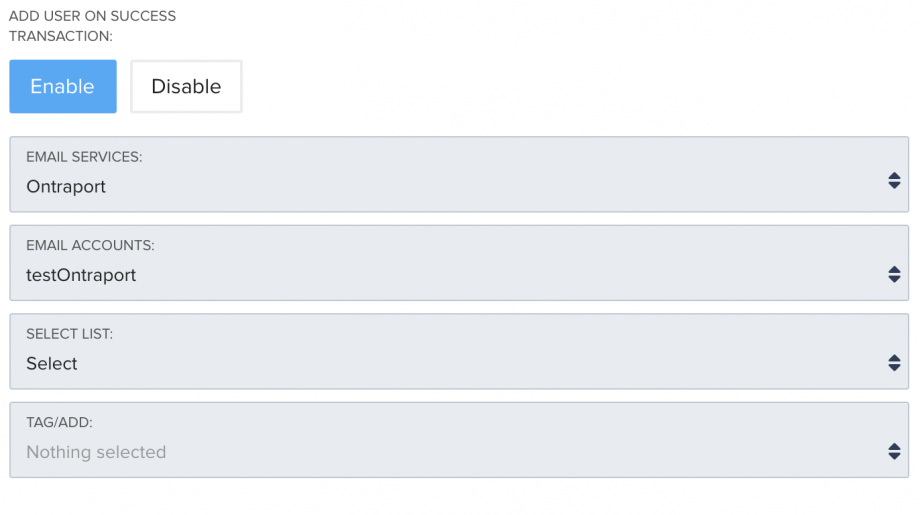
NOTE: You may have a list for every one of your products, so you’d want to choose the list associated with the product in this particular campaign.
Now, when a customer purchases that product, they will automatically be added to the Ontraport list that you chose.
