You can add custom fields to your checkouts by going to Campaigns >> Edit Product Settings.
On Step 2 (Checkout Settings), you will see “Custom Fields”.
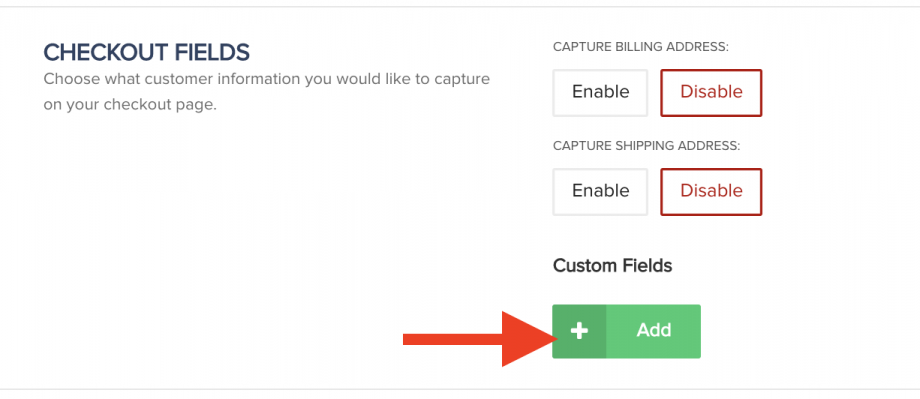
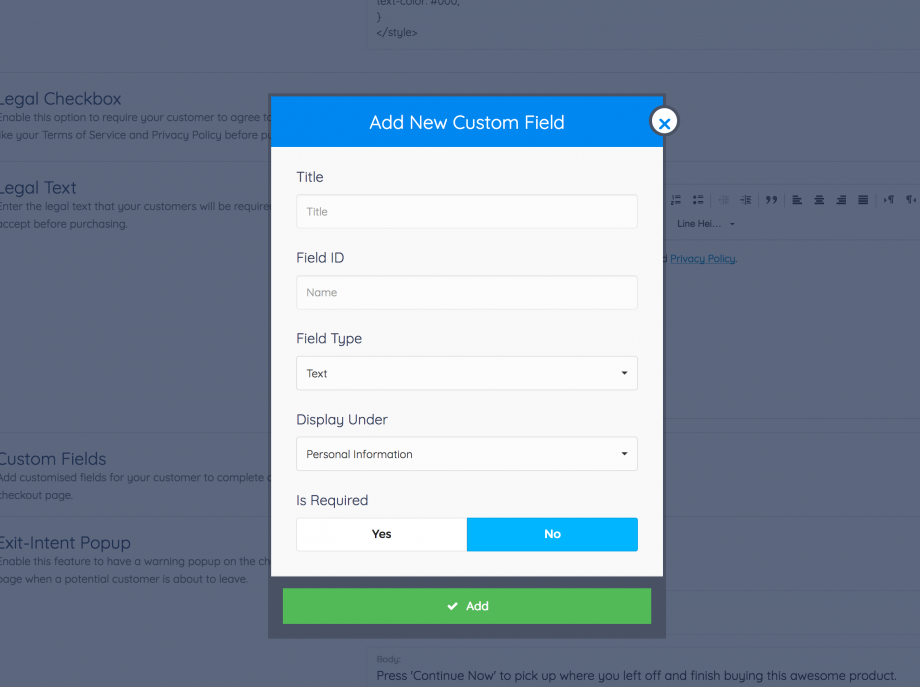
Click on “Add” then a modal will popup. You need to specify what the name/title of the field will be and display on the checkout page.
Then select what type of field it is, where you want the field to display on the checkout page and if it should be required. After you have added it, it will show on the checkout page.
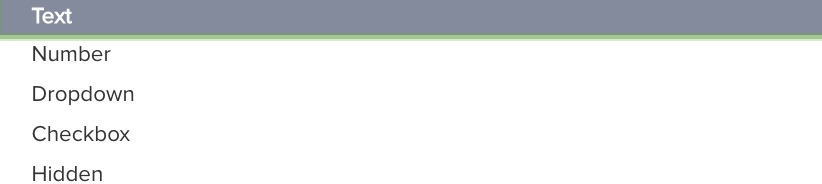
Current Custom Field Types:
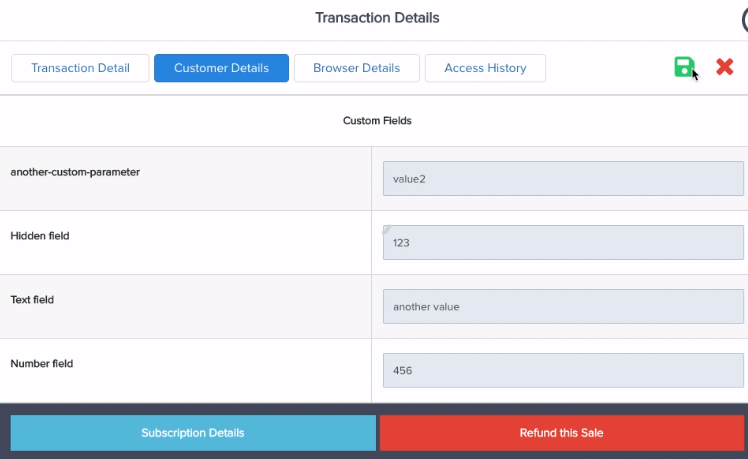
Once a customer has completed the checkout form and made the purchase, you can view custom field details by viewing The transaction details and selecting ‘Customer Details’ section.

In case you need to make any changes to the custom data the customer entered at checkout, click on the edit button in the Customer Details tab.
![]()
Enter the needed changes and click on the Save icon.