Vendors have the ability to connect Facebook Purchase conversion pixels to our Facebook Conversion API integration to send related purchase data to Facebook pixel reporting once the customer makes a purchase.
Follow the instructions below to connect your FB ad/pixel account and trigger data events to send when a customer makes a transaction via a checkout.
To track visits to the checkout BEFORE purchase, add your FB tracking pixel script to the product CSS field.
PART 1: Platform integration
STEP 1:
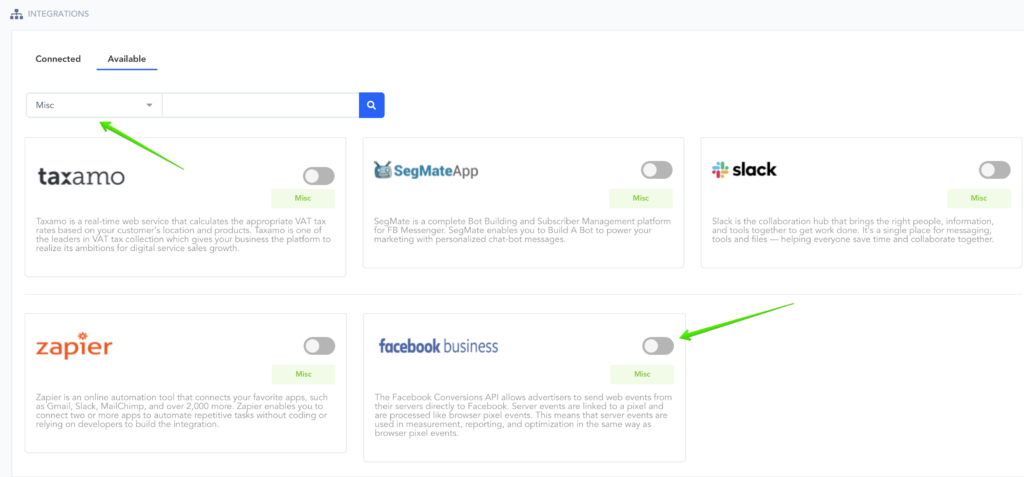
In your vendor account go to CONFIGURE > INTEGRATIONS.
Once in the integration section click “MISC” section, then click “Facebook Business“
STEP 2:
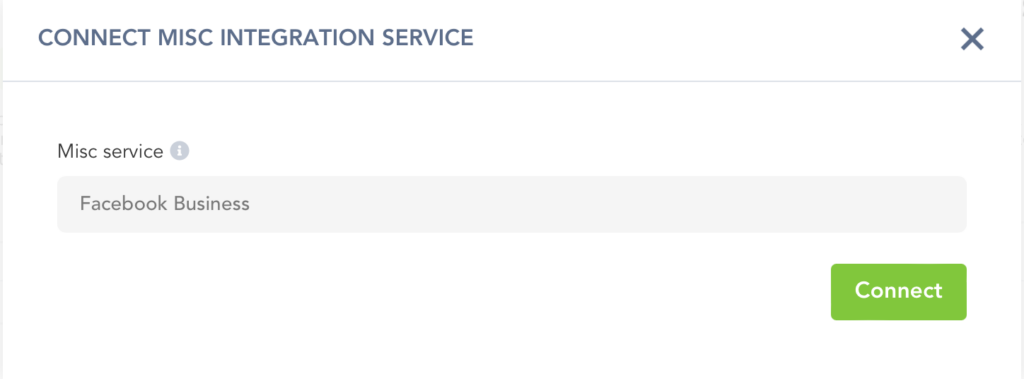
Select Facebook Marketing and click “CONNECT”
IMPORTANT: Log out of Facebook on your browser first, or ensure you are logged to the specific FB account you are wanting to connect before clicking connect.
STEP 3:
You will be taken to Facebook to connect to your FB account. Click to continue to finish the connection.
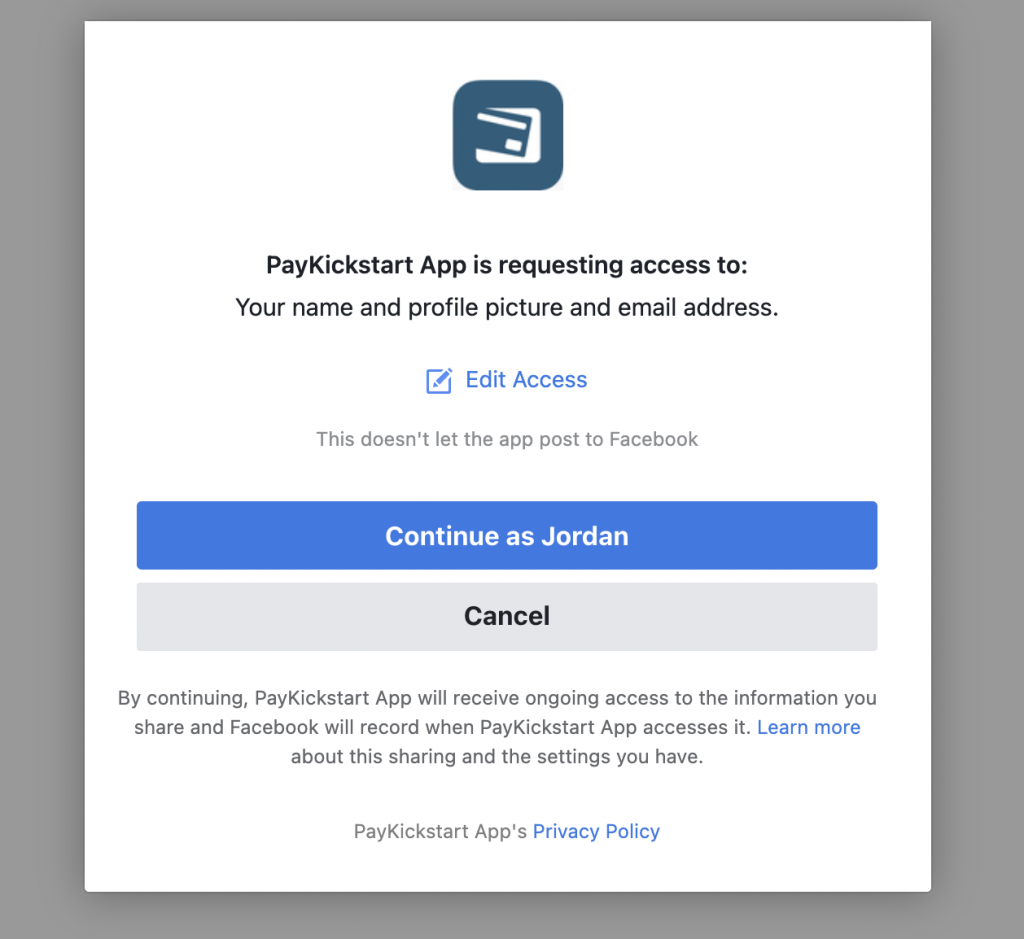
After you finish connecting to your FB account, you will be taken back to the PK integration section and the FB account connection will be saved.

You are now ready to connect on the PRODUCT level. Please see Part 2:
PART 2: Product Integration
Once you connect at the platform level, you can now connect FB conversion SPI to trigger for the specific product(s).
STEP 1:
Go to ‘Campaigns’ on the left sidebar of your dashboard. Here, you’ll see your campaigns listed. Choose the PRODUCT that you want to integrate the FB conversion pixel with and select “edit product settings“.

STEP 2:
In the Product settings, select Step 3 (Integrations) to open up your integrations information.
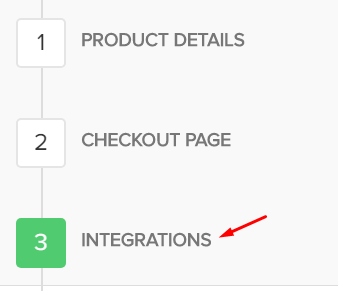
Locate the FB conversion feature and choose Enable

STEP 3:

Facebook Account: The FB account you want to connect to the product.
Facebook Ad Account: The Ad account connected to your FB account you want to use.
Facebook Pixel: The FB pixel from the connected Ad account
Access Token: The Conversion API token from your FB Ad account.
To find Access Token go to the Facebook Ad account event manager
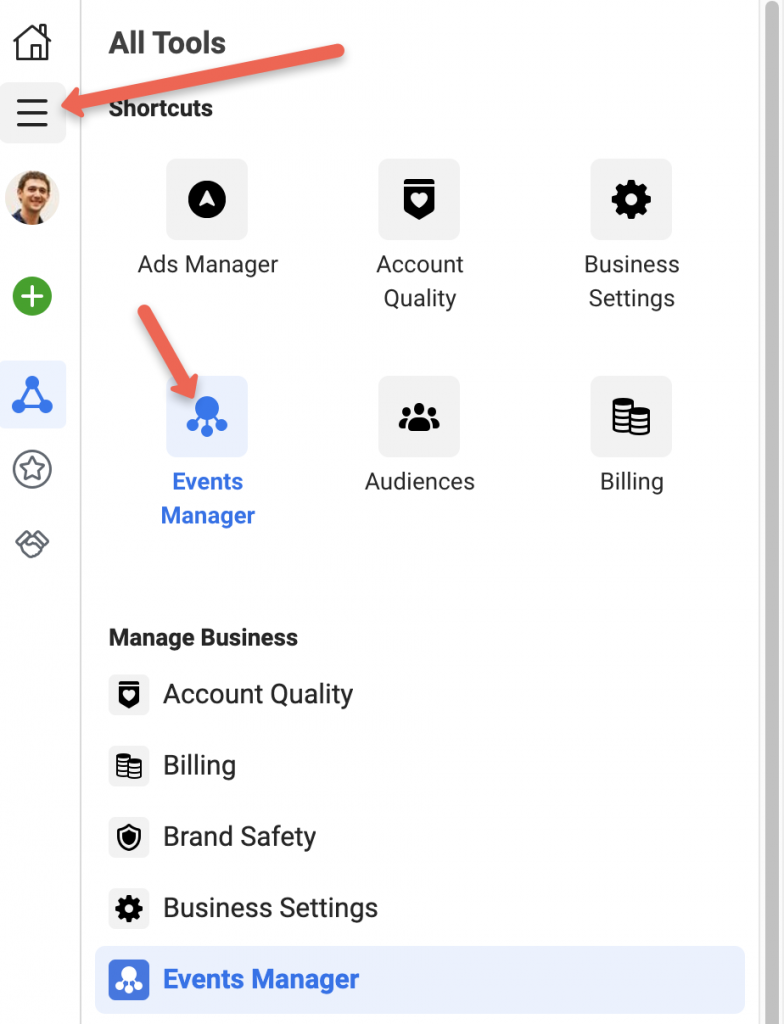
Locate the specific ad account, go to settings and either create a new or copy an existing access token.
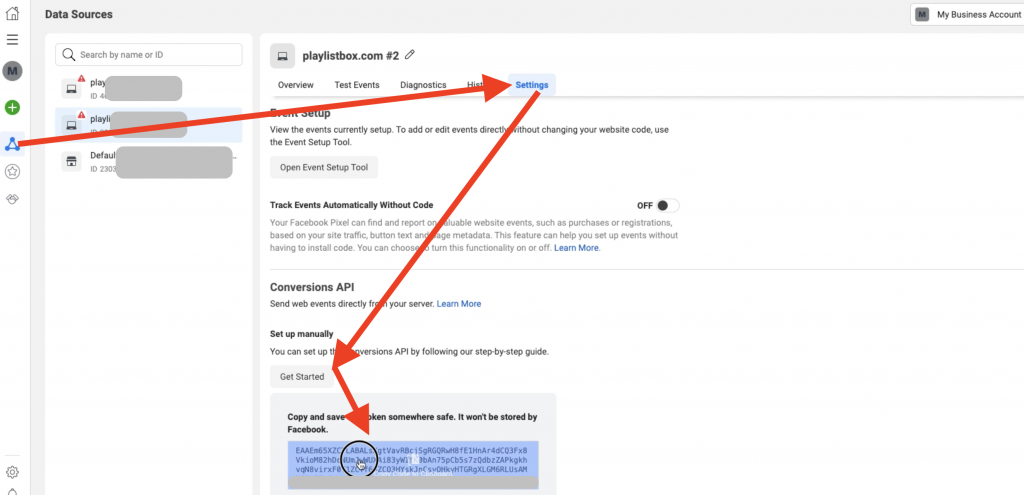

STEP 4:
After saving, click “SEND TEST EVENT”

STEP 5:
A pop-up will appear.
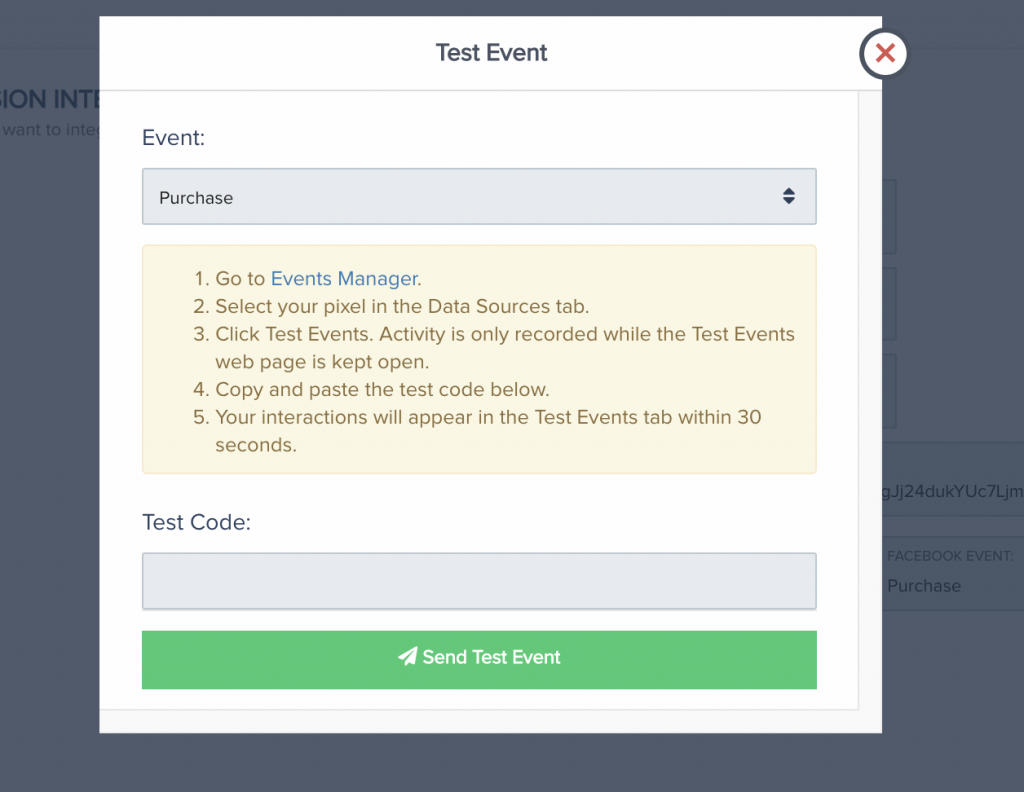
Choose the event you want to test.
Then go back to the events manager.
Locate the “test Events” section in FB.
Copy the test code, then paste in the PK and click to “SEND TEST EVENT”
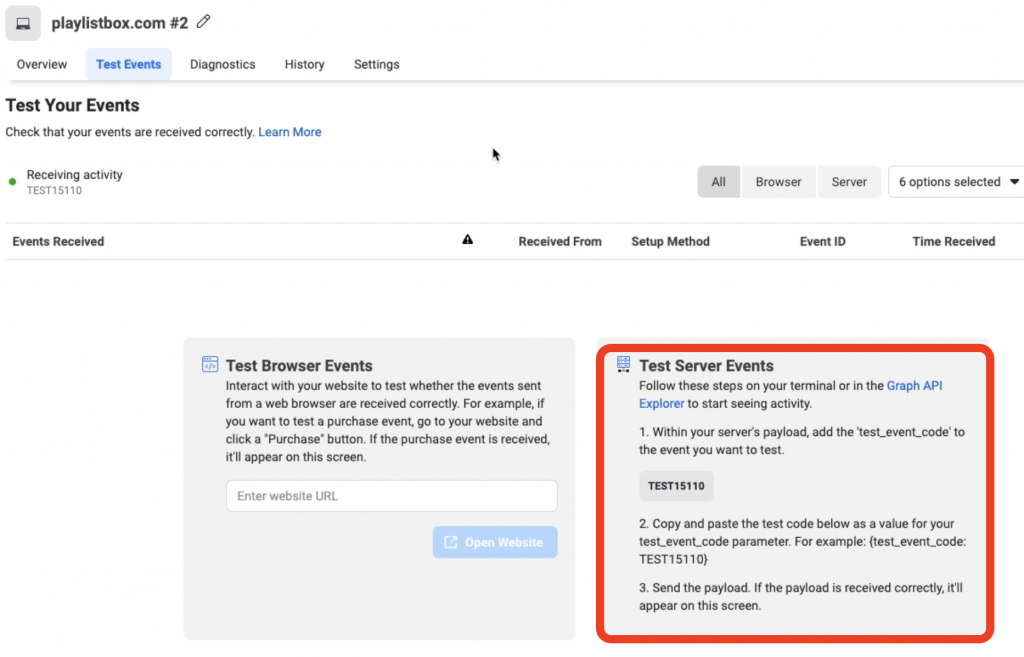
After sending the test, you will see the test event in your FB account.
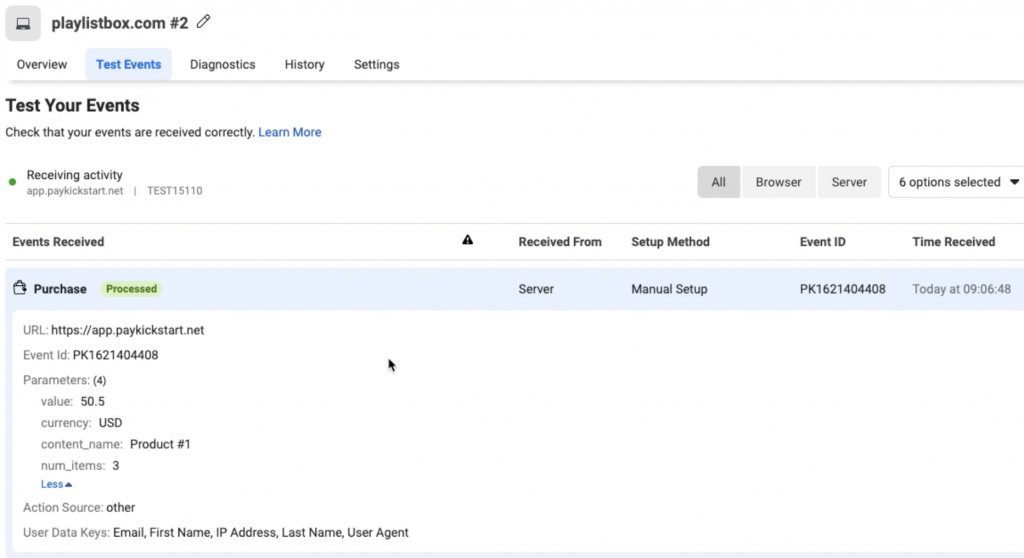
STEP 6:
After testing the event with FB, go back to the PK product settings and add the PK and FB event you want to trigger.

PK Event: When PK will trigger FB
FB Event: The event data PK will send to FB upon trigger.
*NOTE: Multiple events can be selected in the same event fields or you can set up multiple events separately.
Once you are done setting up your events save the product settings a final time and the FB Conversion API integration is ready to go for the product.
Once saved, PayKickstart will trigger and send the related data to Facebook Purchase conversion pixel.
You can repeat this process on the product level for each product you want to connect with.
– Conversion pixels are ONLY triggered on up-front purchases. This will NOT trigger an event for subscription rebills.
– NOTE: For deduplication in your conversion pixel, please use the PayKickstart Transaction ID as the event ID (where applicable)
