
Vendors using WordPress sites and the LifterLMS Membership Plugin can integrate LifterLMS to automatically create and manage membership accounts for your customers via LifterLMS.
To integrate LifterLMS with your products, follow the instructions below:
Important to Note
Website Requirements for Plugin installation:
– WordPress version 5.2 or higher
– SSL certificate must be installed
In your WordPress site, locate LifterLMS and access Settings > Rest API.

In the API section, select Add API Key.

Then enter the following required details:
Permissions: Must be Read/Write.
Description: Friendly name you can use for reference.
User: The owner of the related API key. This will be the vendor or the person in charge of your technical settings. Must be an admin of the WP site.
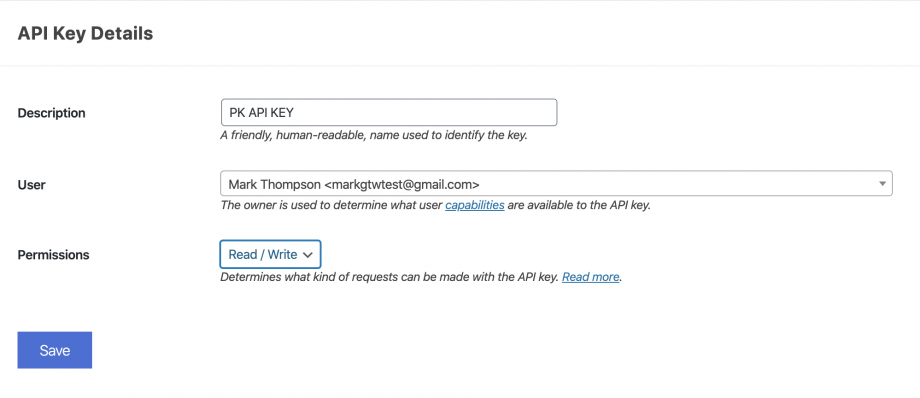
After entering the API details, click Save.
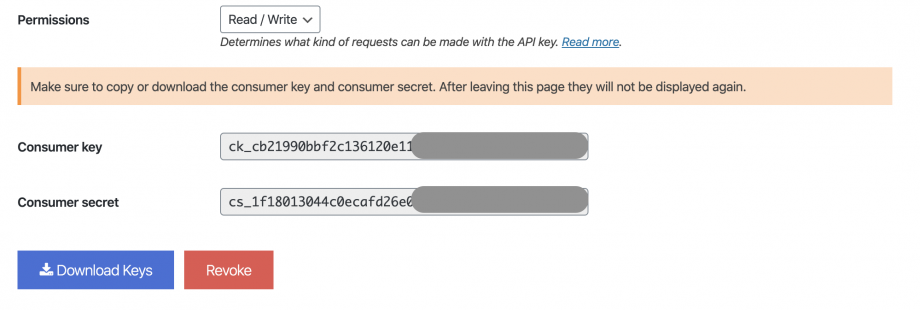
Please Download & Save these Keys in a Safe Place.
You cannot access them again.
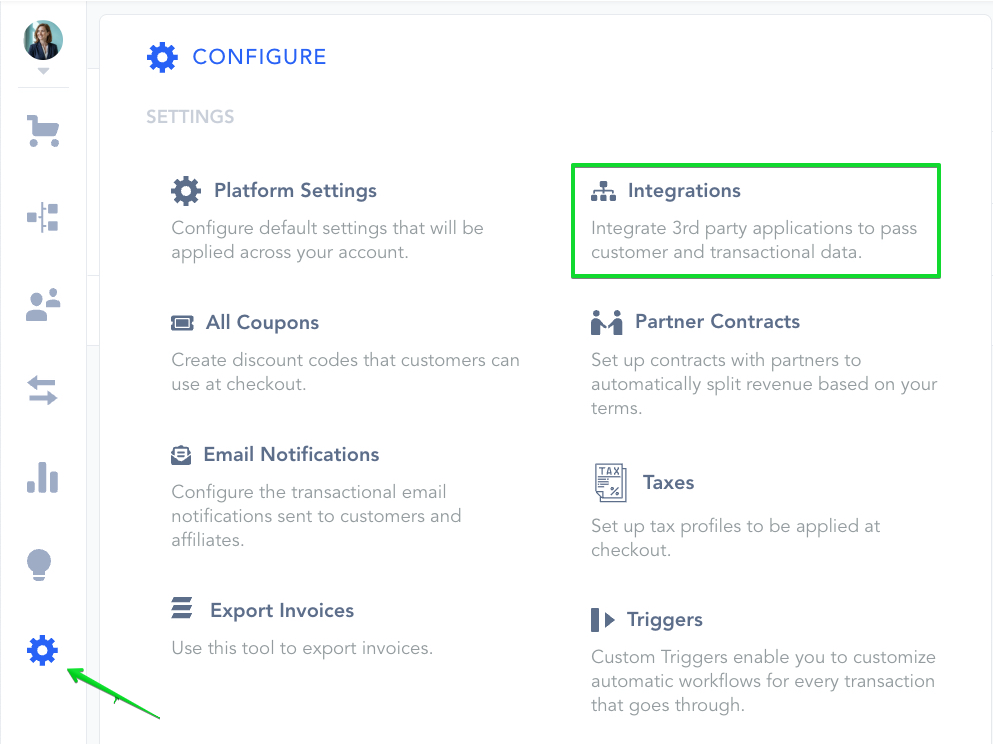
Access the Configure ⚙️ > Integrations section in the left-hand sidebar of your PayKickstart dashboard.
Then, in the drop-down selection, choose the Membership option.
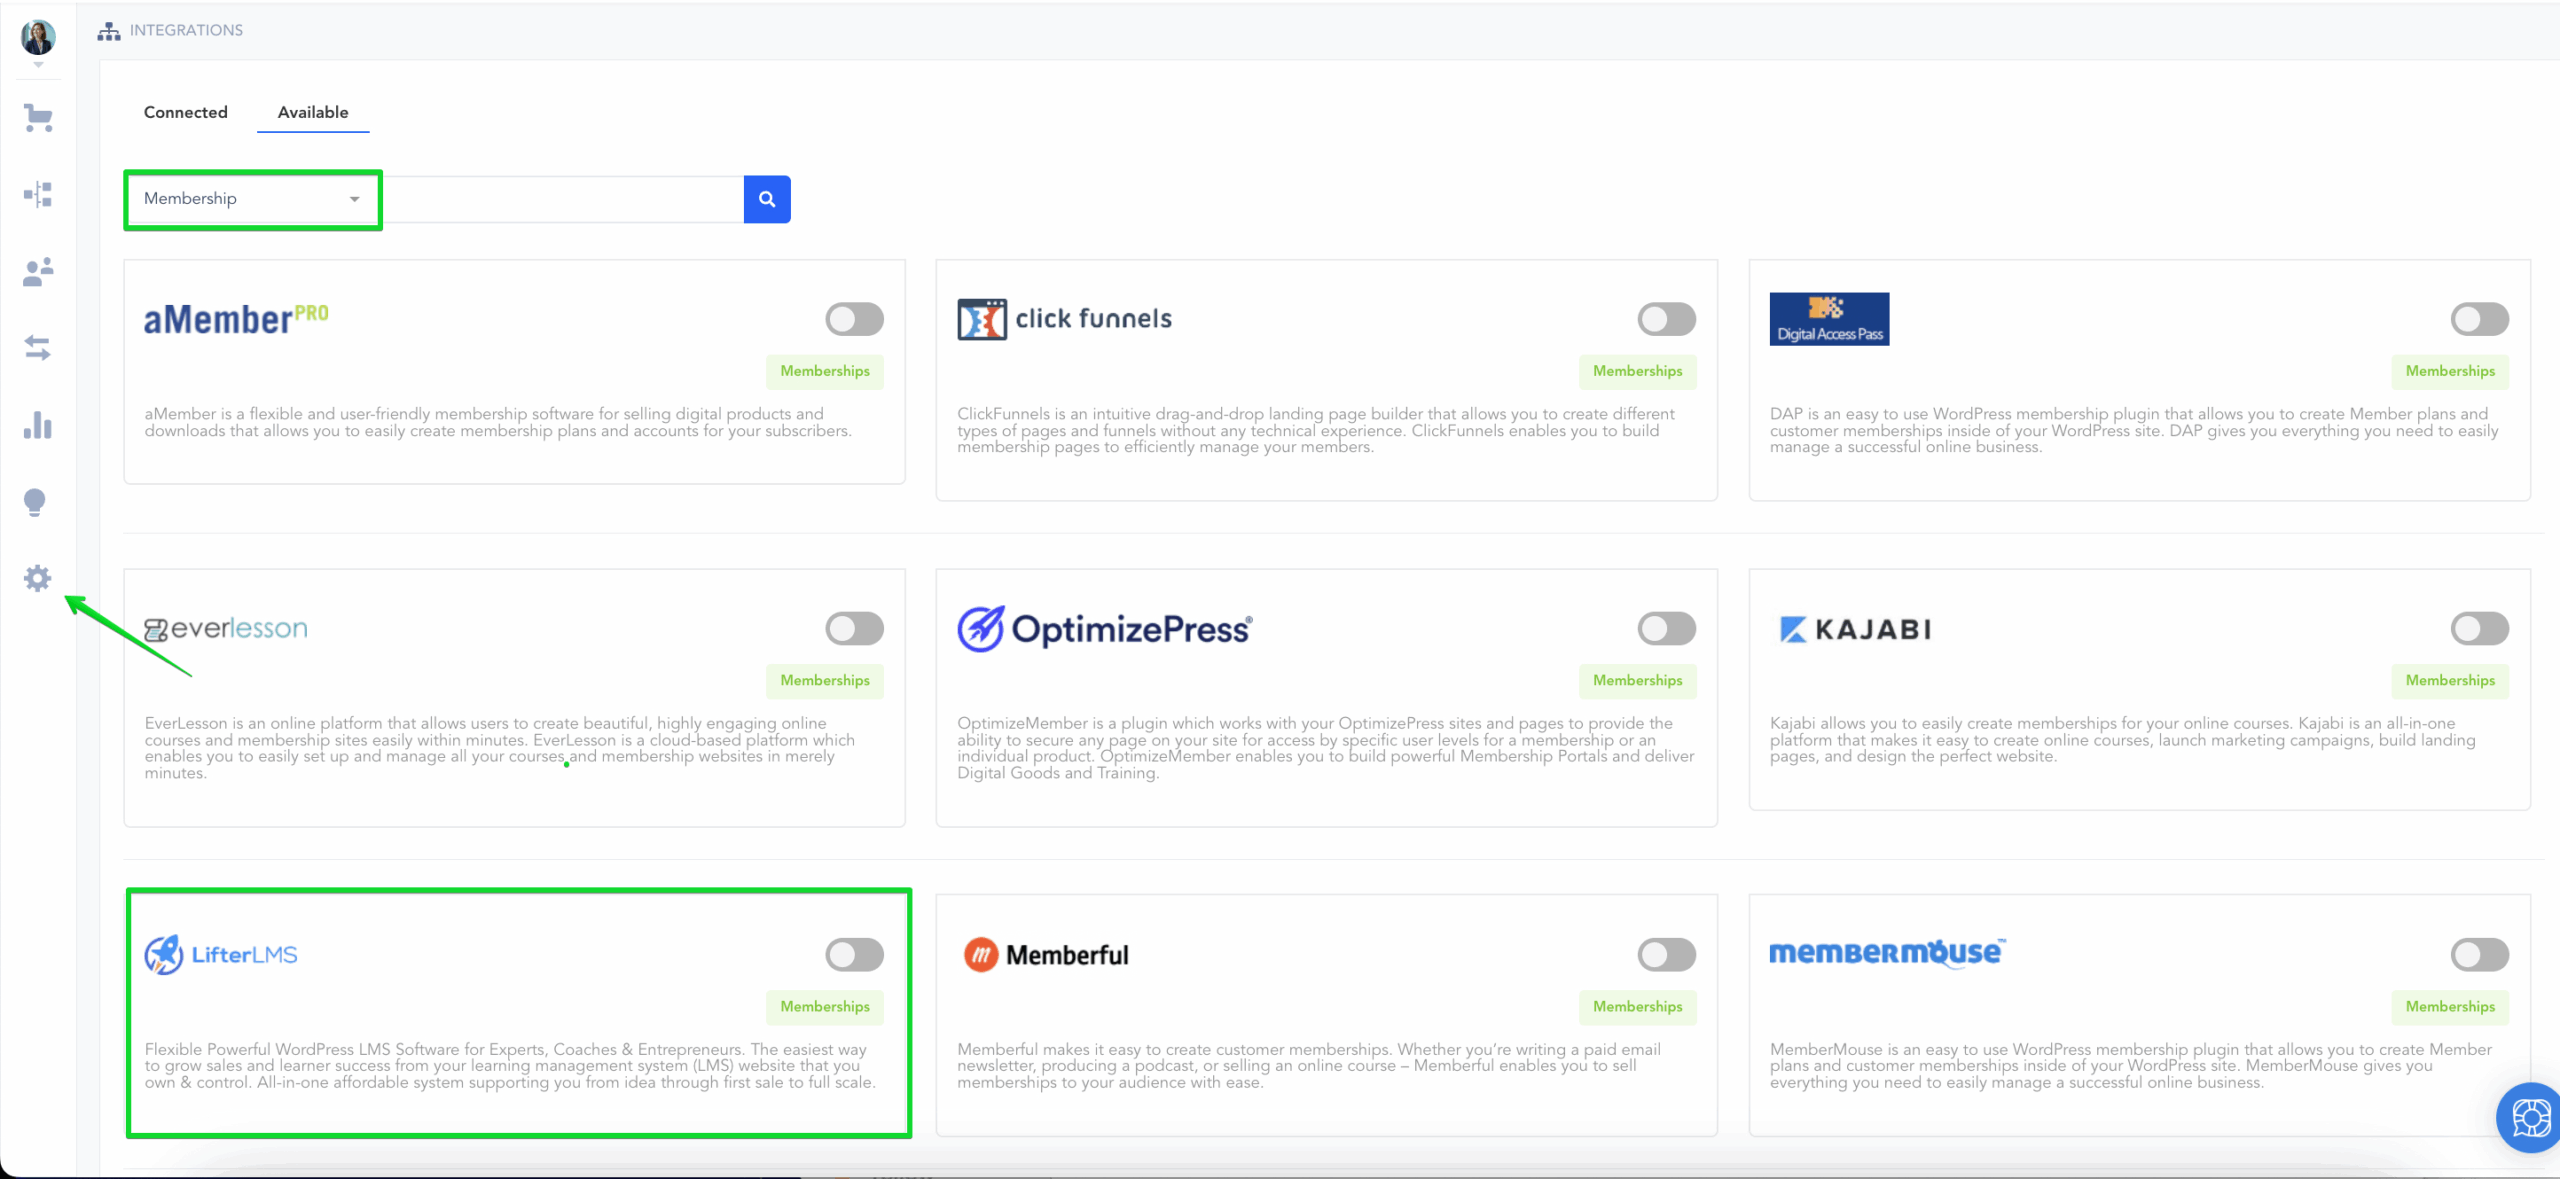
Select LifterLMS and enter an Account Name used for your reference within the account.
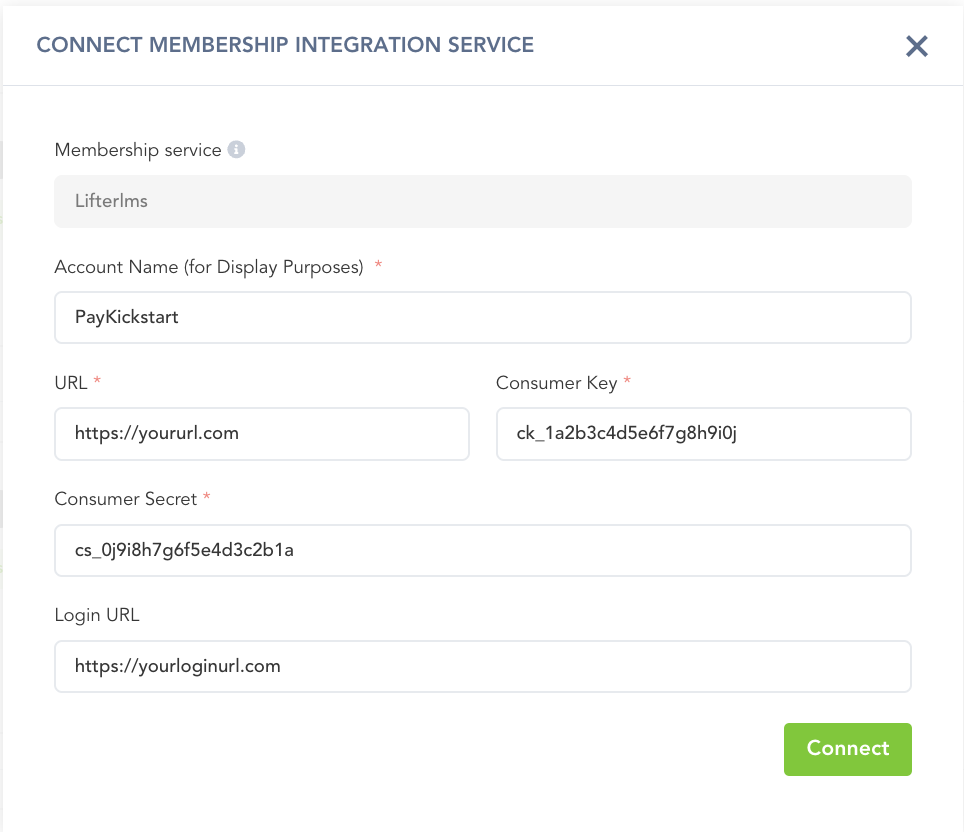
For LifterLMS, you’ll need your site’s Main URL (ex: https://paykickstart.com), Consumer Key, and Consumer Secret, as well as the Login URL.
Login URL: The URL of the Membership Area Login page is emailed to the customer along with their credentials.
Once you’ve entered the correct information in your PayKickstart account to integrate LifterLMS, press Connect.
In the Campaign settings you wish to use the integration with, scroll down until you see the Membership Integration option.

Make sure the Membership integration option is enabled, then save your Campaign:

In the Product Settings, select Step 3 (Integrations) to open up your integrations settings for the product.

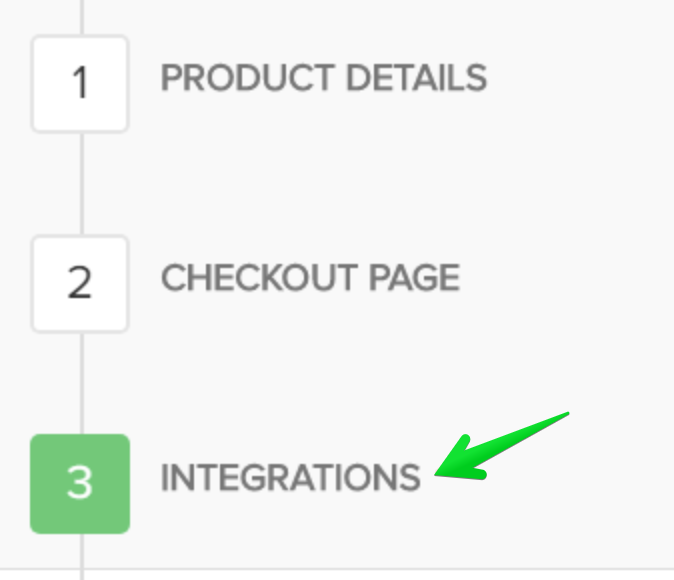
#1: Enable the membership integration option and click the button to Add a new integration:

After clicking on the Add button, select LifterLMS and select the Course and Membership level related to the product.
- Level (Course): Required. Will associate 1 course with the user after purchase.
- Bundle (Membership): [Optional] Will associate all courses related to membership after purchase.
You will now have a membership integration added, and if needed, you can add another integration or level to the same product:

#2: (Optional) If you want to allow the customer to choose their own membership password at checkout, then enable this option. If you want to provide the customer with an auto-generated password, leave this option disabled.
Important to Note for Password Fields:
If you are also offering an order bump or upsell product with a membership integration in the same funnel, the order bump or upsell purchase would use the chosen password set for the first product (front-end) purchase.
If the customer already exists in the Membership service, then CUSTOM PASSWORD functionality will not assign the customer a new password, but instead, provide the customer with their previous set password to access the membership.
After selecting the membership course and level, click save in the top right of the page to save the product settings.

Now that you have integrated on the product level, customers who purchase the product will automatically have a LifterLMS member account created for them for the related course and level.
If the purchase is related to a subscription, account access would be controlled by the subscription’s status.
In your WordPress site, locate LifterLMS and access Settings > Rest API.

In the API section, select Add API Key.

Then enter the following required details:
Permissions: Must be Read/Write.
Description: Friendly name you can use for reference.
User: The owner of the related API key. This will be the vendor or the person in charge of your technical settings. Must be an admin of the WP site.

After entering the API details, click Save.
Please Download & Save these Keys in a Safe Place.
You cannot access them again.

Access the Configure ⚙️ > Integrations section in the left-hand sidebar of your PayKickstart dashboard.
Then, select the Memberships tab and choose the option to add a new Membership integration:
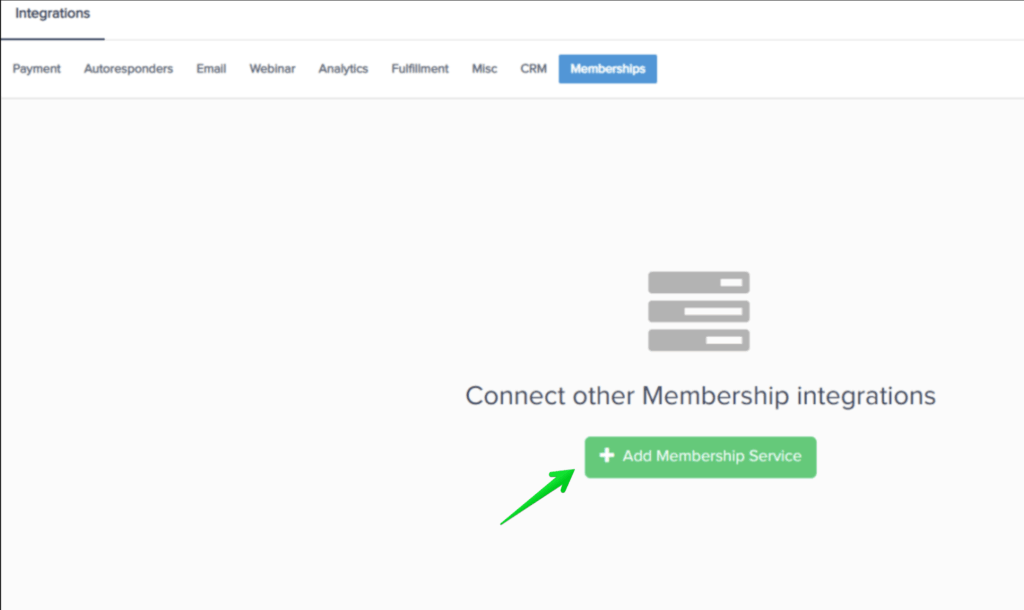
Select LifterLMS and enter an Account Name used for your own reference within the account.

For LifterLMS, you’ll need your site’s Main URL (ex: https://paykickstart.com), Consumer Key, and Consumer Secret, as well as the Login URL.
Login URL: The URL of the Membership Area Login page emailed to the customer along with their credentials.
Once you’ve entere the correct information in your PayKickstart account to integrate LifterLMS, press Connect.
In the Campaign settings you wish to use the integration with, scroll down until you see the Membership Integration option.

Make sure the Membership integration option is enabled, then save your Campaign:

In the Product settings, select Step 3 (Integrations) to open up the Integrations settings for the product.


#1: Enable the membership integration option and click the button to Add a New Integration:

After clicking on the Add button, select LifterLMS and Select the Course and Membership level related to the product.
- Level (Course): Required. Will associate 1 course to the user after purchase.
- Bundle (Membership): [Optional] Will associate all courses related to membership after purchase.
You will now have a membership integration added, and if needed you can add another integration or level to the same product:

#2: (Optional) If you want to allow the customer to choose their own membership password at checkout, then enable this option. If you want to provide the customer with an auto-generated password, leave this option disabled.
Important to Note for Password Fields:
If you are also offering an order bump or upsell product with a membership integration in the same funnel, the order bump or upsell purchase would use the chosen password set for the first product (front-end) purchase. AND, If the customer already exists in the Membership service, then CUSTOM PASSWORD functionality will not assign the customer a new password, but instead, provide the customer with their previous set password to access the membership.
After selecting the membership course and level, click Save in the top right of the page to save the product settings.

Now that you have integrated on the product level, customers who purchase the product will automatically have a LifterLMS member account created for them for the related course and level.
If the purchase is related to a subscription, account access would be controlled by the subscription’s status.
