For Scale (Premium) Vendor plans.
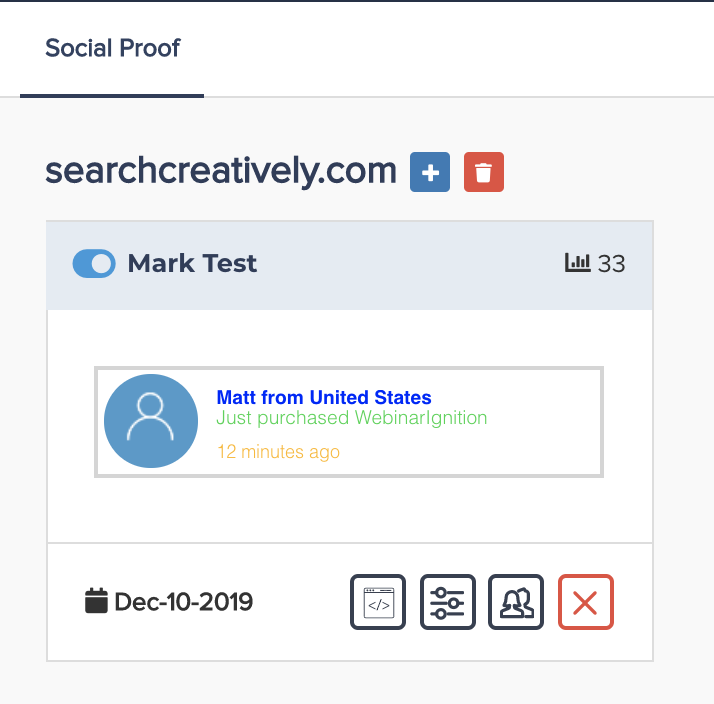
PayKickstart premium vendors have the ability to incorporate social proof on their web pages to show customers evidence of recent customer purchases of the product or service.
This can be a helpful tool to re-enforce to potential customers that other customers are currently purchasing.
To add social proof to your web pages please follow the instructions below.
Step 1:
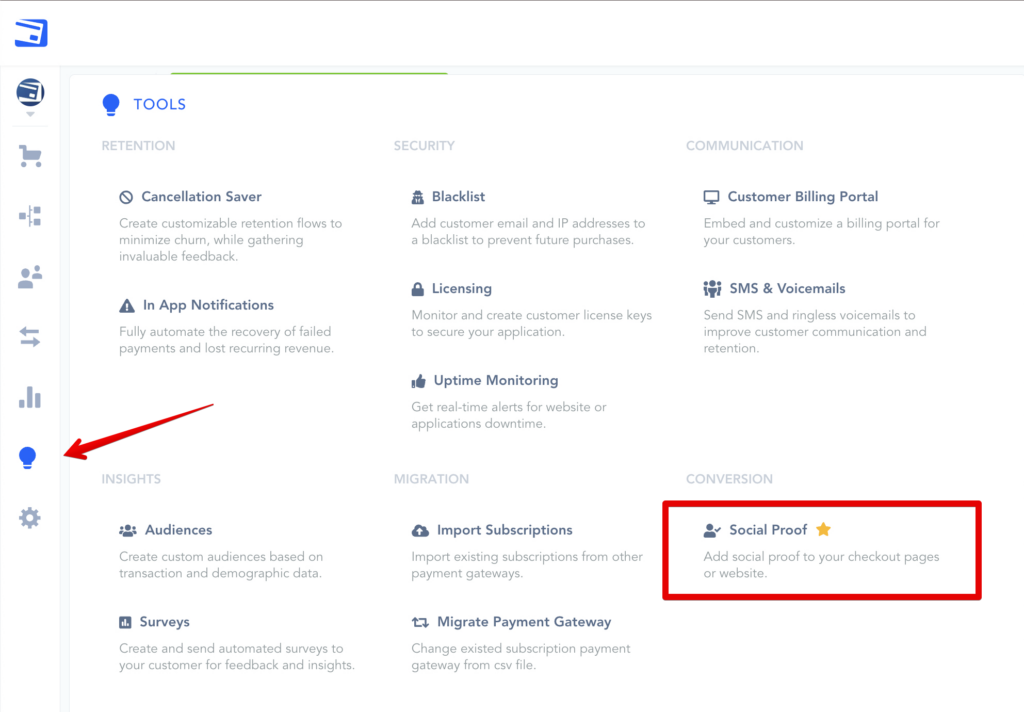
In your PayKickstart account select Tools and then the “Social Proof” tab on the left side of your dashboard.
Step 2:
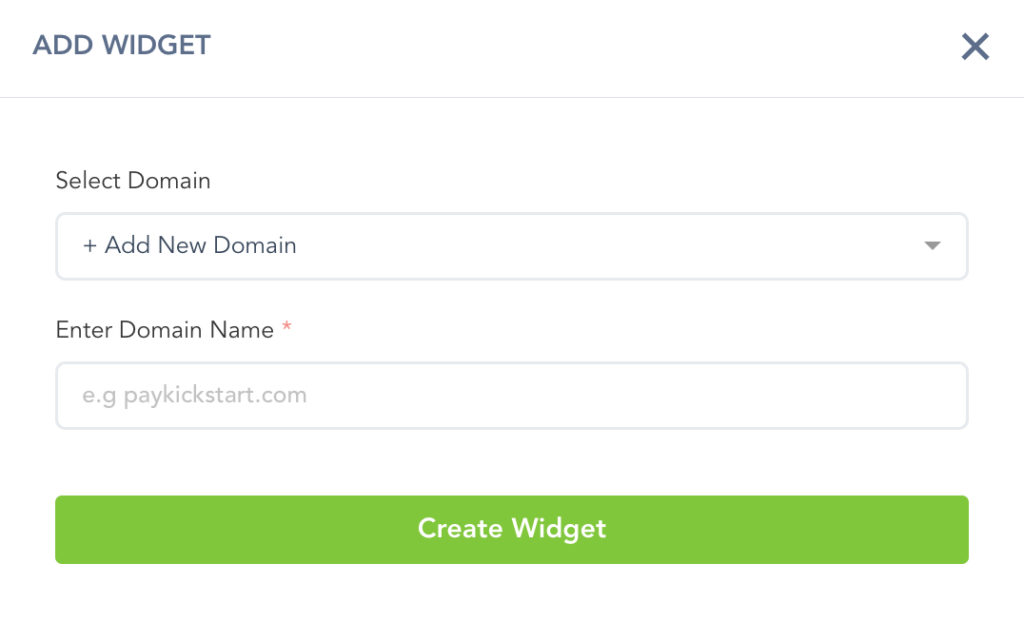
In the Social Proof section click to add a “new widget”.

Once the pop-up appears you will need to add a domain.
This is your website’s main URL. For example: https://paykickstart.com/
IMPORTANT: The widget must be added to web pages from the set domain or the widget will NOT work.
If you have previously used the Social proof widget you have the ability to select a previously used domain.
After setting or selecting the domain click “Create Widget”
Step 3:
On the next page enter the other needed widget details.
Widget Name: internal-facing name for vendors clarification purposes.
Language: The language you want to use with the social proof widget.
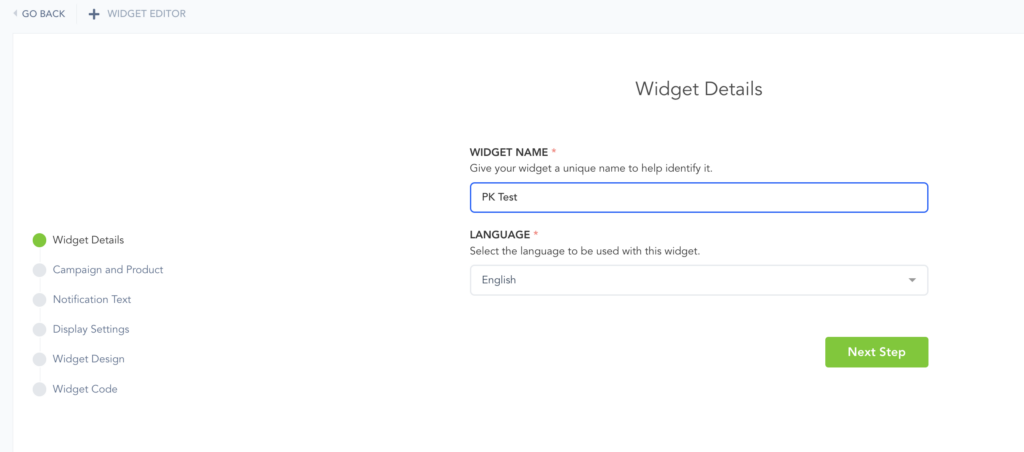
Then click “Next Step”
Campaign: Select the campaign the widget is associated with. 1 campaign selection per widget.
Product: Select the related products from the campaign you want to use the widget with. You can select multiple products from the same campaign if needed.
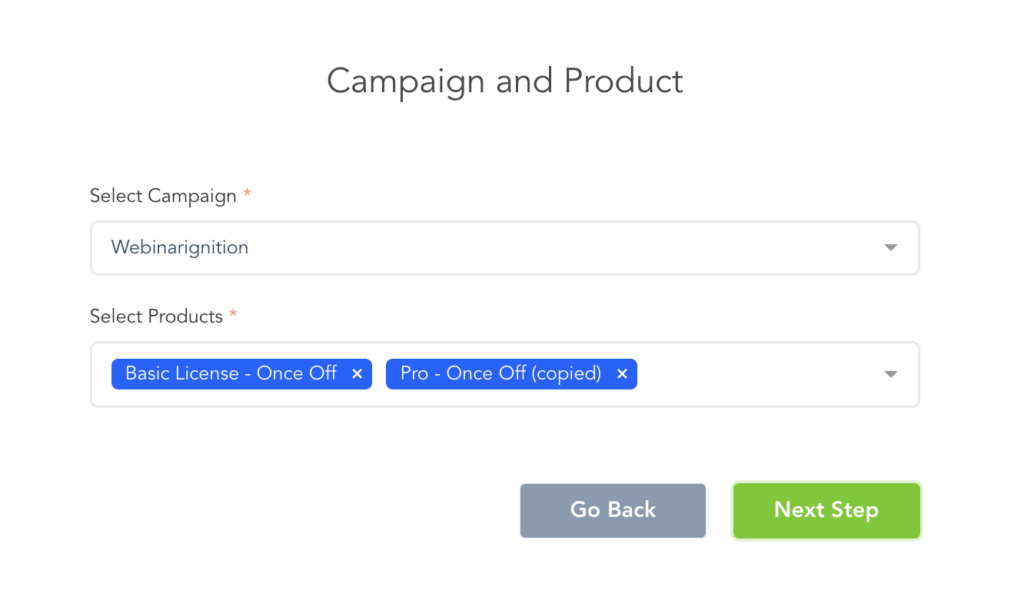
Then click “Next Step”
Notification Text: add the text description you would like the customer to see on the proof widget.
Notification Sound: You can select a sound to play to help grab the customer’s attention when the widget appears. You can also select “no sound” if you would like.
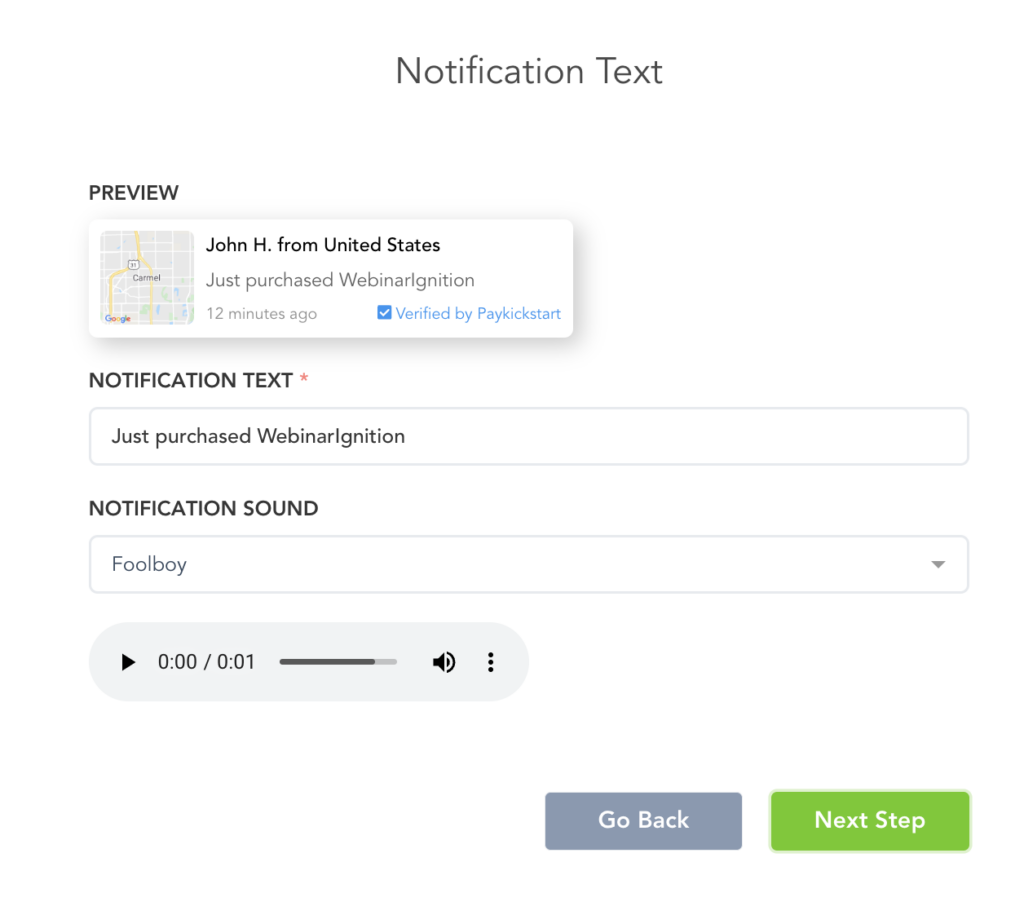
Then click “Next Step”
Delay: You are able to set a delay for seconds or minutes if you do not want the widget to show as soon as the customer reaches the web page.
Frequency: You can set the frequency the social proof widget changes customers. This can be set to seconds or minutes.
Countries: You can select the countries you want to show proof from. This can be all countries or specific countries.
Limit Contacts: You can set the limit of recent customer purchases you would like to show to the customer.
Show Live Counters: You can enable this option to show your customers how many people are currently viewing this product to purchase. You can also set custom text regarding the live view counter.
Display widget on mobile devices: You can enable/disable the customer seeing the widget on a mobile device if needed.
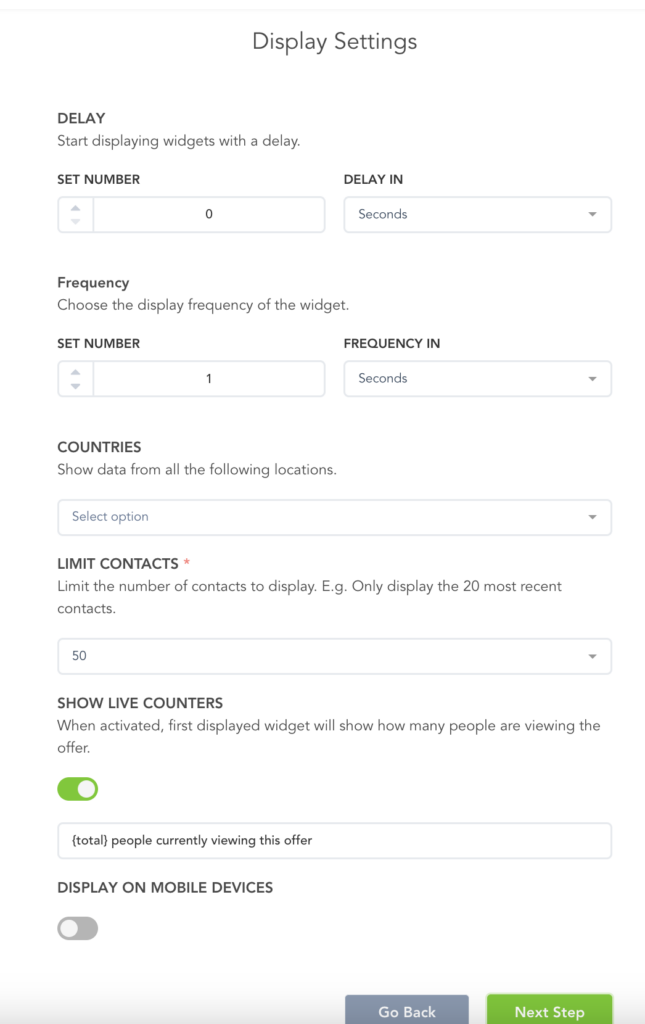
Then click “Next Step”
Animation: This option will allow vendors to add animation to the widget to help get the customer’s attention. This can also be set as no animation.
Colors: Select the colors you want to use with the widget. You can choose colors separately by name & location, notification text(description) and timestamp.
Select Template: select the template style you want to use for the social proof widget.
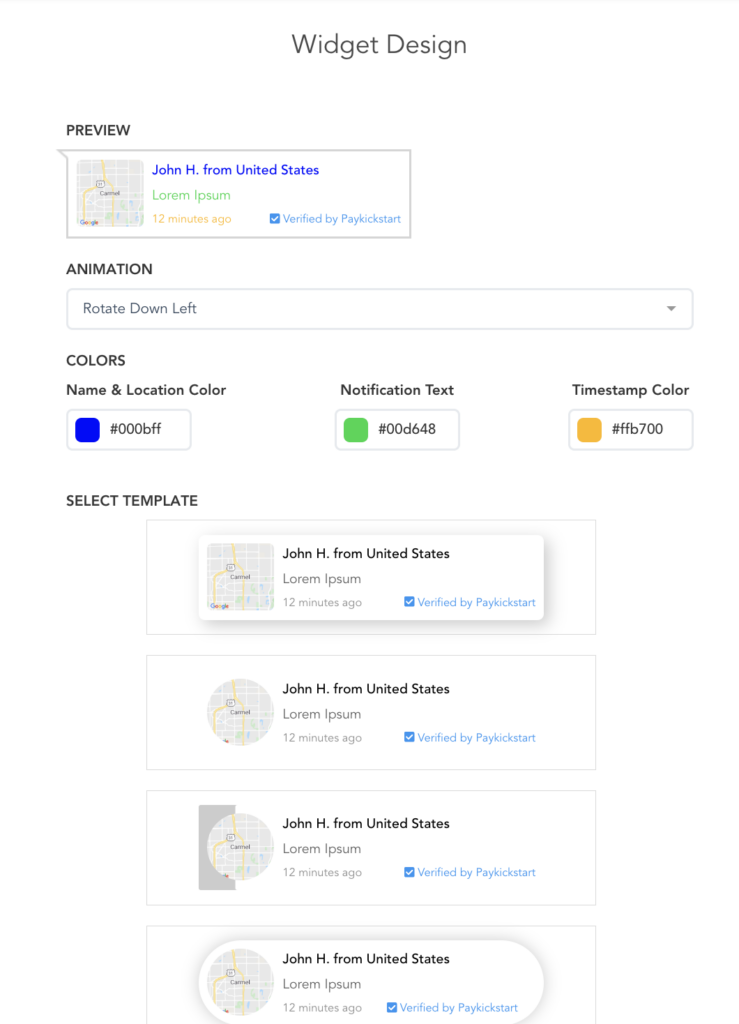
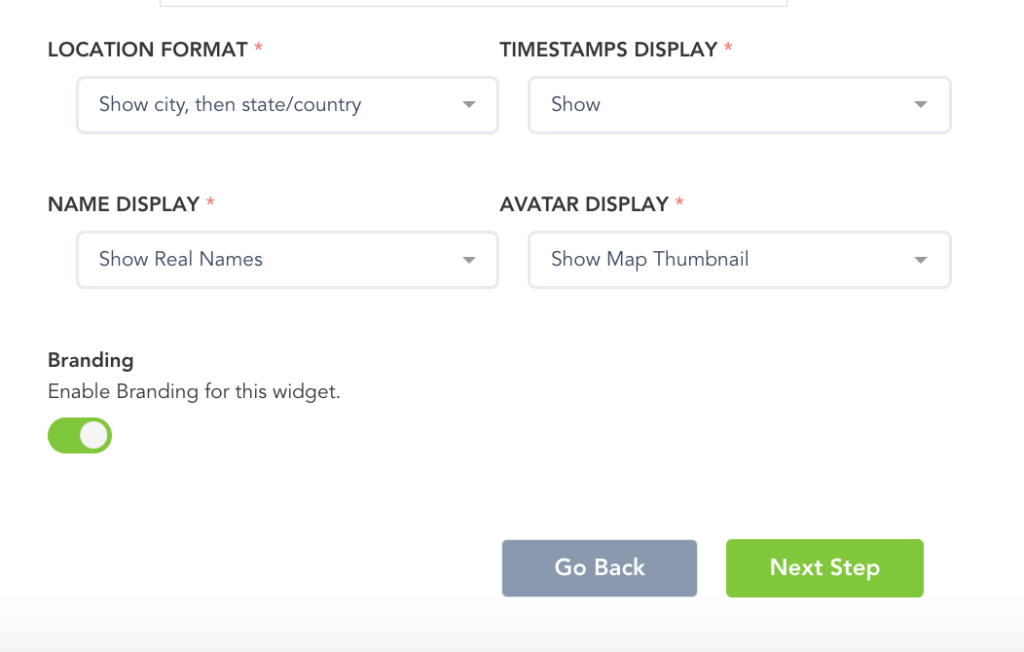
Display:
- Location format: You can not show customer locations or you can choose to show just country, just city, both city and country and state where applicable or no location info.
- Timestamps: you can enable or disable the timestamps that show when previous customers purchased.
- Name display: You can choose to show real customers purchase names or label the purchase as “someone” to keep customer info anonymous.
- Avatar Display: You can choose to show a generic avatar on the widget or show the previous customer’s map location.
Widget Screen Location: Choose where on the web page you want to show the widget.
Branding: enable or disable the widget branding to say Powered by PayKickstart.
Then click “Next Step”
Step 4:
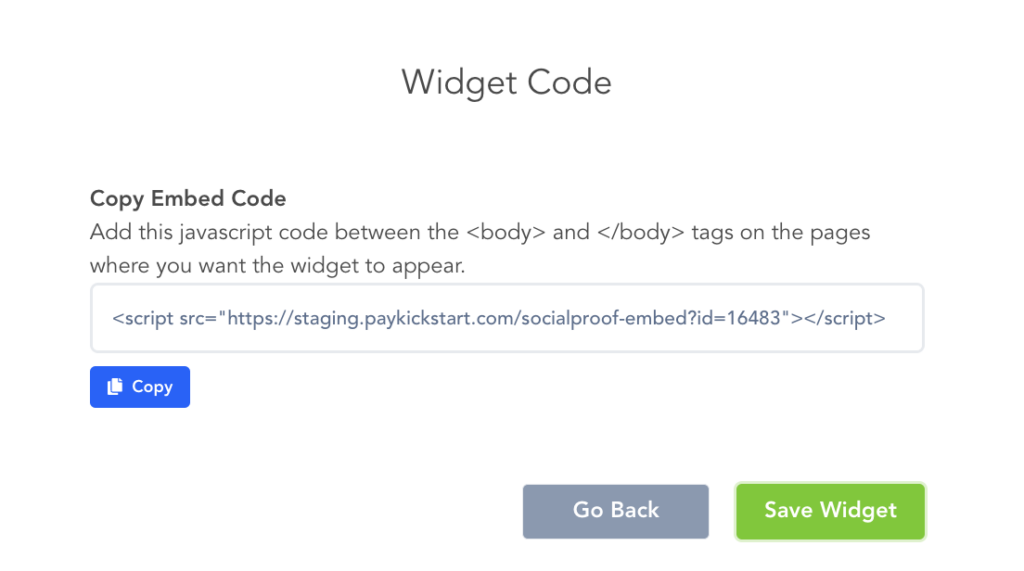
On the final step, copy the embed code and place it on your webpages you want to show the widget on.
The code must be on your web pages between the <body> and </body> tags on the pages where you want the widget to appear.
Lastly, click save to save the widget and set it live.
IMPORTANT: The widget must be added to web pages from the set domain or the widget will NOT work.
After saving the widget and adding the script to web pages related to your set domain, customers will see the social proof pop-up on their web page while viewing.

After saving the widget you can go back to the main social proof section to see customer purchases related to the widget or edit the widget again if you need to make any changes.
You can also disable or delete the widgets as needed.
