
PayKickstart offers vendors the ability to integrate transactional email notifications with Amazon SES to deliver transactional email notifications via their own domains.
To integrate with Amazon SES to deliver transactional email notifications, please follow the steps below:
IMPORTANT: Your Amazon SES account cannot be in sandbox mode for the integration to work. Learn more about moving SES out of sandbox mode here.
Step 1:
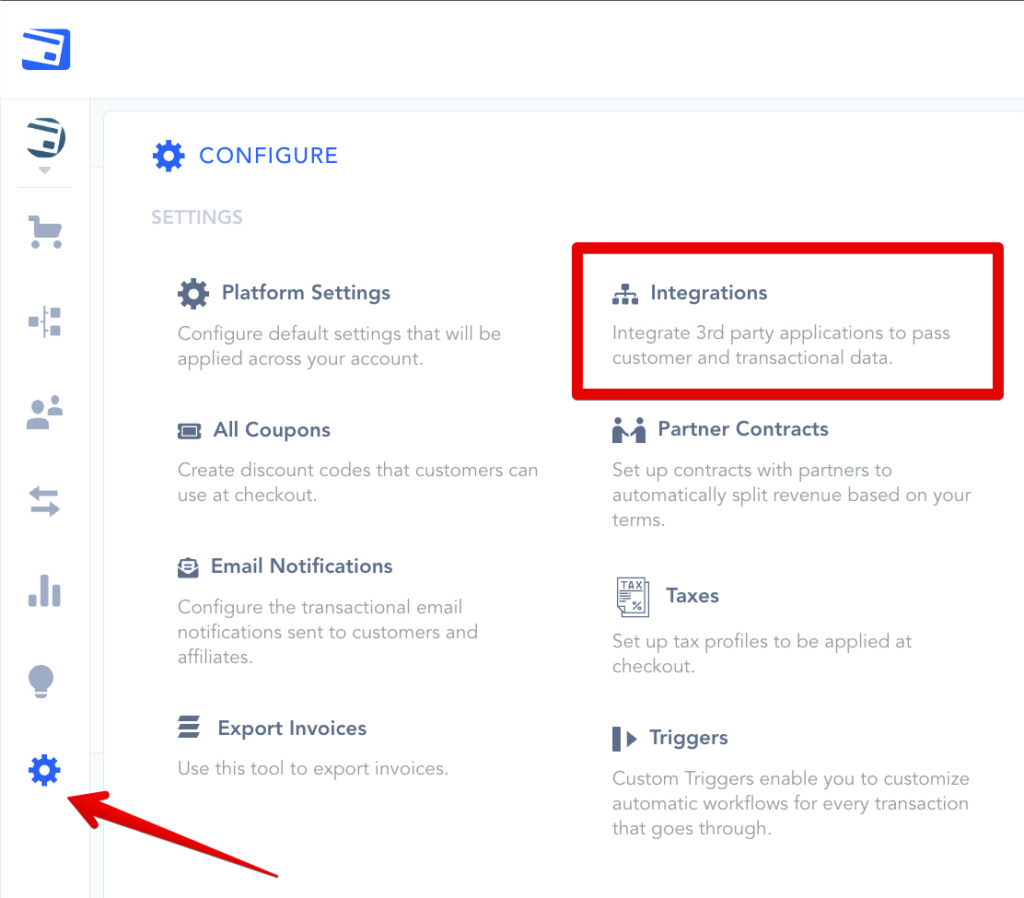
In your PayKickstart account go to the integrations section in the Configure menu.
Step 2:
In the integrations section, select “Email” then select “Add SMTP Provider”

Step 3:
A pop-up will appear, in the first dropdown select “Amazon SES”
This will show the following fields to enter for the Amazon Ses integration:
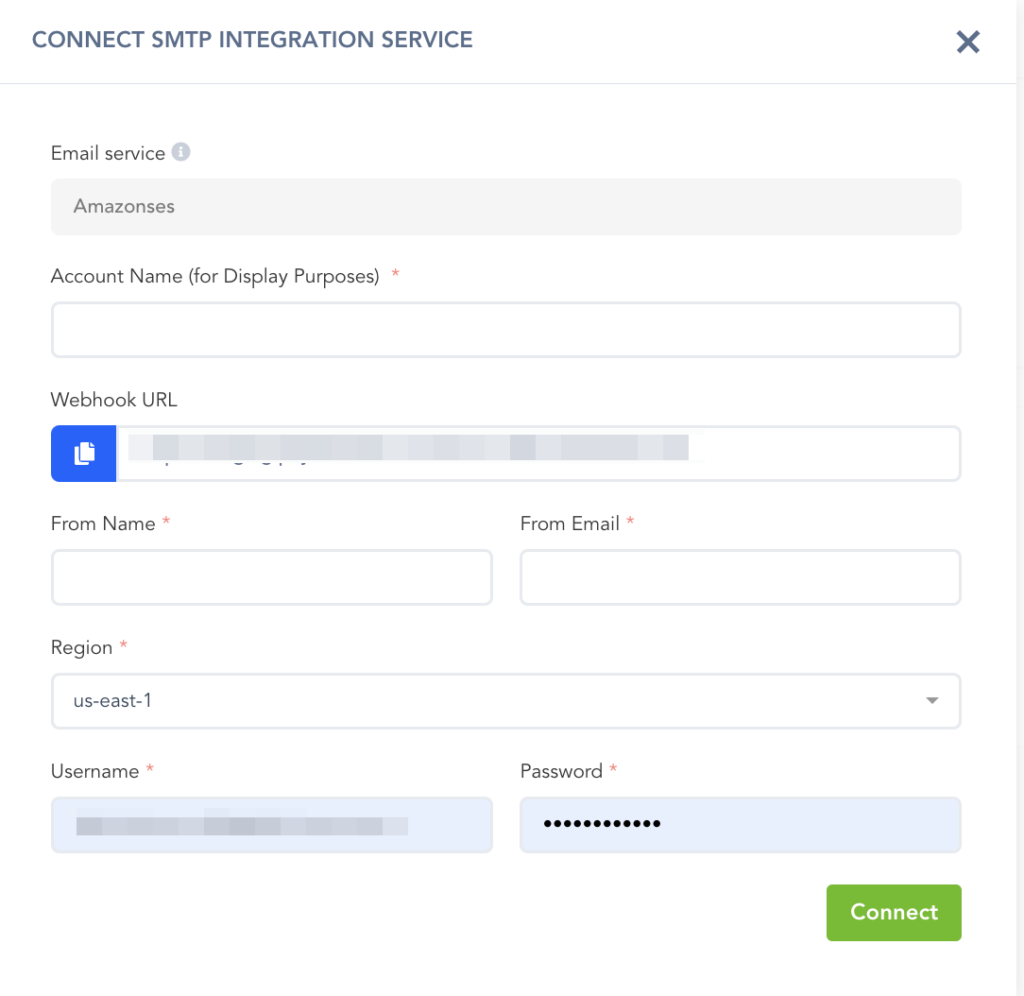
NOTE: for the integration fields below, please refer to Amazon SES.
- Account Name: For your display purposes
- From Name: The name the emails will be sent from
- Region: Select the region you are working with in Amazon SES.
- From Email: The email address the emails will be sent from.
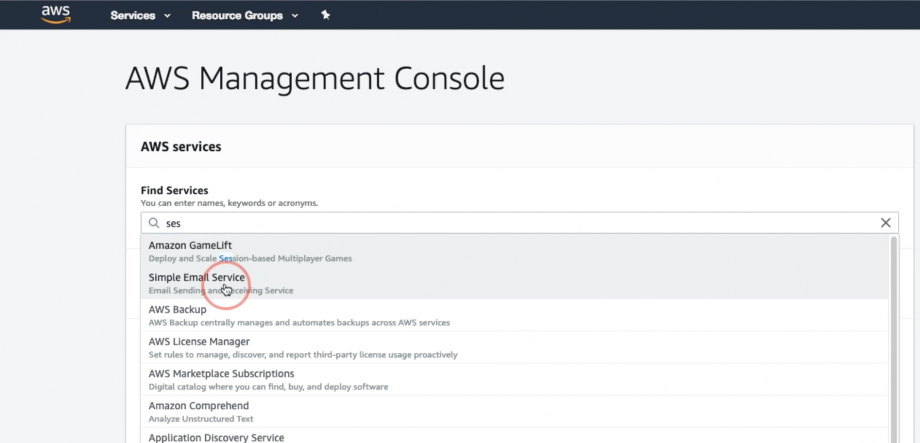
- In the AWS seach field, seach for “Ses” and open this Simple Email Service section.
- Inside SES, locate the “Email address” section.
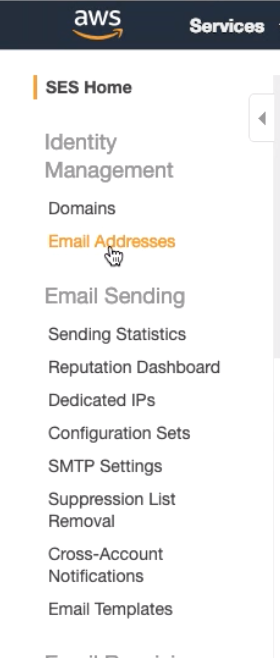
- Locate and use a verified email address in the PayKickstart integration pop-up field for “from email“.
AWS:
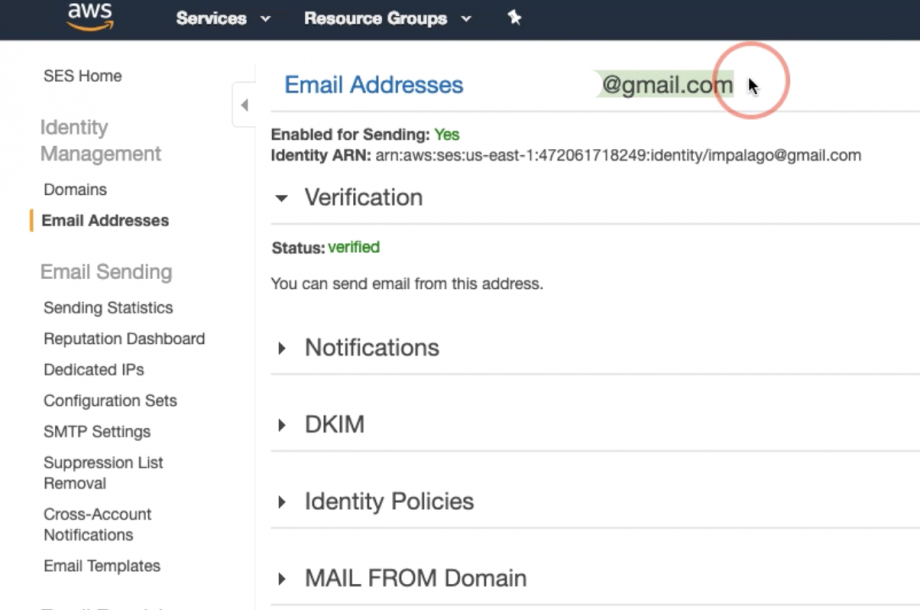
PayKickstart:
- Go to the notification settings for the email address in SES to “edit the configuration“.
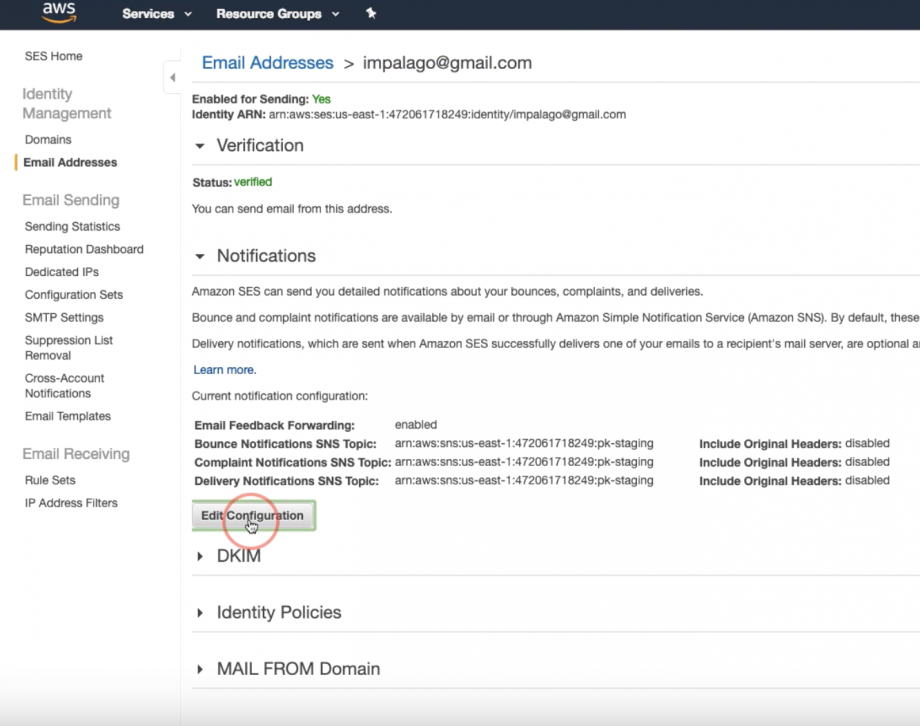
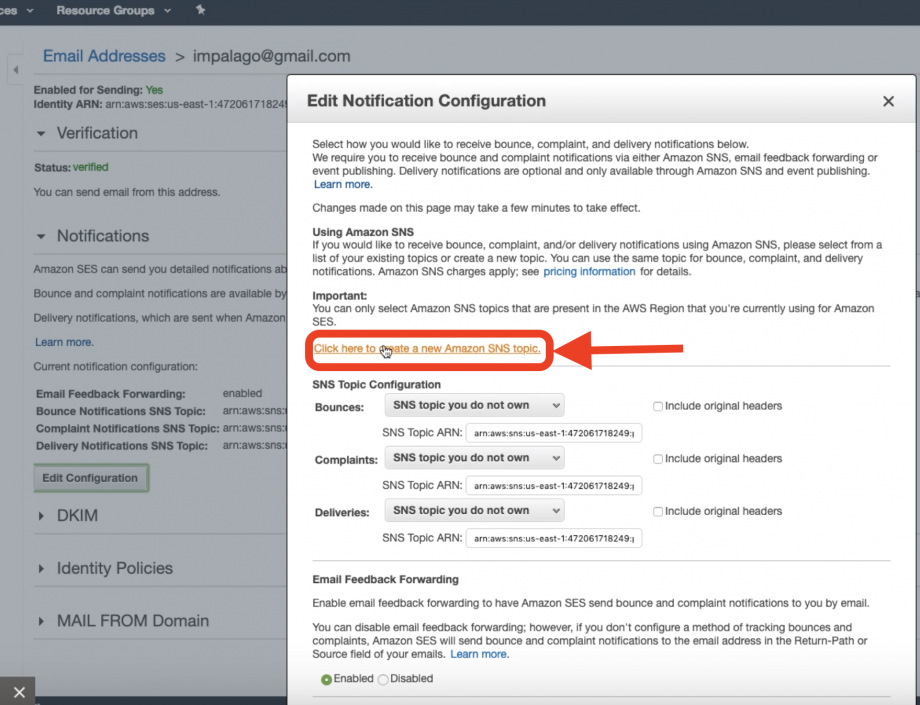
- Create a new SNS topic.
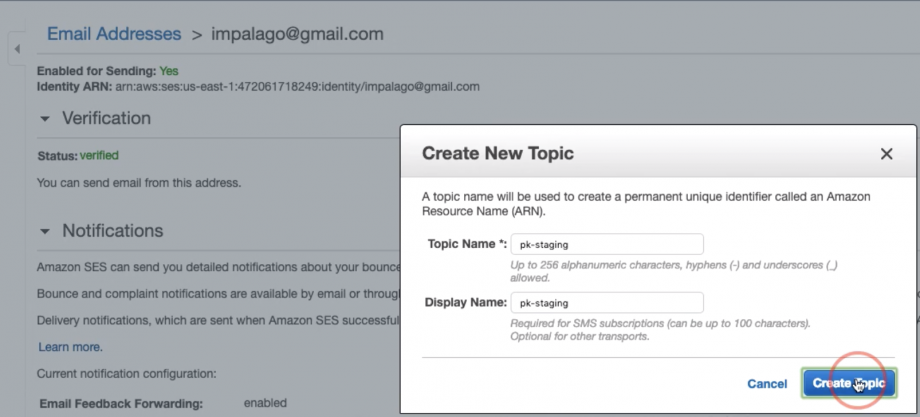
- Add a topic and Display name and select create.
- You will be taken back to the notification configuration. Set all SNS topic configurations to the newly created topic. Then Save.
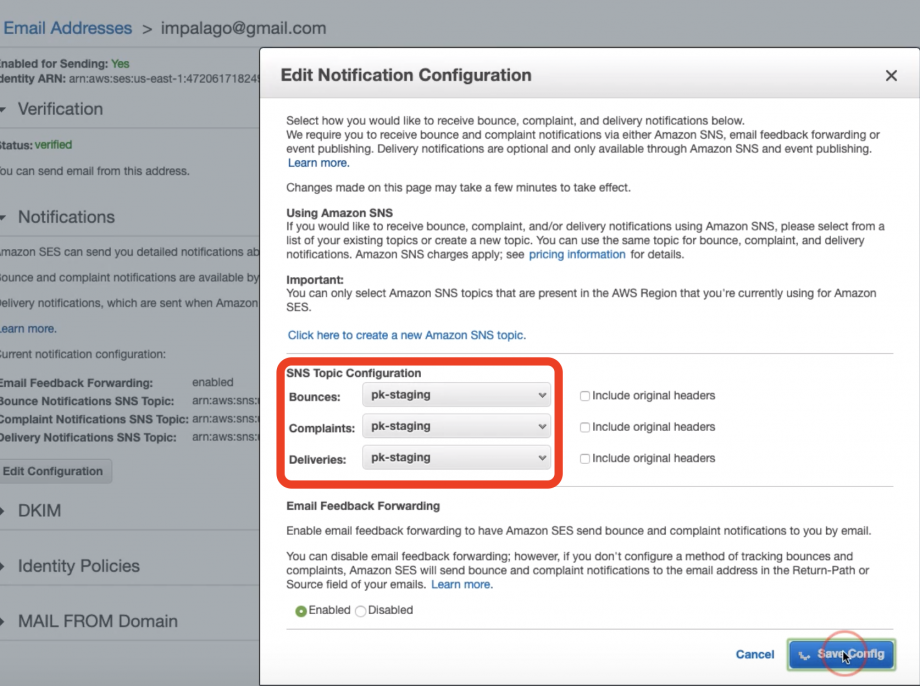
- In the AWS seach field, seach for “Ses” and open this Simple Email Service section.
- Webhook URL:
- After creating the subscription topic for the email address, go back to Amazon AWS , search and select “SNS(Simple Notification Service)”

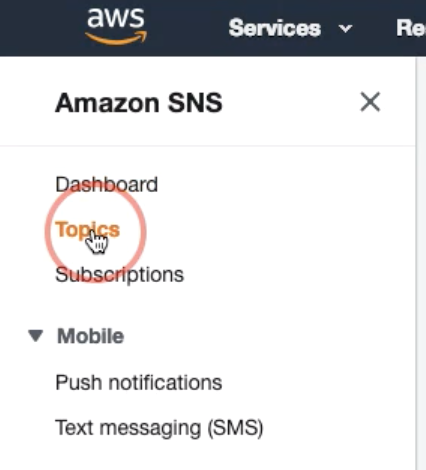
- Inside SNS, select Topics
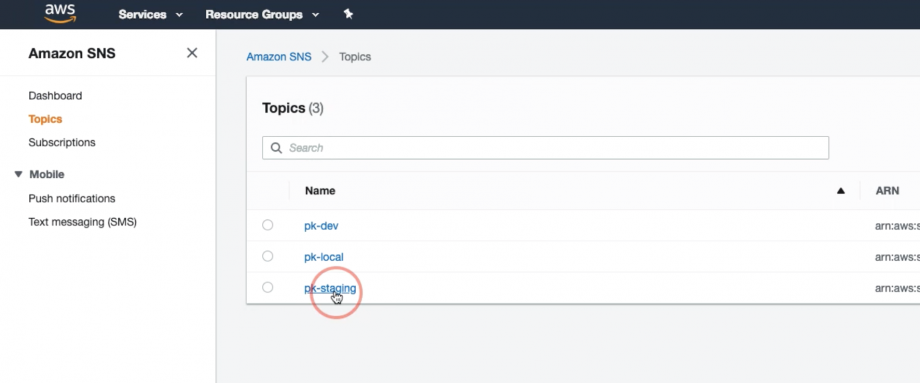
- Locate and select the recently created topic for this integration.
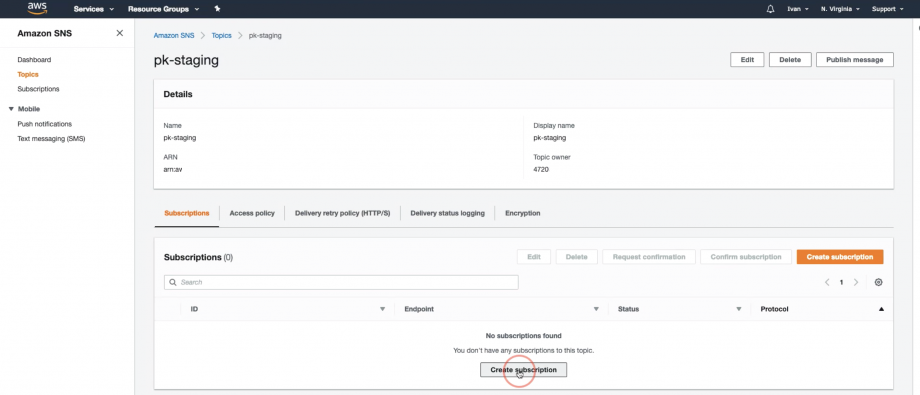
- Inside the topic, select “Create Subscription”
- For “Protocol“, select “HTTPS”
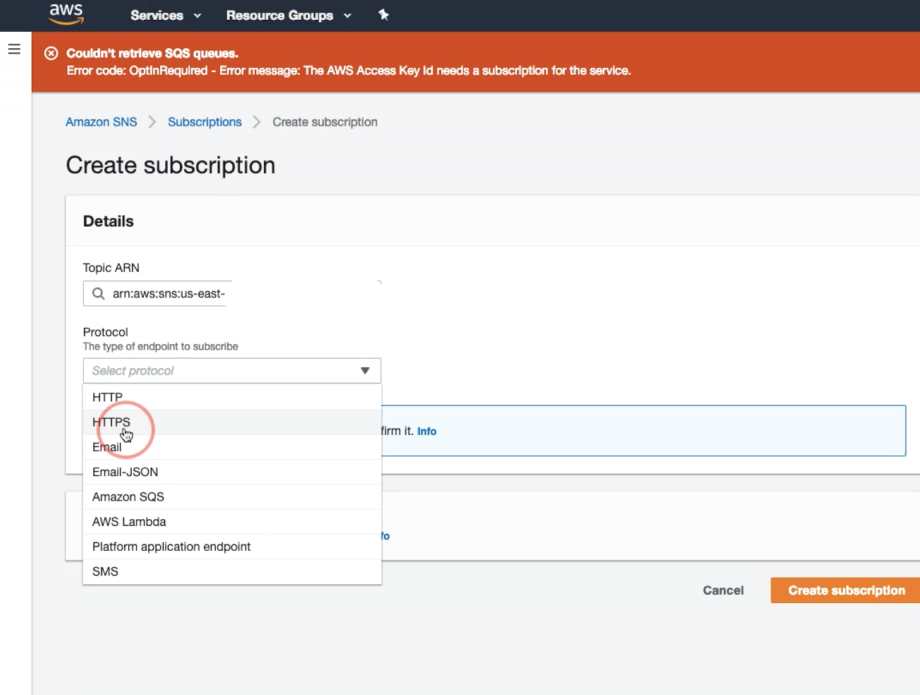
- Go back to PayKickstart to copy the Webhook URL and Paste it into the “Enpoint” for the SNS subscription.
Then select “Create Subscription“.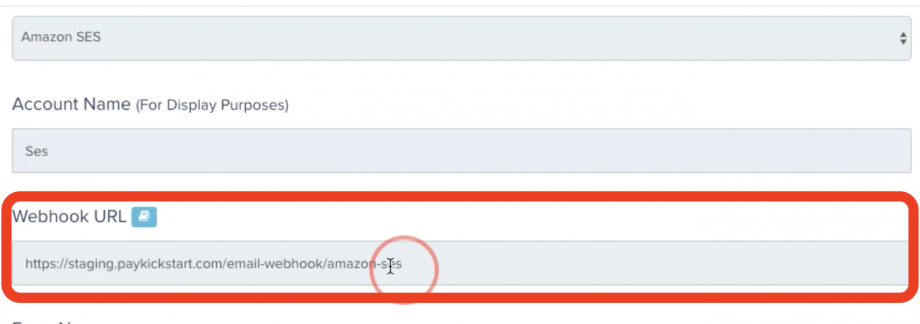
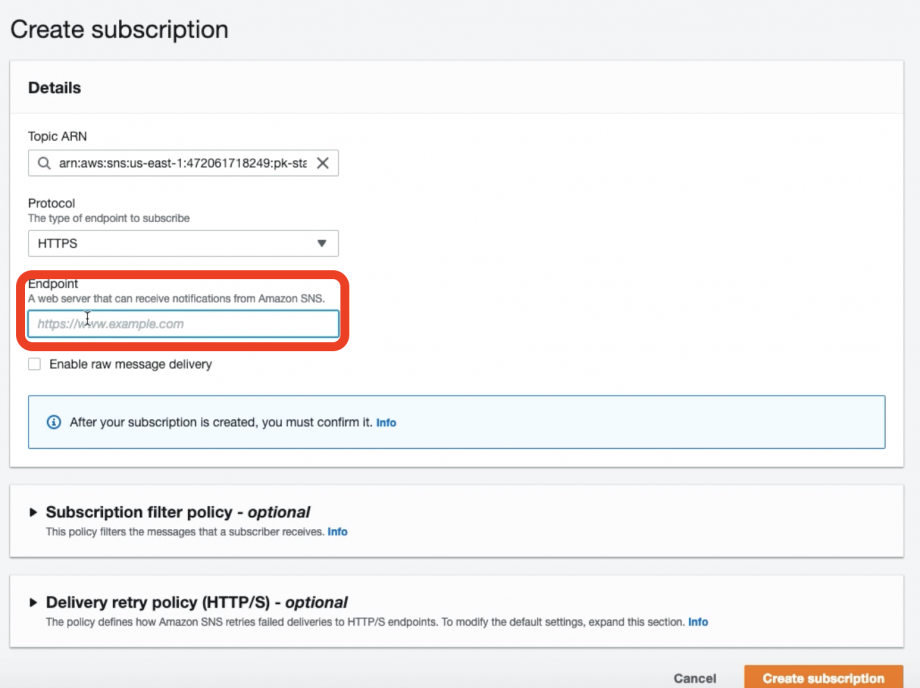
- Locate and select the recently created topic for this integration.
- Username & Password:
- In AWS, seach and select “Iam”
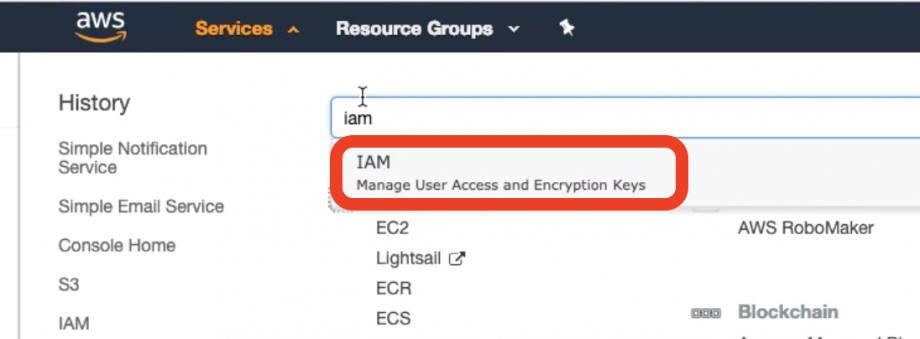
- Inside Iam, select “Users”
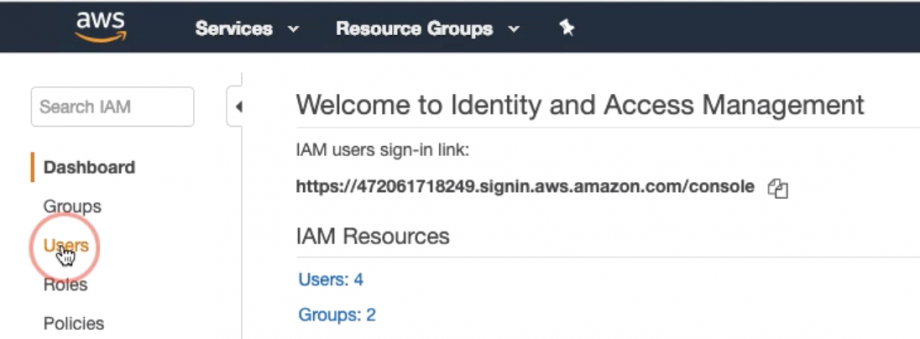
- Select “Add User”

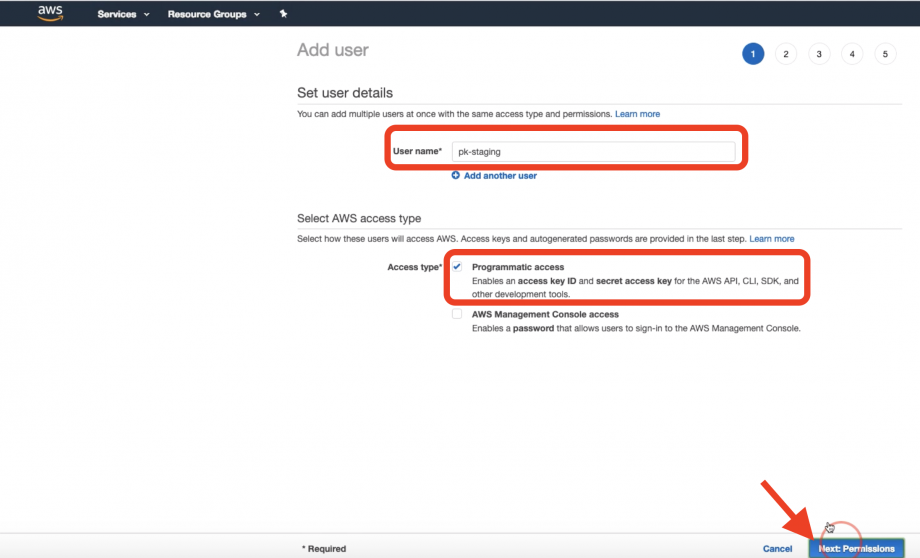
- Add a “user name“, Select access type “Progamattic Access“, then select “Next Permission“.
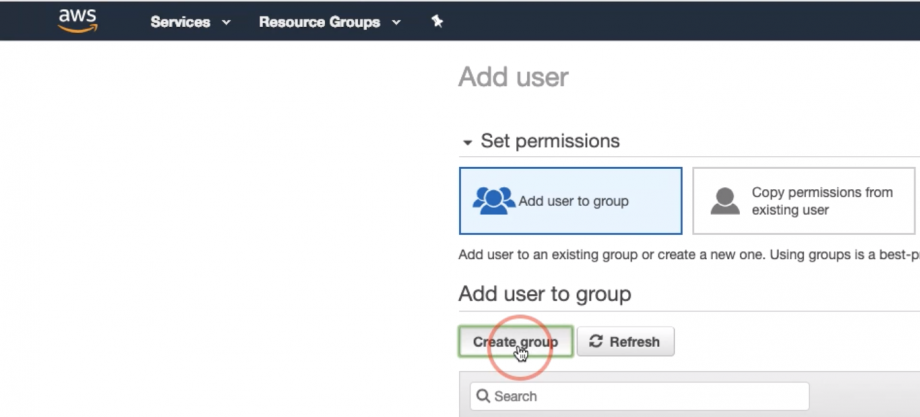
- On the next page, select “Create Group”
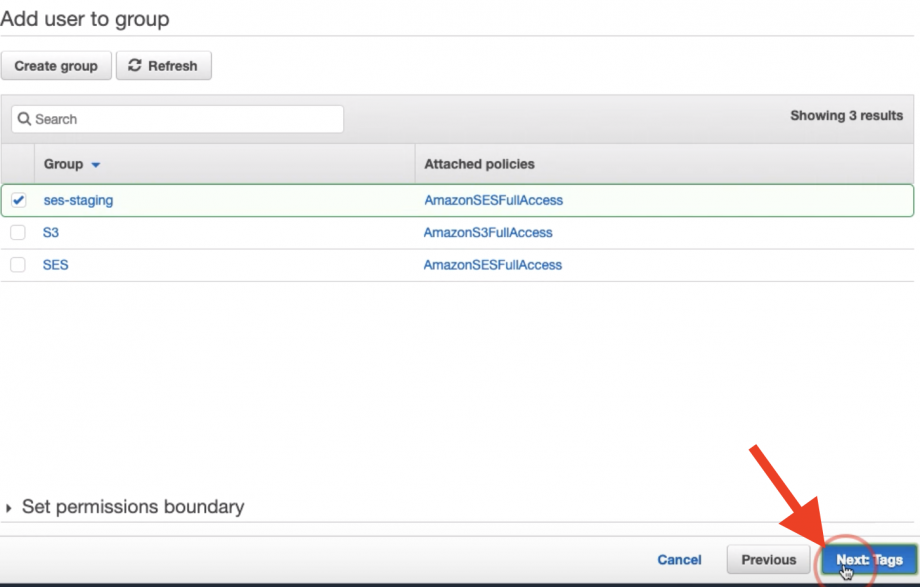
- On the next page, search for “SES“, then select the policy name “AmazonSESFullAccess” and select “Create Group”.

- On the next page select “Next:Tags”
- Tags are optional. On this page you can select” Next: Review”

- On the review page, click”Create User”

- In AWS, seach and select “Iam”

After creating the user, you will be taken to a page to obtain the User name and Password.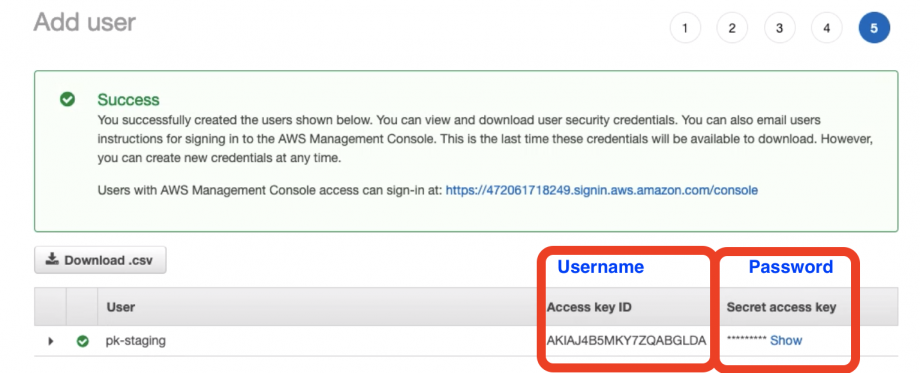
- Finally, click “Connect” to connect and saves the Amazon SES integration at the platform level.
Step 4:
After integrating at the platform level with SMTP you can go to the specific campaign you want to use SMTP notification delivery with and enable the SMTP feature in the campaign settings.


You are now integrated to send transaction emails via Amazon SES for the selected campaign.
You can connect Amazon SES integrations with all campaigns you want to use with the SES delivery service.
To maximize the delivery rate of your email notifications, we strongly recommend you set up Domain, SPF & DKIM verification. Below are some useful resources to help you with this:
What is SPF?
How to setup SPF on your server.
What is DKIM?
How to set DKIM on your server.
MXToolBox is a great resource for monitoring the health of your domain.
SMTP Diagnostics
Blacklist Check
Free Monitoring
