KAJABI’s API is now Deprecated and our integration is a best effort attempt with their system.
Due to Kajabi’s API being deprecated we can only offer minimum support with the Kajabi integration.
We recommend using the Zapier connection with Kajabi instead of the native integration.
Option 1: Zapier integration with Kajabi (Recommended)
Kajabi supports Inbound Webhooks which creates user account and/or grant or revoke access to Offers/Products when an external event occurs (such as a successful payment in a 3rd party payment provider).
Zapier listens for these webhooks from a connected data source and in turn, sends the data to your Kajabi account.
This tutorial will guide you through the process of integrating Kajabi membership service to your campaign via the Zapier integration.
Step 1: Create a Zap and set your PayKickstart as the Trigger app. Learn more about using Zapier and PayKickstart here.
Step 2: Set Kajabi as an Action app
Step 3: Next choose an Action
- Select “Grant Access to an Offer” to grant a new or existing member access to an Offer and it’s Products.
- Select “Revoke Access to an Offer” to revoke access to an Offer from the specified member.
- Select “Create Form Submission” this submits a Form on behalf of a contact. This will opt in the contact for email marketing.
Step 4: Connect to your Kajabi account. You will be asked for your account API key located in your Kajabi Account Settings page.
Step 5: Select your Site and Offer and match the required parameters Member Name, Email and External User ID with merge fields from your data source.
*NOTE: Kajabi uses customer email as their “External user id”
Step 6: Proceed testing the connection.
Note that due to webhook limitation, you can only grant a user access to an Offer once (unless manually deactivated from the user account in your site backend). You can grant other Offers to the same user.
Option 2: Native integration with Kajabi (NOT Recommended- Kajabi API is Outdated)
This tutorial will guide you through the process of integrating Kajabi membership service to your campaign via the native PK integration.
Note: Unlike most of the other membership integrations, they handle integration a little bit differently. You will need to configure each membership level in Kajabi at the EDIT PRODUCT screen in PayKickstart.
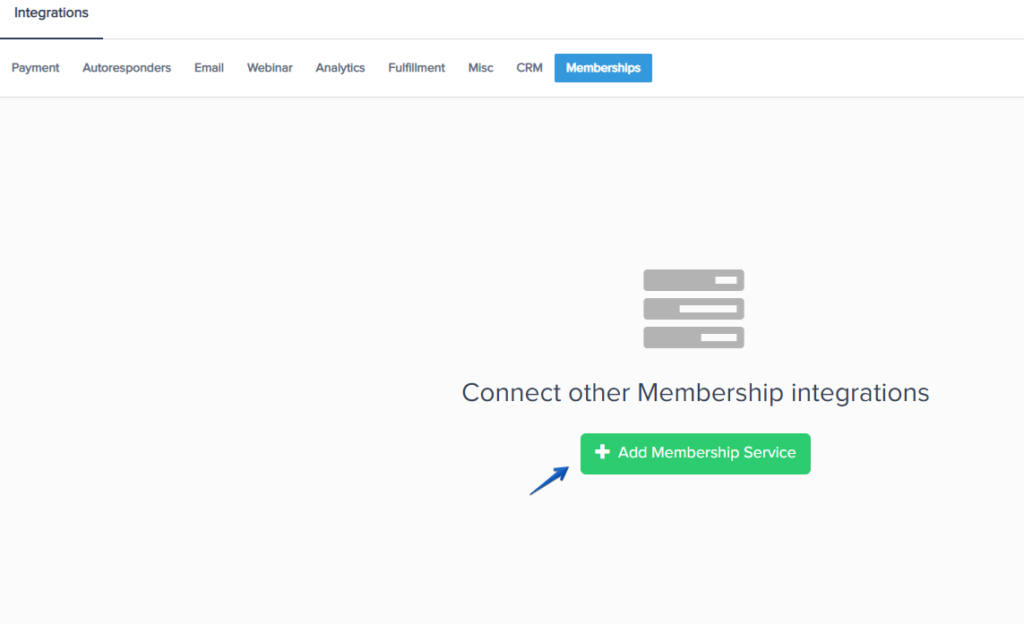
Step 1: In your PayKickstart dashboard, click on “Configure > Integrations” in the left-hand sidebar.
Then, select the Memberships tab and choose the option to add a new Membership integration:
Step 2: Select Kajabi, and enter an Account Name used for your own reference within the account.
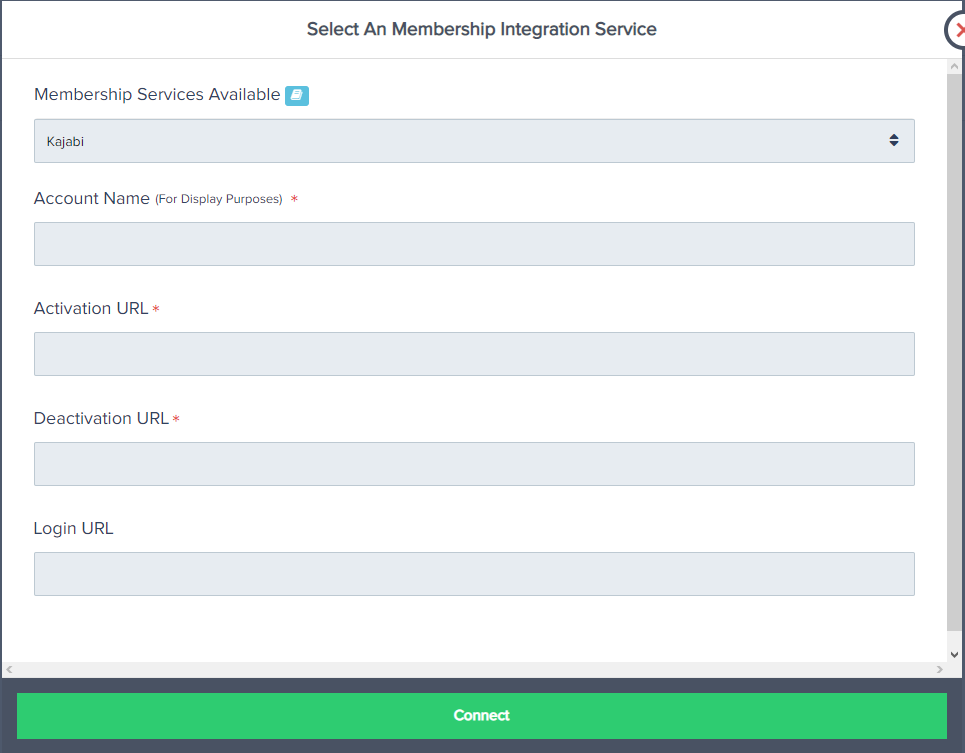
The Login URL is related to the URL customers would go to access their membership area.
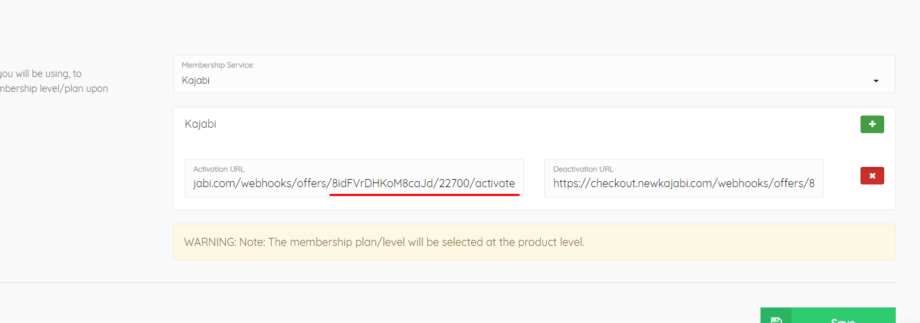
You will need to enter your Activation URL and Deactivation URL:
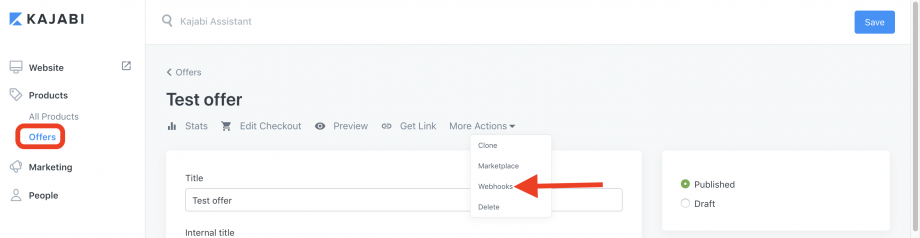
- Activation URL: To create a member in Kajabi when an external event occurs, such as a successful payment in a 3rd party payment provider, you can accomplish this with Inbound Webhooks. Each Offer has an “Activation URL” displayed on its edit screen.

Step 3:
In the ‘Campaign settings’ you wish to use the integration with, scroll down until you see the ‘Membership Integration’ option.

Make sure the Membership integration option is enabled, then save your Campaign:

Step 4: Please return to the Campaign screen and now click on ‘Products’ drop down.
In the ‘Products’ drop-down, select product settings of the product you want to integrate with Kajabi.
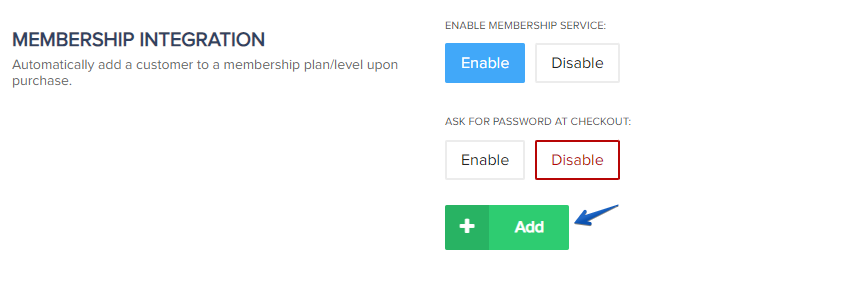
Step 5: Once in the product settings, please go to Section 3(Integrations), then locate the Membership integration section.

Click on the Add button to add a new integration:
Step 7: Once you’ve entered the correct information in your PayKickstart PRODUCT to integrate Kajabi, press ‘Save’.
Now, your product will be integrated with Kajabi to automatically add customers to a membership level/plan upon purchase.