PayKickstart makes it easy to manage the fulfillment process from beginning to end for any physical goods you need to ship to your customers.
Here is how to enable fulfillment and shipping…
Step 1: You need to first determine how you would like to handle fulfillment of each order.
Option #1: Integrated 3rd Party Fulfillment Company
Are you going to be using a 3rd party to handle fulfillment? If so, we currently offer integrations with the following fulfillment companies:
If using one of our integrated partners, the order status will update automatically for you without having to do anything.
You’ll see from Order Received to Fulfilling to Shipping to Delivered (and Returned).
Option #2: Non-Integrated 3rd Party Fulfillment Company
There are LOTS of fulfillment companies out there, so unfortunately we cannot tightly integrate with all of them. However if you use a 3rd party fulfillment company that is not an integration partner you can still pass all of the customer details to them in a few different ways.
- Our API
- Have your developers create a bulk CSV daily/weekly/monthly (however often you want) that gets sent to your fulfillment with the customer and product details.
You’ll have to update your orders manually in the Fulfillment area of PayKickstart.
Option #3: In-House
If you plan on fulfilling the order in-house/yourself, then you’ll want to fulfill, ship and update the order status manually from inside PayKickstart without a shipping integration connection.
Step 2: Configure your product in PayKickstart for fulfillment.
NOTE: Use the Knowledgebase articles above if using one of our integrated partners.
On that Edit Product page, go to Product settings( section 2 – Checkout page) and make sure to Enable Shipping and set whatever shipping cost you want.
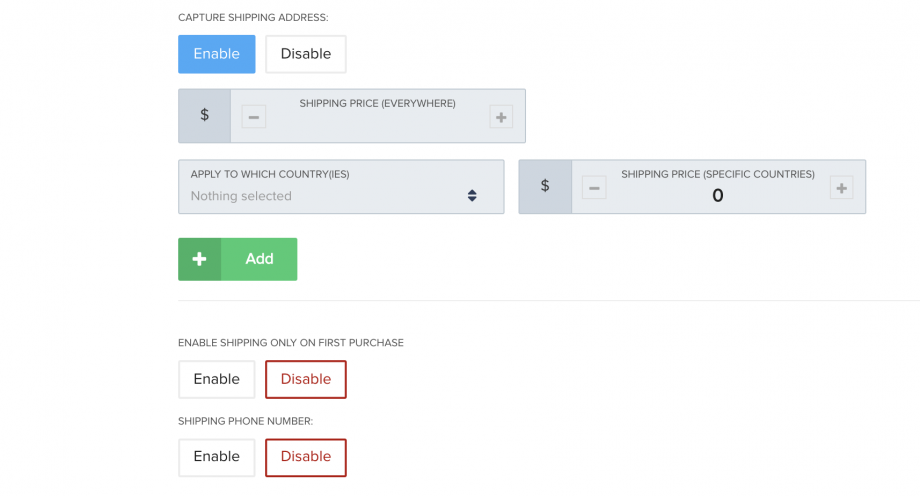
- NOTE: if the override shipping countries selected all share the same currency AND that currency is selected in the campaign, then it’ll be used. If the selected country currency is NOT being used for the related campaign, shipping will be charged in the campaign’s base currency.
- You can also set shipping to trigger only on the first purchase if the product has a recurring charge.
- You can also enable a shipping address phone number
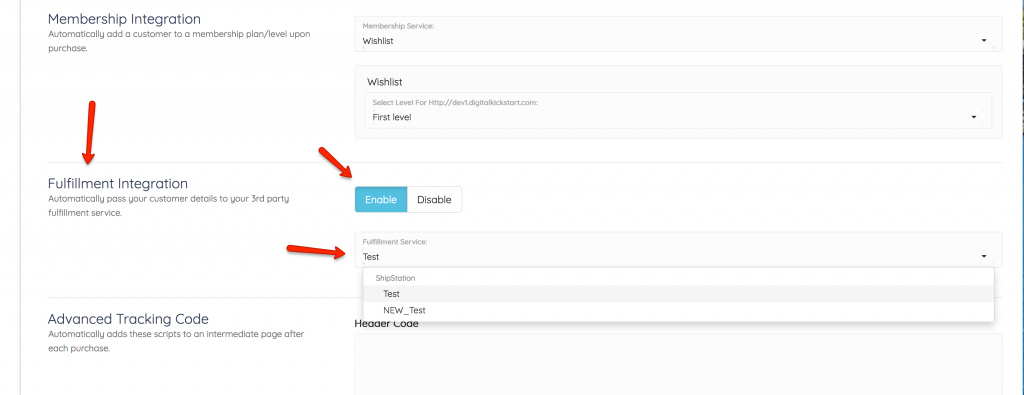
Next, Go to the Edit Product settings in section 3 “Integration”, Then Enable Fulfillment and select the integration you added.
NOTE: if using a custom API integration or handling fulfillment manually, you will not have an integration option for the product since this is handled differently.
Once you’ve done that, your checkout page will look something like this. It will have the Shipping Fields visible and you’ll see the additional shipping line item in the pricing area.
![]()
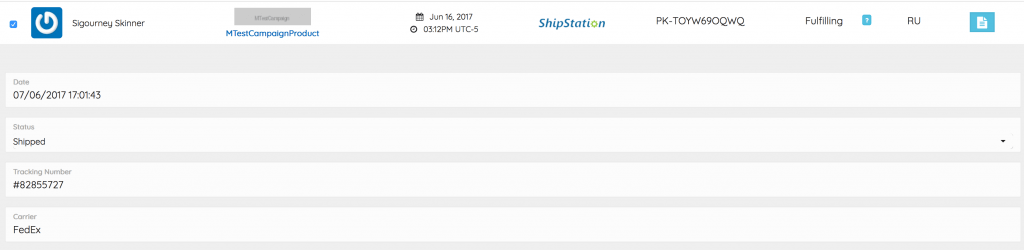
Step 3: Manage your order statuses from the fulfillment area.
Go to Payments >> Fulfillment to access the orders.
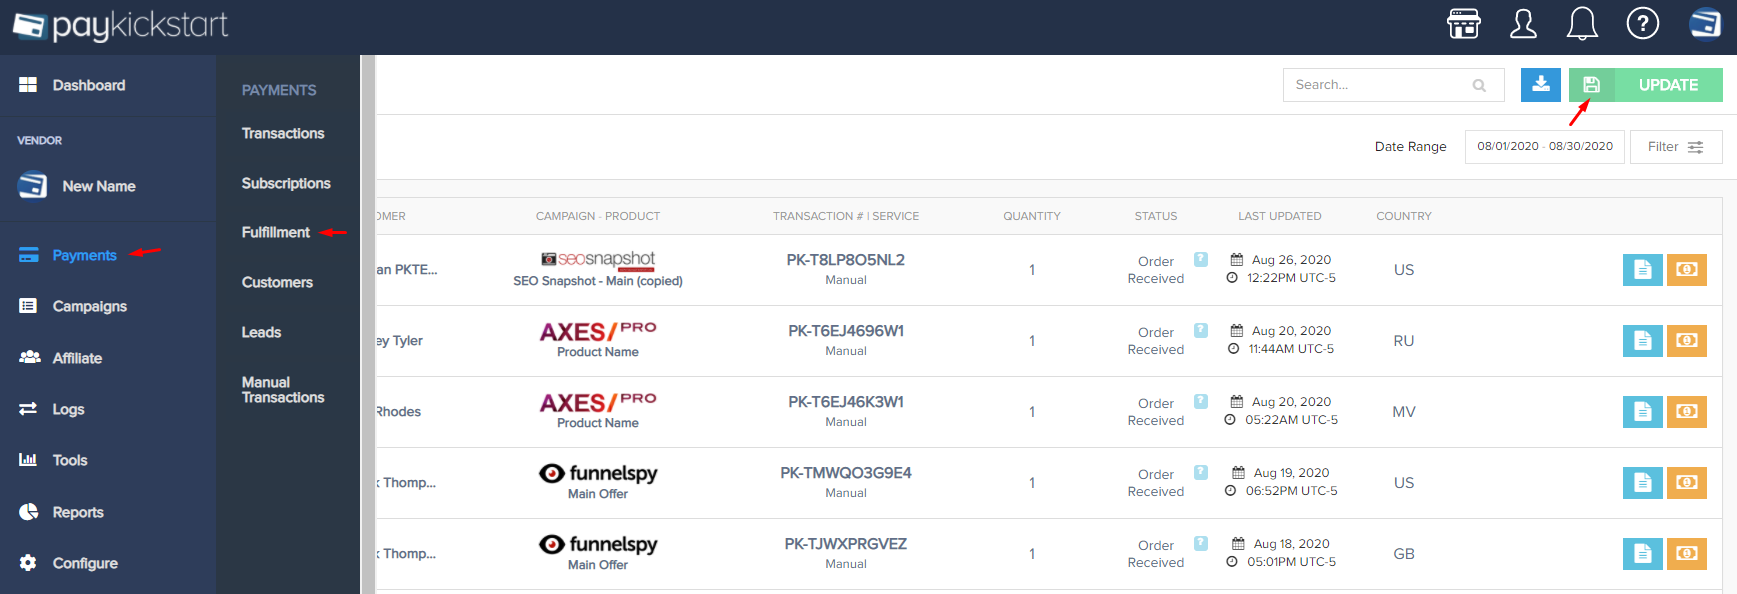
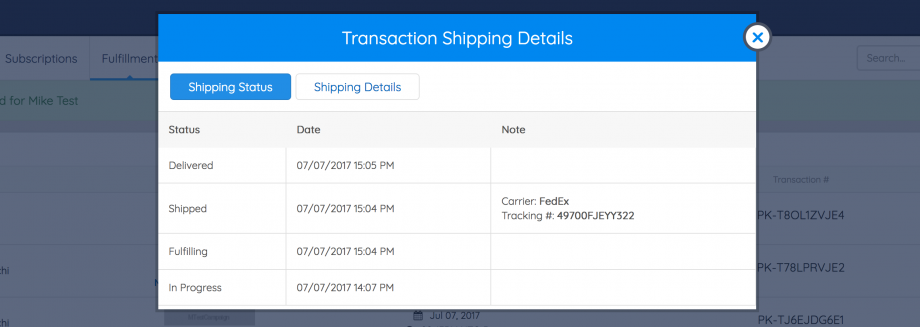
If you click the checkbox on one of the orders, a dropdown will show, that will allow you to manually update the order status, including adding a tracking number and what carrier was used to ship the order.
You can click the details icon on the right to see the entire fulfillment process from when the initial order was received, until it was delivered.